September 30, 2014

19th Century Housewife

I'm currently in the middle of two big sewing projects, which you all will eventually be hearing more about, but, in the meantime, take a look at my new 19th century housewife!


What is a housewife, you might ask - not the cooking, cleaning, apron-wearing homemaker in this case -
"While not exactly a work-box or work-basket, the housewife or sewing kit should also be included as a part of an article on sewing necessities. There were many instances where the larger work-boxes were not practical; while traveling, a lady might need sewing implements for a clothing repair or a soldier would need a small sewing kit.  Patterns for these small sewing kits were included in most lady’s magazines and the  Christian Commission distributed a pattern for a soldier’s housewife...[Housewives could be made from] leather, stamped paper, silk, ribbon, satin, velvet, white dimity, Holland, or any other material, even common print" (Mescher 12).  
Excerpt from: "The Case of the Lost Thimble: Work-boxes, Work-baskets, Housewives and Traveling Sewing Boxes" by Virginia Mescher.  Fascinating and well-researched paper - totally recommended!


My new sewing kit is copied from the one the dressmaker made for the shop at the museum.  Completely hand-sewn, the housewife is made from scraps of reproduction fabric and linen.  (All of the prints were used in previous projects from shortgowns to the Sophia wrapper project!)  It features two pockets and a pincushion at the end stuffed with wool.

Inside.

Outside.

All rolled up.

Tutorial to make your own fast, easy & fun "flower" or "pumpkin" shaped pincushions here: http://whipup.net/2006/03/01/stickin-it-to-the-pincushion/.


Helpful Links Referenced:

September 23, 2014

1810s Working Class Separates

With a couple of options now in the Regency wardrobe, I'm calling the 1810s working class separates project complete!  (You can view the in progress posts here: Part I and Part II.)


Inside Out Sequence: All photographs courteous of sister - thanks a ton!


First layer: striped stockings, 1850s chemise & corset. 


Second layer: petticoat.


Third layer: bodiced petticoat. 


Fourth Layer: kerchief & blue striped short gown.


Alternate Fourth Layer: kercheif & golden print short gown.


Fifth Layer: cross-over strap apron.  (Note: bib aprons do not look great with short gowns, opt for a half apron instead.)


Completed Project Shots:

"Some people are your relatives but others are your ancestors, and you choose the ones you want to have as ancestors. You create yourself out of those values" ~Ralph Ellison


Showing off my Fugawee "Rose" Boots, which still look good
after an entire season of wear & tear!

Project Review

Year: 1800-1810

Pattern:  GCM&V short gown pattern, Regency apron directions

Material: cotton muslin, 100% linen, checked homespun, reproduction cottons

Cost: Did not keep track of total expenses - 4 yards of linen $35, 4 yards of reproduction cotton (2 yards of each) $40, stash fabric

Critique:  Nowhere near perfect, but it's a start!  I am very happy with the construction of each of the garments - though the fit could use a little work.  My favorite piece is probably the blue short gown, which is very comfortable and I can see myself wearing it with modern clothes.  My least favorite piece is the apron, which just doesn't fit well, especially over a short gown.  Eventually, I'll need to make period appropriate undergarments, but, for now, my conglomeration works fine.

Overall verdict I'd say is satisfactory - the garments are holding up to wear at work well and I'm looking forward to wearing them again and again through the end of this season!

September 17, 2014

Playing Catch-up

I just submitted my weekly internship write-up and couldn't remember the last time I did an internship entry here, which means I must have a little catch-up to play...I do apologize in advance for the lack of pictures: one, I am terrible at remembering, and, two, we are not allowed to whip out modern conveniences on site where visitors might catch us...it really would ruin the authentic 19th century experience that the museum works hard to give!

August 28, 2014:  A full day of working on repairs with Cheryl and Wilma in the costume shop!  My first task of the day was to tackle the box of under petticoats in need of mending.  For each petticoat, I removed the elastic from the waistband, machine-stitched a side opening and inserted a drawstring for greater adjustability.  After the entire box of petticoats was fixed, I measured and ripped panels from heavy, striped linen for more needed petticoats.  To wrap up the day, I stitched ties for the apron I had been working on for the past couple of weeks.  It felt wonderful to finish my first entirely hand-sewn project for the museum and, again, reminded me of how much I am learning from the costuming ladies.  My hand-sewing skills are definitely improving with all of the practice!

August 29, 2014:  I spent the day at George Eastman’s Boyhood Home to experience 19th century quilting methods with the gifted head quilter of the village, Judy Deyo.  I learned right along with the visitors about the history of quilts and the names of various quilt blocks, as she interpreted the building and instructed people at the hands-on quilting stations.  I found it most interesting that there is no historical evidence that quilts signified safe homes on the Underground Railroad; rather, as Judy explained, ladies aid societies would have raffled off quilts to raise money for anti-slavery purposes.

 Best of all, I tried my hand at a Jacob’s ladder quilt block, constructing it with 19th century methods.

Jacob's Ladder Quilt Block
(via: http://blog.shopmartingale.com/quilting-sewing/quiz-how-many-quilt-block-designs-have-you-made/)

A good majority of the day was spent just tracing each individual square and triangle piece using the templates and, then, carefully cutting out each of the pieces.  To ensure that the seams were straight and the corners lined up, each piece then had to be hand-stitched along the marked lines.  For the last hour or so, I began to sew a few of the pieces together, practicing the traditional rocking stitch that Judy demonstrated.   By the end of the day, it was very clear why, on average, a quilt took at least a thousand hours to piece together!

(Update: picture added June 20, 2014)


September 4, 2014:  After the short break from the Sophia project, it was nice to spend the day in the costume shop making progress on the 1870s wrapper reproduction.  Now that all of the pieces were cut out, I could begin piecing together the puzzle.  Bevin first helped me lay out both sides of the wrapper and match up the lining.  But, before I could begin sewing, I had to replace one of the side back pieces that I accidentally cut a duplicate for rather than a mirror image.  To conserve fabric and as a period appropriate solution, I cut from the duplicate and, matching the pattern as closely as possible, pieced together the new side back panel with delicate, top hand-stitching.

The rest of the work day was spent sewing and, by the time I left, the entire right side of the wrapper reproduction was assembled.  Bevin taught me her ingenious trick for adding a perfectly neat pocket on the side by sewing it one with the seam.

Side pocket.
After inserting the pocket, I worked on machine stitching all of the side panels in place, careful to follow the seam allowance of the original and to press each seam for a neater finish.  I only had to rip out and redo one side panel to better ease in the fabric along the curve, so the day was definitely a success.


September 11, 2014:  An exciting day in the costume shop as the Sophia Project, after two months of making progress, began to resemble the original wrapper, rather than a box full of fabric puzzle pieces.   Picking up where I left off last time, I machine stitched the entire left side of the wrapper reproduction together.  Bevin then guided me through assembling the odd-shaped back panel and its Watteau pleat.

Reconstructed watteau pleat.

Once that was finished, the right and left sides were matched to the back panel, machine stitched and pressed.  Joining the shoulder seams followed and, finally, the sleeveless wrapper could be draped on the dress form.


Still thrilled by the morning’s progress, I spent the rest of the afternoon working on the sleeves.  Machine stitching the front and back pieces and their lining was straightforward; however, recreating the hem and opening design will require studying the original sleeves.  I then finished the day by practicing a new skill as I carefully pressed narrow hems and hand stitched a backing on the triangular piece of the sleeve.

Backing the triangle of the sleeve.

September 12, 2014:  A super fun day in the bubble-gum-pink Dressmaker's Shop with experienced seamstress and shop interpreter, Rhonda B.!  Rhonda was actually one of the first interpreters that I met at the museum’s orientation, and, since the beginning, I have truly enjoyed every chance I have had to talk with her.  I have spent the entire season admiring her work, so it was such a pleasure to spend an entire day in her company!!

Dressmaker's Shop c.1825
(via: https://www.gcv.org/Historic-Village/Historic-Buildings/Businesses-Shops-and-Professions#19)
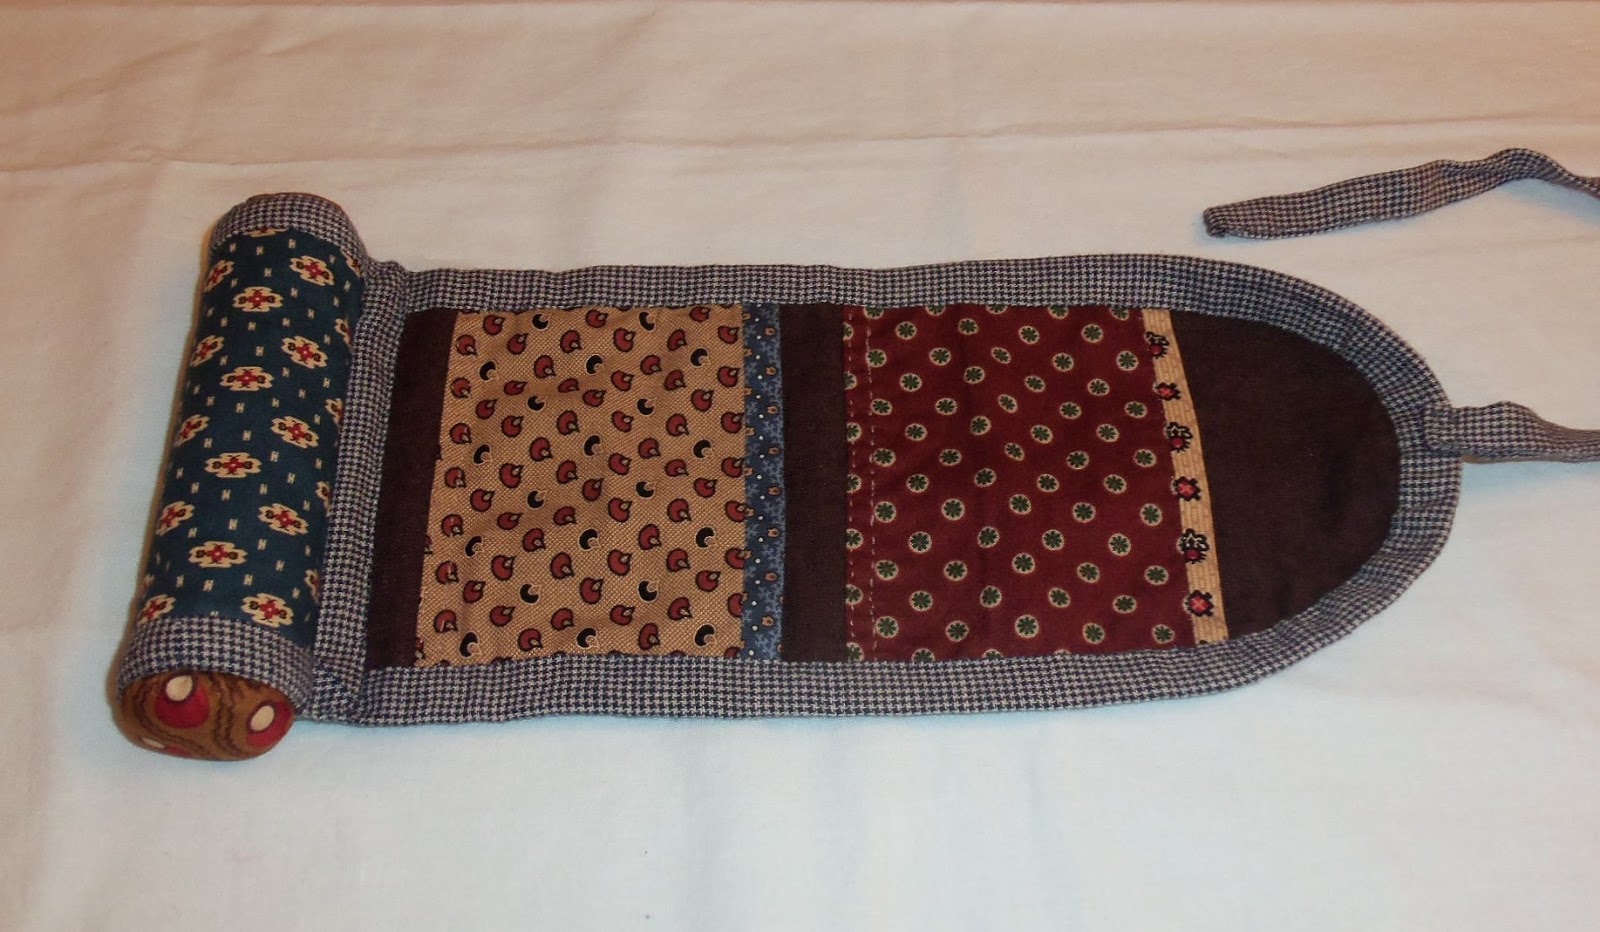
Rhonda and I chatted all day about historical clothing as we worked, discussing everything from its representation in period films, to the work of accomplished seamstresses in the field, and even to our personal goals and future endeavors.  While Rhonda hand-stitched a hem and tucks on a chemise, I copied the housewife, or sewing kit that Civil War soldiers often carried, that she made for the shop.  I will be very happy when it is finished and I can replace the plastic Ziploc bag with a more period appropriate 1850s sewing case.  

A beautiful example of an early American housewife c.1830 (via: http://www.pinterest.com/pin/25192079140501244/)

Well that's all for now - time to return to wrestling with the chiffon sleeves of my latest endeavor...the Halloween Regency Dress...stay tuned...

September 11, 2014

1810s Working Class Separates (Part II)

When do you really call a project "finished?"  When do you simply step back and leave your creation be?  Admire what you've accomplished and challenge yourself to do better next time?  I've completed the main pieces I wanted to for my 1810s working class ensemble...and there are a bunch of other pieces that could really add to the overall project.  On the other hand, they could be saved for a later date (or maybe take two for next season).   Anyways, I'm honestly getting a little impatient with this project and am ready to move onto another!

In the mean time, here are the latest additions to my 1810s wardrobe:

Bodiced linen skirt:  ripped and seamed two panels of a sturdy linen for the skirt.  Bodice is fully lined and self drafted from cotton muslin.  Closes with four buttons and drawstring at the neck.  Three inch deep hem facing with navy blue cotton.

Front & back view.  Skirt has small pleats in the front and gathering in the back for a total circumference of 85".  (Please excuse the poor fit on Beatrice, it fits me much better, promise!)

Side view.  If you look closely, you will see that I had to fudge the bodice fitting a bit with two tucks in the front and back sides each.  I'm still learning...

Close up of back closures and spare button.

A peak at the navy blue hem facing.  Hand stitched.

My inspiration came from this c.1890-1800 block printed linen skirt and cotton bodice from the UK National Trust:

UK National Trust Inventory Number 1348737.1
(via: http://www.pinterest.com/pin/1115756652896466276/)

Next on my list were two more short gowns:  Made from dark blue striped and golden patterned reproduction cotton prints.   

Striped cotton short gown with careful piecing at the shoulder seams and sleeves
so that the design would match and go the right direction. 
 

Golden yellow short gown with a bright and cheery print!


Close up of the pleated trim, hand tacked to lay flat.

Hand-sewn regency apron with a bib and crossed straps.  Made use of the selvage edges for the sides and cut the bib on the bias, following the easy instructions for a regency apron found here:  http://acrosstheages.tripod.com/regencyapron.html


What's next?  Well, from here, I could work on more working clothes (like the pumpkin-colored skirt I started) or call my ensemble finished and start some new projects!  And venture into corded petticoat land...

Helpful links referenced:

September 3, 2014

Fall Sewing List

Happy September, everyone!  Summer sure flew by, and, I guess it's time to post a new sewing list for the fall season.  While I didn't get as much sewn over the summer as I had hoped, I did have a ton of fun interning and interpreting!

I've got high hopes for sewing this fall:

1810s working class ensemble:  I'm very happy to report that I've made great progress and just have the following left to finish, so expect some pictures soon.
  • 2 muslin shifts
  • another shortgown
  • checked cotton apron
  • striped linen apron (may hold off on)

The early nineteenth-century maid, pencil drawing by William Brocas c.1800
National Library of Ireland.
(Image via:  https://countryhousereader.wordpress.com/2012/05/05/country-house-amenities-part-iv-cleaning/)

The Rochester Otaku Festival is September 27 and I'm thinking about trying my hand at some cosplay.  (I don't follow any anime, but do love Disney, so Alice in Wonderland, anyone?)  The best part is even if I don't get my costume finished in time for the festival, it will be perfect for the Rochester Steampunk Society's Picnic on October 11th AND Halloween!

Alice in Steampunkland: 
  • fancy drawers
  • petticoat with tucks and ruffles (started)
  • corded petticoat (started)
  • dress with bustle bow

Take a look at this fabulous Alice cosplay!
(Image via: http://melindascostumes.wordpress.com/2012/01/17/alice-in-wonderland/)

  • apron with applique designs 
Apron inspiration
(Image via: http://www.pinterest.com/pin/404409241512819346/)

  • accessories (how cute would a tea cup fascinator with a little "drink me" sign be!)

1850s undergarments:  I would really like to have these finished by October 17th as I've been asked to be a part of Penfield's annual ghostwalk again AND in time for Yuletide at the village.
  • 2 more chemises (cut out)
  • 2 more pairs of drawers (still waiting on waistbands)
  • a pair of flannel drawers - cause it's cold in Rochester!
  • modesty petticoat
  • corded petticoat
  • tucked petticoat or two

Wish me luck & happy sewing!

September 2, 2014

Victorian Day Fashion Show 2014

I just wanted to share a few more pictures and details from the Victorian Day fashion show I had the opportunity of participating in two weeks ago.  I had such a wonderful time and really hope that next season I will be asked to model again!
 

Elaborate hairstyles, like those of the late Victorian period, are always fun to create - especially when you have 33" of hair to work with!  I was tasked with styling my hair for the show into an early 1870s style coronet braid and ringlets.  So the first thing I did was look for inspiration and create a pinterest board for 1870s hairstyles:

Coronet Braid & Ringlet
(Image source: http://www.rapunzelsdelight.com/updos/updos.html)

Photograph of an early 1870s Hungarian beauty
(via: http://www.pinterest.com/pin/404409241512693680/)

Victorian Ringlets
(Image source: http://www.rapunzelsdelight.com/updos/updos.html)

Then, I set out to create my updo!  While I do have quite a bit of my own hair, there was no way I could achieve the look I wanted without some extensions...so this elaborate 1870s hair tutorial was very helpful: http://www.arrayedindreams.com/articles/hair-and-make-up/1870s-hair/.

I ended up winding my hair into a tight, braided bun, center back.  Then, I braided the cheapest ponytail from Sally's beauty supply, 100% Kanekalon Jumbo Braid, and secured it around my bun to serve as the coronet.  (I also attempted to curl sections of the other ponytails I bought for longer ringlets, but, just ended up with a melted plastic and gooey hairspray mess.)  Finally, we clipped a strip of ringlets under my bun and pinned on the hat.

My 1870s hairstyle.

Next came dressing for the show!  Over my underpinnings - including a chemise, drawers, cage crinoline and petticoat - I wore a gorgeous, fragile, silk gown made from vintage saris.  It was light as a feather and delightfully poofy! (I feel poofy, oh, so poofy...)  AND it had a large "butt bow," as we so elegantly termed it.  

Front view of the dress.

At the fashion show, I had a lot of fun parading around with the others in front of our large audience - including my mom, sister (photo credits go to her) and visiting uncle.  The museum always does such a fantastic job with the fashion shows and, this time, one of the emphases was the changing silhouette from 1860 to 1910!

Twirling on the runway :)

Emphasizing the elliptical silhouette of 1869.
  
Afterwards, of course, came more posing for pictures!

Timeline of 1860 - 1910 fashion show models.

The Happy 19teens Couple

And, finally, some silliness ensued: Make sure to check out Ruby Foote's (the museum's dedicated photographer) Victorian Day photo set here:  https://www.facebook.com/ruby.foote.5/media_set?set=a.699854770069740.1073741888.100001356711594&type=3

I like big BUSTLES and I cannot lie!
Photo credits go to Ruby Foote.
(Image source: https://www.facebook.com/ruby.foote.5/media_set?set=a.699854770069740.1073741888.100001356711594&type=3)

Helpful links referenced:

We ❤︎ Our Patrons

Like what you see here, and want to support future blogging and educational programming? Consider becoming a Patron - click on the button below to unlock exclusive contents, bonus blog posts, and more! Every contribution makes a big difference, thank you!