January 29, 2015

HSM January Challenge: 1850s Undergarments


"As I can, but not as I would" ~ Jan van Eyck

I've been sewing, but not blogging!  Though I didn't get as much done for my portfolio in January as I would have liked, I have high hopes for February.  January, as well as December, seemed to be a month for foundations - from laying out costume plans to gathering materials to sewing undergarments.  Lucky for me, the first challenge of the 2015 Historical Sew Monthly, hosted by the lovely Dreamstress, happens to be foundations!

Remember all of those 1850s undergarments I put on my winter sewing list?  Well, I realized that Yuletide at the Village has come and gone, and I still have not posted about what I wore.  In fact, I've even finished a few more mid-century necessities since then.  Therefore, since all of the garments were completed within the month or allowed parameters, my entries for the January Foundations Challenge are my mid-19th century undergarments!


A new chemise & pair of drawers:  like all of my other sets, these were made using Simplicity 2890.  Next time, I think I will try drafting my own as both of these articles are very roomy, to the point of much to big.


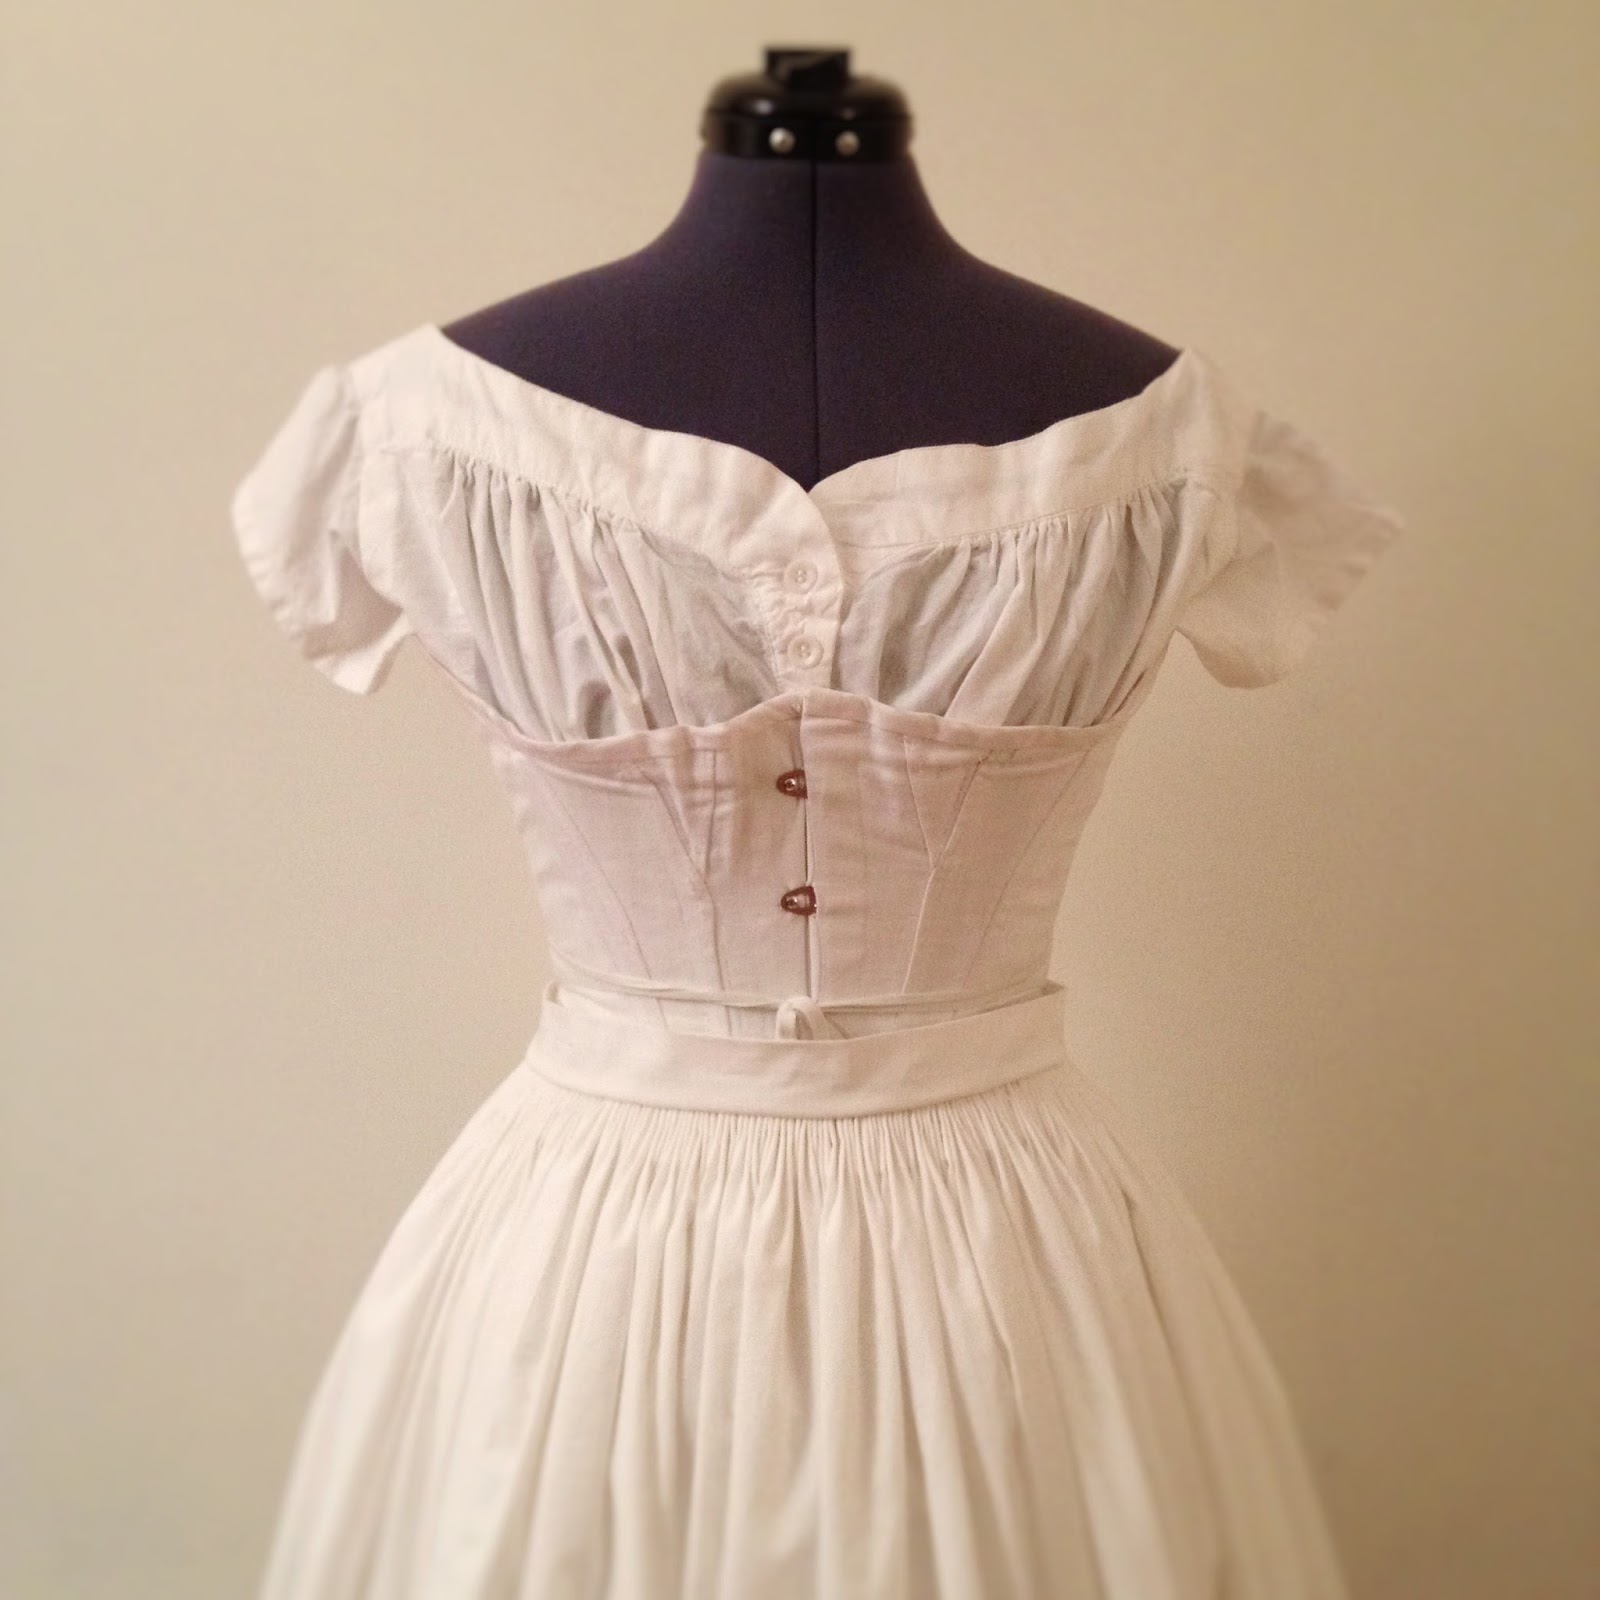
Though not new, a corset is a must for the 19th century silhouette! 


An 1830s bum pad:  Features a small roll as well as two corded flounces, secured around the waist with cotton twill tape. Based on two period examples -

Bustles of various materials and styles, 1833.
Manchester Art Gallery (unfortunately the online collection is unavailable at this time).
(Image via: http://www.pinterest.com/pin/404409241514418874/)

Cotton bustle, 1820 - 1830.
Snowshill Wade Costume Collection via the National Trust Collections.
(Image via: http://www.nationaltrustcollections.org.uk/object/1350051)


An 1850s bum roll: features a single flounce and is secured below the waist with cotton twill tape.  (I buy all of my twill tape from: http://www.twilltape.com/, very affordable prices and excellent quality.)  


A "modesty" petticoat:  Falling mid-calf, the modest 90" under petticoat features three half inch tucks above the hem, stroked gathers and button closure.


Close up of the stroked gathers!
Three rows of hand gathers + whipped on both sides of the waistband
= labor intensive, but the result is worth the work!


Red flannel petticoat: 110" in circumference and features two 1" tucks above the hem.  I gauged the skirt length and whipped it to a sturdy, brown linen waistband.  Also closes with a button.  Nice and toasty warm for our cold, Upstate New York winters; however, next time I would use wool, rather than cotton flannel, and add a yoke, as was period, to reduce the bulk at the waist.


Close up of the gauging or cartridge pleating!


A plain petticoat:  Made from three panels of 45" cotton muslin with a 3" deep hem.  Also features stroked gathers, as well as a button closure.


Back view.  Bear in mind that Beatrice, my dress form, is larger than me - when worn, the corset completely shuts (hopefully will be replaced before next season) and the petticoats fasten correctly.


A tucked petticoat:  Completed just two nights ago, this petticoat was made from three panels of 45" pimatex cotton, which, by the way, is just lovely to work with.  Features five (originally six) half-inch tucks above the hem and is gauged and whipped to a 24" waistband.


Detail shot of the gauging!

Detail shot of the tucks & hem.


The Challenge:  #1 Foundations

Fabric:  Cotton muslin, Pimatex cotton, red cotton flannel, brown linen for waistband

Pattern:  Simplicity 2890 for the chemise and drawers, The Dressmaker's Guide for petticoat instructions.

Year:  Mid-19th century, specifically intended for 1830s & 1850s.

Notions:  DMC floss, thread, buttons

How historically accurate is it?  90%, except for the machine sewing and materials perhaps, I would say that these are pretty historically accurate, especially the construction methods!

Hours to complete:  Did not keep track.

First worn:  Yuletide in the Country, at the Genesee Country Village & Museum (first three weekends of December).

Total cost: $30 for the Pimatex, $15 for the flannel, $30 for the entire bolt of muslin


And that wraps up my first 2015 Historical Sew Monthly entry!  I hope to finish a few of those portfolio projects during February, ambitious, I know, so stay tuned for my mid-19th century undergarments in use...Thanks for reading!

January 20, 2015

Hats Off to Sleepy Hallow

Hello, everyone!  I had planned for today's post to be about the completed 1820s Mad for Plaid dress project; however, due to technical difficulties and sewing mistakes (bodice not fitting, gauging the skirt to the waistband backwards, fighting to rip out stitches that were stitched to stay, etc.), the project has been put on hold.

So, instead, today it's hats off to some more millinery Past Projects from Junior year!  In the previous Past Project post, I wrote about the first show, Bugsy Malone, that I created headpieces for at Stages Children's Theater.  The next show I had the chance to student costume for there was the Legend of Sleepy Hollow (2013) directed by Dianne Schaumberg.  And, of my responsibilities, the most memorable was creating three headpieces for Mrs. Van Tassel, who actually was played by a former friend, Casey, from Our Lady of Mercy's theater!  In fact, I fondly remember acting on the stage together, as well as backstage, learning how to perform quick changes like a master.

Katrina & Lady Van Tassel
Sleepy Hollow (1999), directed by Tim Burton
(Image via: http://www.pinterest.com/pin/478929741594689887/)


The first hat I came up with for our Mrs. Van Tassel was was the Maroon Church & Party Headpiece, which was made to match two separate costumes.  The hat featured a maroon puffed crown and ruffle, various feather sprays and flowers, and two large black plumes.  Black satin ribbon ties were later added.


The next creation I came up with for Mrs. Van Tassel was the Lavender Wedding Headpiece.  This hat featured a white crown puff, lavender puffs, various feather and flowers, as well as one large ostrich plume.  Gold satin ribbon ties were later added.  


After some late night and last minute sewing, I finished Mrs. Van Tassel's Fancy Mob Cap, just in time for the full dress rehearsal.  The director specifically requested height to the cap, and, after looking at some period examples, this is what I came up with:


Last, but not least, I'll include this hat I made for a friend's birthday!  Jenny's birthday falls right around Easter, so I made a her a proper Easter bonnet.  Constructed in a similar way to those I made for Sleepy Hollow, the hat also served as a perfect gift card holder :) 


Thanks for reading!  'Till next time...

January 16, 2015

All Dolled Up for Bugsy Malone

Anneliese here with your next installment of Past Projects - today, it's a trip back to the Roaring Twenties with some costumes from Bugsy Malone.  As I mentioned before, on my search for some more theater experience during junior year, I came upon the fabulous costume team at Stages, the children's theater at the Auditorium Theater of Rochester.  The first show I student costumed for (and earned my keep) there was Bugsy Malone, directed by Holly Hessel in 2013.

Described in Kids Out and About as a "slapstick musical comedy," the fast-action show, Bugsy Malone, "follows the rivalry between two half-witted street gangs" under the leadership of Fat Sam or Dandy Dan.  The two gangs of "1920s cartoon cutouts" go head-to-head with each other, shooting their "splurge guns" (silly string) and throwing custard pies in this "film noir spoof."  All in all, we had a lot of fun and still found silly string remains months after the curtains closed.

(Image via: facebook)

During the musical, however, I was responsible for anything from repairs and alterations, to making dresses and headpieces, and to assisting during fast changes.  My first task was to construct a polka-dot ruffle dress with a matching hat for promo shots, which became Blousy Brown's signature and main outfit. (Unfortunately, I did not take pictures of the outfit on the actress, so these shots are from a year later...please excuse the wrinkles.)


Next, I was tasked with creating flapper-style headbands for the grand slam girls.  Following the style and silver & black color scheme of the original headband they gave me,  I made five more child-size headpieces.  Eventually, beads were also added to mimic the original. 

The original headband.


Along with various alterations, hemming & taking in, I dressed up the Lena "came home" dress.  I also made her a matching orange bead hat, which was not used for the show (it has, however, been on the stage a couple of times since :)

This teeny-tiny actress was adorable!


After discovering my love of hat embellishing, I moved on to make a fancy black hat for Dandy Dan's girlfriend:


Finally, I made the ostentatious opera singer's headpiece.  My only directions were to "make it obnoxious," and, for the record, it was the director's favorite piece :)


The curtain has indeed fallen on Bugsy Malone!  The set was striked, the costumes put away (or traveling to other shows), but the memories will never be forgotten.  It is always ahead and onto to another show...next up at Stages: The Legend of Sleepy Hollow.  Thanks for reading!

We ❤︎ Our Patrons

Like what you see here, and want to support future blogging and educational programming? Consider becoming a Patron - click on the button below to unlock exclusive contents, bonus blog posts, and more! Every contribution makes a big difference, thank you!