As I'm preparing for a busy Fall season of fashion and other programming, I realized we left off (way back in March!) with the making of the skirt and draperies for a three-piece, c.1883-86 plaid ensemble. Not only did I finish the ensemble last Spring, I've worn it to two events - presenting "Getting Dressed in the 1880s" at the Niagara County Federation of Historical Agencies, and Spring Teas at the Rich-Twinn Octagon House. In fact, I'll be doing another 1880s "Getting Dressed" program in November for the Wilson Historical Society, and will probably bring it out again with some new accessories.
So, for our next installment in the 1880s plaid ensemble series, today I present: making the bodice! (The other blog posts in the series include: making the skirt & draperies, lobster tail bustle, underpetticoat, and flounced petticoat)
This project certainly took me out of my early/mid-19th century costume comfort zone, as bodices in the 1880s are longer and more tailored, featuring curve-hugging seams and pleats that flare out over the bustle. After several mock-ups and pattern corrections, I ended up with a jacket-like bodice featuring a velvet front inlay, collar, and cuffs, which matched the deep navy in the plaid cotton.
Construction Details
Since I detailed the historical inspiration for this project in my previous post, we'll dive right into the construction of the bodice. As a starting point, I traced the bodice pieces from Truly Victorian's
1884 French Vest Bodice (TV463) and selected the princess-length sleeve (which falls between the 3/4 and full-length sleeve). Since I don't have a go-to late Victorian bodice block, and my dress form is too large for me to drape on, Truly Victorian patterns are a great place to start - but this bodice needed a whole
lot of alterations to fit! I also drafted a new collar and cuff pattern to fit with my design.
 |
1880s bodices had lots of pattern pieces -
I love using the 1" grid pattern interfacing, which helps with alterations in patterning;
and keeping fabric grainlines straight and matching plaids when cutting.
|
I can't remember the exact number of mock-ups this project took, but it was a ridiculously frustrating number...all of the pieces needed shortening lengthwise; the shoulders, neckline, and armscyes needed adjustments; darts and seams needed to be moved; and the hip areas needed widening to fit over the large bustle. I also shortened the sleeves, so the elbow fit better, and drafted cuffs and a new collar with a 1" overlap at the front. It might have been faster to draft a bodice block using a period manual, than the many paper pattern adjustments and mock-ups. At least now I have a working pattern, which hopefully I can use again!
I used leftover canvas for my mock-ups to mimic how structural the finished bodice will be with interlining, lining, and boning at each of the seams. I found this also prevented stretching that might have happened with the single-layer muslin I typically use:
.JPG) |
Truly Victorian's 1884 French Vest Bodice mock-up.
This pattern needed soo many adjustments - next time I would rather draft a block. |
.JPG) |
| Mock-up from the back - I do love the curved princess seams and pleats at the back! |
.JPG) |
Another view of the back laid flat - here you can see just how many pieces these late Victorian bodices had!
Notice how all of the pieces are perfectly shaped to the body.
|
.JPG) |
I do clip and notch my seams even on mock-ups,
as well as thread-trace where finishings (hems, center front closures, etc.)
will be to get the best idea of how the finished version will fit.
|
After all of the mock-ups and doing the final corrections to the pattern pieces, I was finally ready to cut the fashion fabric. The grid pattern interfacing made matching plaids and keeping the grainline parallel a breeze - and I totally recommend
Pellon's Tru-Grid for your more finicky projects. I keep a bolt right by my cutting table, along with regular pattern paper and another bolt of cheap muslin.
I cut the bodice pieces from the same woven plaid cotton as the skirt and draperies, and used a sturdy cotton twill as the lining. I cut the "vest" fronts, cuffs, and collar from matching navy velvet, which is a pain to work with, as well as corresponding cotton twill linings.
 |
Cutting the fashion fabric, which is a navy, rust, and white woven plaid cotton.
The lining is a sturdy, white cotton twill.
|
Once all of the pieces were cut out, I flat lined the fashion fabric and lining to treat them as one piece, and stitched all of the side seams. With all of the curves, there was a lot of clipping and notching needed for the seams to lay flat, so I also hand-overcast all of the raw edges to prevent fraying.
 |
After flat lining the fashion fabric and lining, all of the side seams were stitched,
pressed open, notched, and overcast by hand to prevent fraying.
|
Next, I turned my attention to the cuffs and sleeves. The sleeves were lined with the same cotton lawn as the drapery to keep the sleeves from being too stiff. The cuffs were finished the same way as the velvet "vest" fronts, and the collar, which is one of my favorite ways of neatly finishing edges. First, stitch the side seams of the cuffs. Line up the outer cuff edges, and stitch right sides together. Grade seams to reduce bulk, clipping curves as needed, and understitch the lining so it won't show. Slightly roll the lining seam to the inside, and press well.
.JPG) |
Preparing the cuffs to attach to the sleeves.
Understitching helps keep the lining tidy and hidden on the inside.
|
These sleeve cuffs are intended to be simple folding cuffs, so all I had to do was attach them to the sleeves, right side to wrong side, and fold them out for a clean finish. The collar was attached to the bodice the same way, and I used a bias-cut strip of cotton muslin as a facing.
.JPG) |
Attaching the velvet sleeve cuffs.
|
To finish the interior of the bodice, I added boning cases to each of the side seams. I used 6 spiral steels to support the curves.
.JPG) |
Interior of the bodice in progress, showing bone casings with spiral steels.
The hem of the bodice was also finished with a bias facing, much like the neckline.
|
I was on a tight deadline, and apparently didn't take pictures after this point - but I did finish the pleats, and secured the raw edges with twill tape. I put a bias facing around the entire hem to finish the bottom edge; and stitched around 2-dozen small, metal hooks and thread eyes to close the bodice. Two additional hooks and thread eyes close the overlapping velvet collar.
.JPG) |
Front view of the bodice in progress - almost done!
|
.JPG) |
Bodice in progress, side view looking sharp!
|
.JPG) |
Back view of the bodice in progress -
adding the boning created ripples along the back side seams...
does anyone have suggestions for avoiding this in the future?
I'm thinking of boning the center back, only, and not the curved side seams again!
|
As is period practice, I added a waist stay, which is a 1" cotton twill tape strip tacked at the waistline to help take strain off of the bodice seams at the waist, and to keep the bodice from shifting while wearing. I also added a metal hook and thread eye for a closure.
And with that, we have a finished 1880s plaid bodice with velvet accents!
 |
Finished bodice, view of the front
|
 |
Finished bodice, view of the back
|
American Duchess "Renoir" Scalloped Button Boots
With the completion of this 1880s project from undergarments to day dress, and to celebrate journeying into a new era, I treated myself to something I've always wanted -
American Duchess boots! Specifically, the
"Renior" scalloped, Victorian button boots in brown, which I've drooled over since they were first released. American Duchess footwear is really out of my price range, but on par with other historical footwear pricing -
and worth every penny in my book! I made a special allowance this time, and used the speaker fees from both Spring programs to cover most of the cost.
The buttons are difficult (but not impossible) to button by hand, and is much faster with the aid of a
reproduction button hook, also sold by American Duchess:
 |
| Using a reproduction button hook to put on my "Renior" button boots from American Duchess! |
Overall, I'm really happy with this investment - having the proper footwear is important to me during "Getting Dressed" programs, when showing an ensemble from boots to bonnet, or head to toes.
Completed Project Pictures
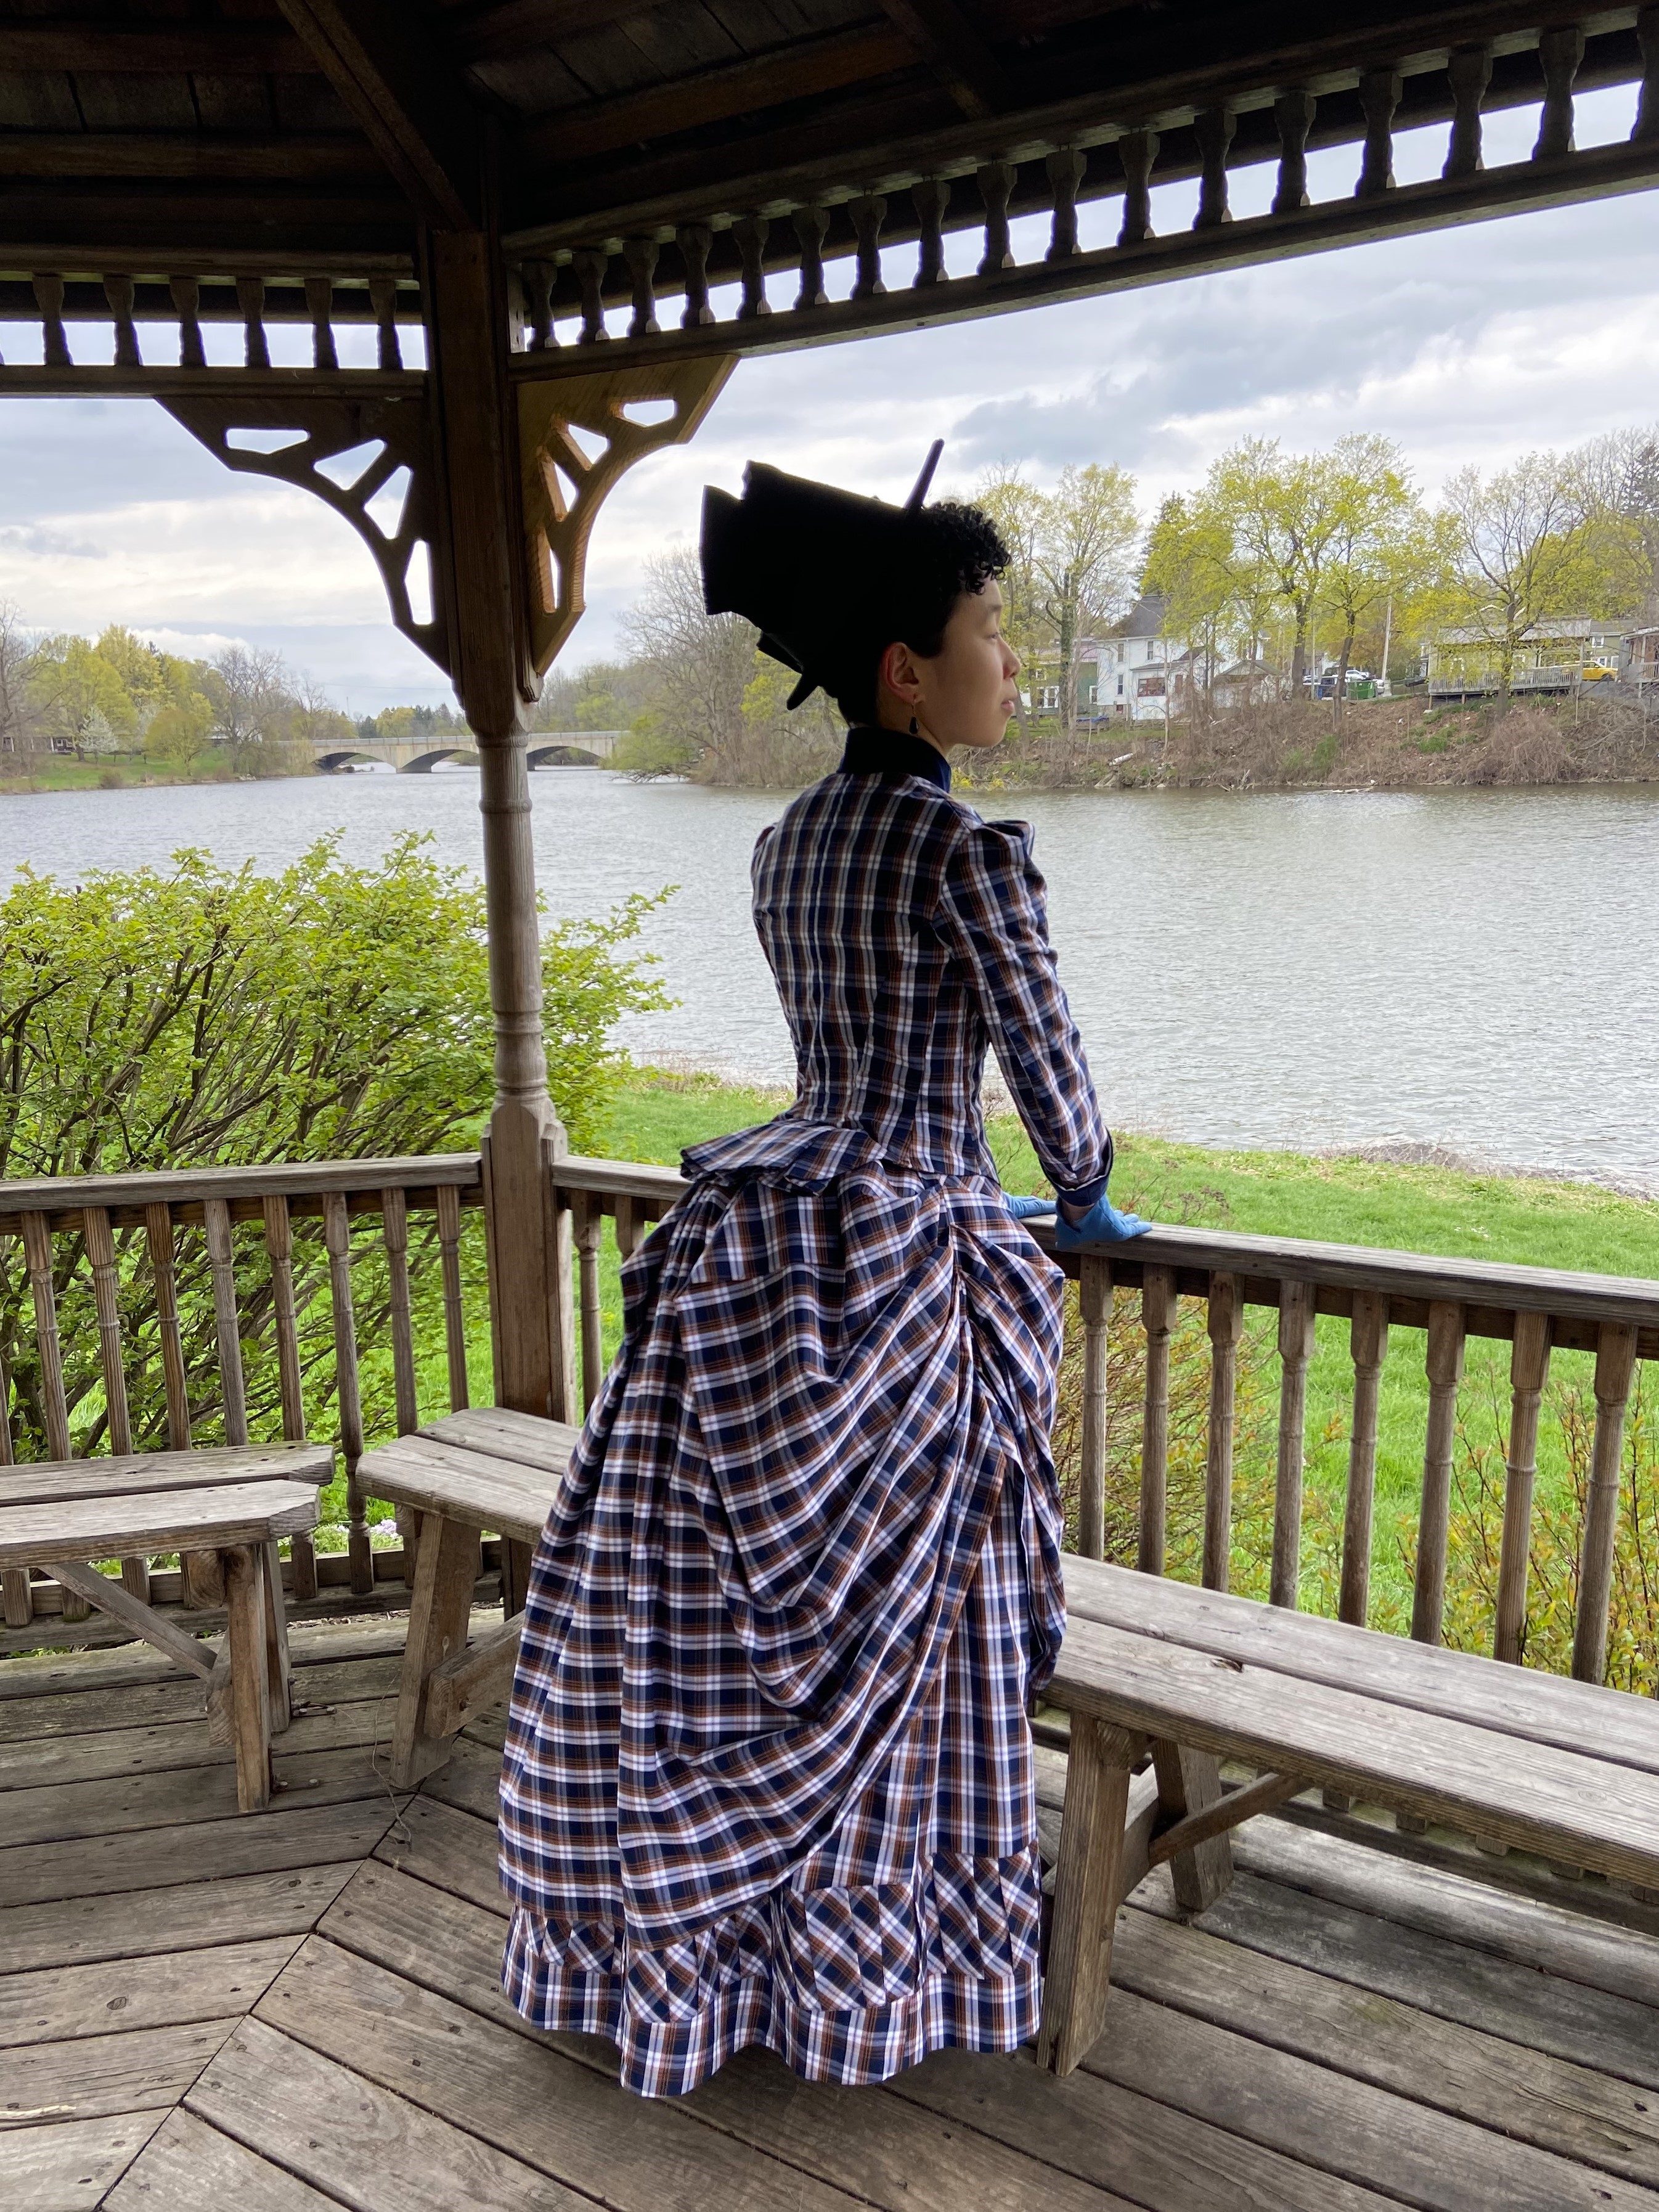
And now, for the finished, three-piece c.1883-1886 plaid ensemble:
I still want to make a matching velvet hat for the ensemble (hopefully before the November program), and maybe add velvet lapels to the bodice, and lace trim at the neckline and sleeve cuffs. But otherwise, we're calling this project DONE - and I already have a million ideas for the next bustle dress(es)!
Shortly after its completion, Maria, my sister and often photographer, came down to photo shoot with me in the historic town of LeRoy. I'll share the results in a separate post this week, since this is already quite picture heavy!
Like what you see here and want to support the creation of future content, historical costumes, and fashion history programming? Consider joining us over on Patreon with pledges starting at $2/month, and you'll also unlock exclusive content like bonus blog posts and more! Follow @youngsewphisticate on Facebook & Instagram for regular updates.
Thank you for reading & special thanks to our generous patrons!


.JPG)
.JPG)
.JPG)


.JPG)
.JPG)
.JPG)
.JPG)
.JPG)
.JPG)


.JPG)


