Is it just me - or do you also enjoy making fancifully trimmed underclothing, even though they're rarely meant to be seen? Following the construction of my
lobster tail bustle, the next layer was naturally an 1880s petticoat, and to make it
pretty, I had to add a flounce with whitework trim!
 |
Making an 1880s Flounced Petticoat with Whitework Trim.
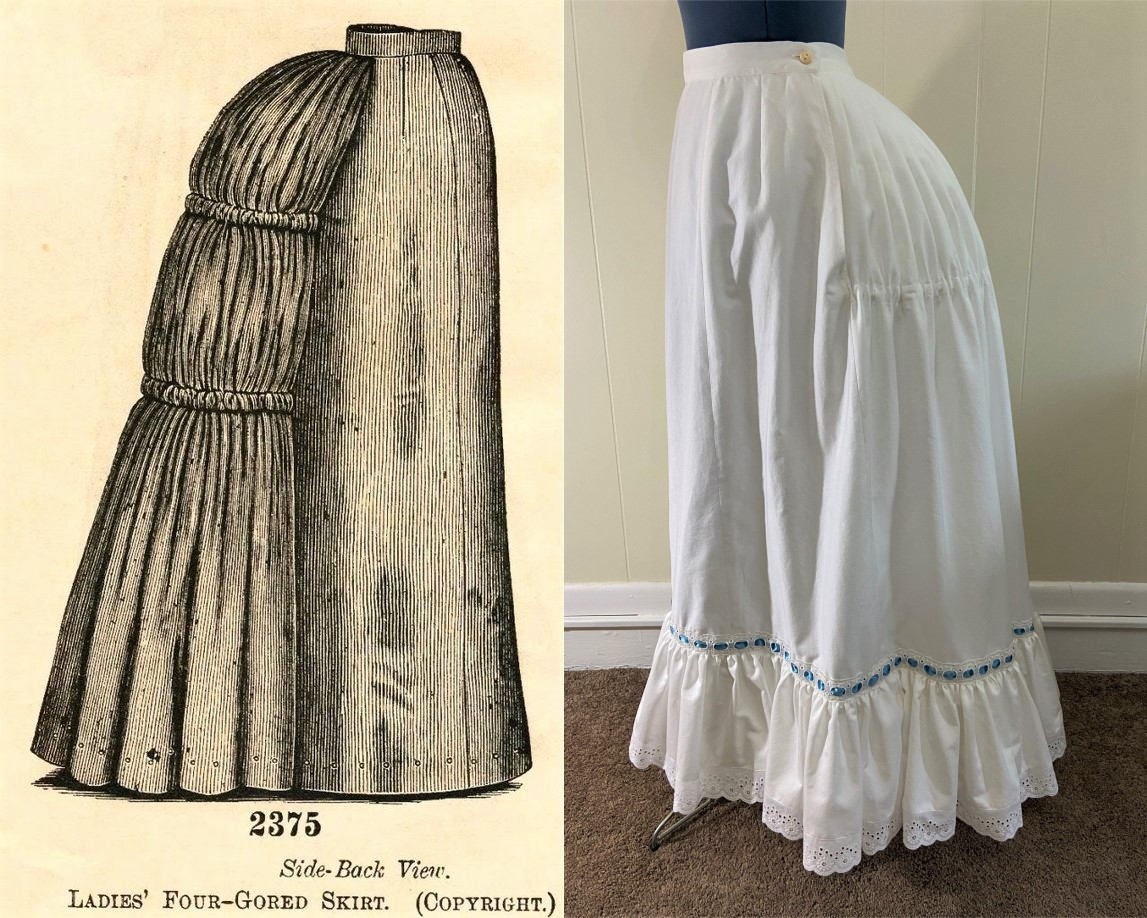
"Four Gore Skirt" from the Delineator, 1888 (left); and my reproduction petticoat (right).
|
Historical Inspiration
Petticoats in the Bustle Era served to soften the lines created by shelf-like bustles and to support the overskirt. Though I had a good idea of what I wanted to create, I did look to a couple originals that showed a similarly trimmed flounce with both scalloped and beaded eyelet. This example from the 1860-1960, One Hundred Years of Fashion and Accessories website, was particularly helpful:
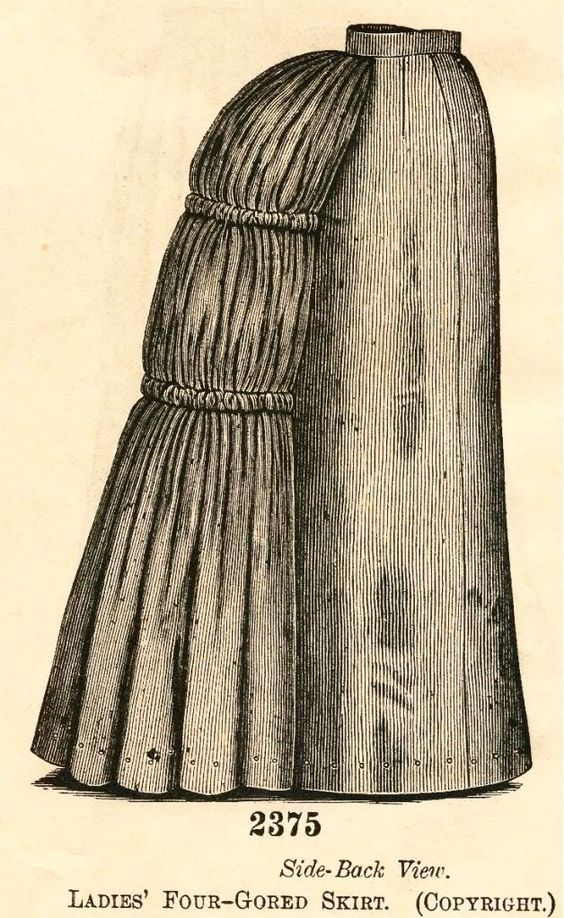
Though an advertisement for a skirt with reeds in the casing and not just ties, this plate from the
Delineator magazine, 1888 issue, was also an inspiration. It was shared
here, at the "what-i-found" blog, along with the accompanying magazine description:
 |
| Delineator magazine, 1888 |
"No. 2375. - This skirt is portrayed made of dress goods and plainly finished. Its three dart-fitted gores and full back-breadth are shaped to produce a graceful, even hanging; and across the back-breadth two reeds are adjusted in casings and tied into curves by tapes or elastics. A belt finishes the top of the skirt, and the placket opening is made at the left side-back seam. A small pad bustle is a feature of the skirt; it is shaped in two parts that are narrowest at the top and rounding at the bottom. A filling of moss or curled hair is used, and the parts are caught together in upholstery fashion. The top of the bustle is caught to the belt." - Delineator, 1888
Construction Details
To make my petticoat, I used Truly Victorian's 1885 Four-Gore Underskirt, pattern TV261, for the base. After tracing the pattern pieces in my size onto pattern paper, I adjusted the hem lengths to suit my height, and subtracted an additional inch so it would be shorter than the skirt. I cut the pieces from a lightweight cotton sateen, as well as a 220" long rectangle for the flounce. The scalloped whitework trim is the same used for the detachable lobster tail bustle ruffles, and the petticoat flounce ended up being ~8.5" in height when finished.
I forgot to take pictures of it, but I added a twill tape casing to the back piece and inserted a drawstring, which can be adjusted to fit over various sized bustles. I seamed and pressed each of the darts, and then the side seams, pressing open and finishing each raw edge with zig-zag stitches. Then I pressed and machine-stitched a 1" hem, since it would be covered with the flounce anyways.
To gather and attach such a long flounce, I used a method I had been wanting to try for some time - cord gathering! If you're unfamiliar or need a refresher on the technique, The Dreamstress wrote a wonderful tutorial, here: "How to sew gathers & ruffles with cord gathering (aka the easiest way to gather, ever)"
After dividing the flounce into four equal parts, I zig-zag stitched blue button twist thread a half-inch below the unfinished top edge. Then, pinning quarters again, I pulled the button twist to draw the gathers, and added more pins so I wouldn't have to worry about shifting off the stitch line, or take the time to baste:
 |
| Drawing up the cord gathers and pinning generously! |
Next, I took it to the machine and stitched slightly below the zig-zagged line:
 |
| Stitching on the flounce |
Because the cord I used was light blue, I did take a few minutes to unpick and remove it, even though it was going to be covered with more trim...
 |
| Removing the light blue cord/gathering thread |
 |
| Flounce attached! |
More is more in the Victorian Era, so I went ahead and covered the raw edges with eyelet beading lace, which was carefully edge stitched on the top and bottom:
 |
| Adding eyelet beading lace, which also covers the raw edges of the flounce |
 |
| Eyelet beading lace attached! |
The last step was to draw a satin ribbon through the eyelet and tie a bow at the center front!
 |
| A blue satin bow for the finishing touch |
With the flounce attached and fully trimmed, all that was left was adding a waistband and a bone button and button-hole closure:
 |
| Side closure with bone button and button-hole |
The front and sides of the finished petticoat are flat, with shaping provided by the darts and gored hemline, and the back features directional knife pleats.
Completed Project Pictures
Here's the finished petticoat worn over the lobster tail bustle:
 |
| The petticoat's fullness is controlled at the back with directional knife pleats and ties in a bias-bound casing. This also allows the wearer to adjust the petticoat to fit a variety of bustle sizes. |
 |
| Decorative flounce mounted on top of skirt, and revealing hemmed petticoat underneath |
Do you like to make your 19th century underclothes pretty, or utilitarian? Next up in the Bustle Era series is either a second petticoat, or onto the skirt and draperies!
Like what you see here and want to support the creation of future content and fashion history programming? Consider joining us over on Patreon, and you'll also unlock exclusive contents like bonus blog posts, live chats, and more! Follow @youngsewphisticate on Facebook & Instagram.
Thank you for reading & special thanks to our generous patrons!


.JPG)
.JPG)
.JPG)
.JPG)


No comments:
Post a Comment