
There comes a time in every historical costumer's life when they decide to leave comfort behind and dive into a new era's clothing...which means building the look from the undergarments, out. That's right - it's BUSTLE time! And to start, I made an 1880s "lobster tail" style bustle:
 |
| Making an 1880s "Lobster Tail" Bustle. MET Museum Original on the left, my reproduction on the right. |
Historical Inspiration
When the bustle came back in 1883 for what is referred to as the Late Bustle or Second Bustle Era (1883-1889), it was bigger and better than before. Fundamental to the fashionable silhouette, a structural undergarment, called a "bustle," was worn to create a shelf-like protrusion at the rear. While bustles were made in a variety of shapes and from various materials, one of the most iconic styles from the 1880s was the "lobster tail." Named for its resemblance to the coastal crustacean, these bustles featured cascading rigid hoops, often mounted to fabric and decorated with a flounce, for a shell-like appearance.
I was drawn to a particular example from the Metropolitan Museum of Art, specifically because of the double-tiered, detachable flounce. Its purpose was two-fold: to soften the line from the hoops, and to allow for easy removal for laundering.
 |
| Bustle, 1880s. Metropolitan Museum of Art, (C.I.43.22a–c) |
 |
| Bustle, 1880s, side. Metropolitan Museum of Art, (C.I.43.22a–c) |
I did my best to source a similar whitework trim for the flounces on my reproduction, though I mounted them lower than the original, which was in line with what I saw on other extant examples.
Construction Details
To make my reproduction, I used Truly Victorian's Imperial Tournure, pattern TV163 for the base. Since I don't like to cut the original, multi-sized patterns, I traced the pieces in my size onto pattern paper, and cut them from a sturdy cotton twill. There was an option to order precut and tipped boning from the company a while back - and I totally recommend the shortcut, if it's still available.

 |
| I used a frixon (heat-erasable) pen to mark the boning channels |
 |
| Pining single-fold bias tape to create the channels |
 |
| Boning channels all stitched! |
I did use the same bias tape to face the sides and inner pieces to finish the edges, which I thought looked nice. Rather than use the provided flounce from TV163, I encased the lower edge into the final boning channel. To finish the waistband, I added a vintage mother-of-pearl button and button hole.


Next step was to create the double-layered flounce. For the ruffles, I ripped two, long rectangles from cotton sateen, added the whitework trim, and top-stitched through the layers to ensure the edges stay upward and out of sight. Then, I pleated and gathered each layer individually, and mounted them to a single band.
.JPG) |
| Detail shot! |
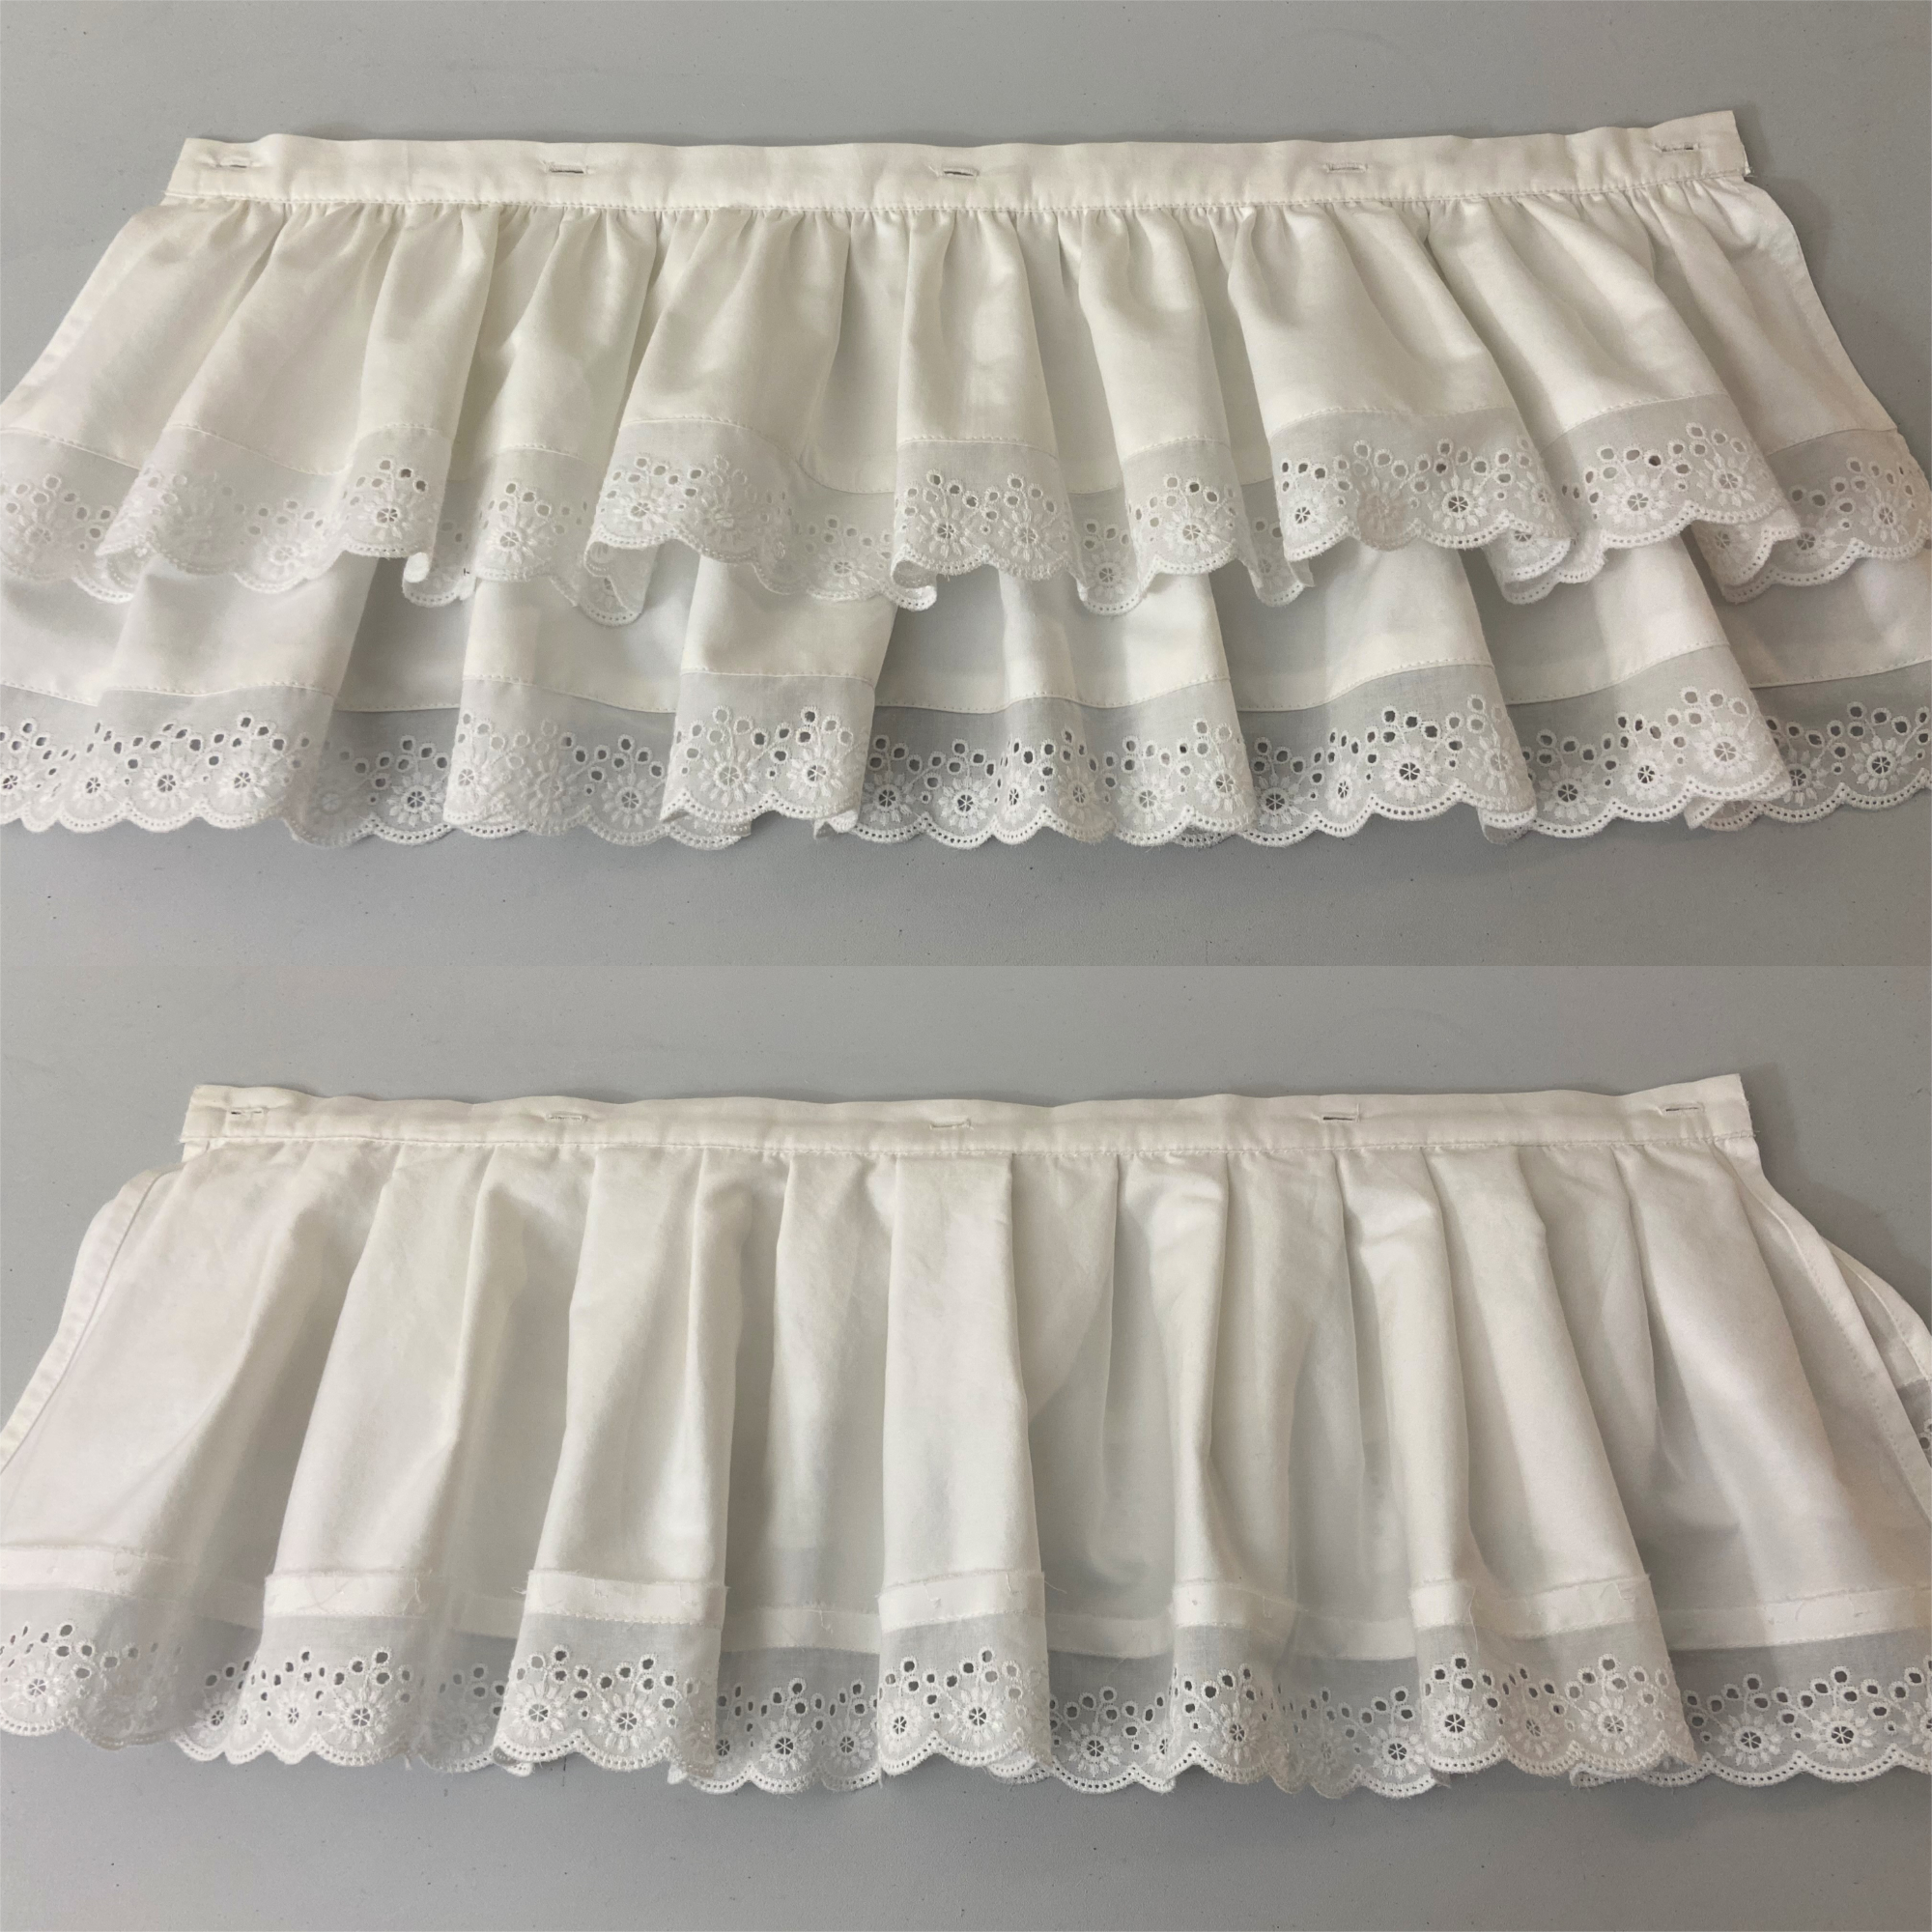 |
| Detachable flounce, front and back. The longer ruffle was pleated, and the shorter ruffle was gathered onto a single band. |
The flounce buttons onto the bustle with 5 vintage, mother-of-pearl buttons and button holes to complete the "lobster tail" look!
 |
| 1880s Lobster Tail Bustle |
.JPG)
.JPG)
.JPG)
.JPG)
.JPG)
.JPG)
.JPG) |

Wow. Your bustle looks great. The way you made it seems very doable. Thanks for sharing.
ReplyDelete