
My first completed - and now blogged about - sewing project of 2023 is an 1820s corded petticoat!

If you've been following along over on the Facebook page and Instagram @youngsewphisticate, you'll know that I've been working on a few projects simultaneously, including a plaid 1880s ensemble and the beginnings of an early-1820s wardrobe. Both projects are for "getting dressed" programs later this year (the details of which are still secrets!) - and while it seems silly (overwhelming perhaps?) to take on two new eras, I need the challenge to keep pushing my sewing skills. Especially post-college, and now that I'm no longer wearing historical clothing as part of my daily job...
Anyways, the project I'll be featuring in this post is my newly completed 1820s petticoat. I wanted something to bridge the gap in my wardrobe between my rather columnar, 1810s bodiced petticoat and 1830s petticoats - both corded and tucked - which sit a the natural waistline. Enter the perfect combination of the two - a high-waisted bodiced petticoat with a corded hem and full flounce!
Historical Inspiration
When looking at examples of 1820s petticoats, (yes, I made a whole pinterest board), the one that kept popping up in searches is the c.1828-1835 bodiced petticoat from the Manchester City Galleries. Quinn of the Quintessential Clothes Pen blog, made her own c.1822-1824 version after the Manchester original, and you can read about her sewing project, here: Project Journal: 1822-1824 Ensemble Part II: Initial Petticoat Detail
A couple of other inspirational examples include this petticoat, unfortunately without a source other than the watermark: I knew I wanted a flounce at the hem of my petticoat to give it more body and volume, without having to wear a second petticoat. This example also has gentle pleats at the front, which would presumably be more concentrated at the back, and two flounces with whitework trimming.
 |
| Petticoat, c.1820-1825 (Image source: Pinterest) |
I also took lead on the corded hem from this example from the Victoria & Albert Museum, which has two blocks of cording, and six rows in each section. There appears to be a deep tuck right at or above knee-level - and I mimicked this, as you'll read later, with a French seam to add much-needed length to my skirt. Also, according to the entry, the original petticoat's hem circumference measures 220cm. (which is 86.6 in.), and my reproduction ended up being just under 90" too.
 |
| Petticoat, c.1820-1829 Victoria & Albert Museum, (accession number: T.194-1929) |
Construction Details
Now for the making of my own 1820s petticoat! I like to start with the skirt portion, because it's usually all rectangles. In my mind, skirts are the easier, but more tedious, part of construction - giving me the mojo to tackle the more difficult and fiddly bodice. When both parts are done, all that's left to do is join the top and bottom, add closures, and then you're finished! But, I'm getting ahead of myself here...
For this petticoat, I started at the hem and worked my way up. I flat-felled two lengths of cotton muslin to create a ~90" tube, and folded it in half. To cord the hem, I sandwiched rows of sugar-n-cream crochet yarn between the two layers, and stitched, and stitched, and stitched, in a continuous circle until I felt like I had enough rows. Then, I skipped an inch, and made another, smaller section of cording.
Once the two sections were corded to my liking, I folded the inner edge by a 1/2" and topstitched to enclose the raw edge:
.JPG) |
| Finishing the edge of the corded panel. |
.JPG) |
| The finished hem with two blocks of continuous cording! Cording provides volume at the hem of the skirt, and keeps all the layers from tangling around the wearer's legs. |
Next, I worked on the flounce. By mounting a deep flounce over the corded panel, I'm smoothing the line of cording, and creating more volume at hem without having to wear a second petticoat. The 1820s was a transitional fashion period between the columnar silhouette of the previous decade, and the bell-shaped skirts of the 1830s.
My flounce ended up being a little wider than I initially planned, but I didn't want to cut the gorgeous, scalloped whitework trim that I found! So, instead of 1.5x, I went with 2x the width of the hem. After sewing enough lengths of muslin together, I finished the hem by turning it a 1/4" twice. Then, very carefully, I edgestitched the lace, which had a machine overcasting, so I didn't have to worry about fraying. I divided the ruffle into four sections, and evenly gathered it around:
 |
| Gathering the flounce to the petticoat hem. |
Once the gathers were pinned in place, I went ahead and stitched at a 1/2" from the top. To cover the raw edges, I pressed a 1" band of self-fabric bias, and topstitched to neatly encase the seam allowances. At this point, the hem needed a good pressing too.
 |
| Flounce with scalloped whitework trim mounted above the corded panel. A 1" band of bias neatly covers the top of the flounce. |
To finish the skirt, I needed to add length to the corded panel. I cut and flat-felled another ~90" tube, and attached the pieces with a 1" French seam to mimic a tuck, and to match the length of the bias band. The corded panel with the flounce is quite heavy, so the double fold of the French seam also made for a stronger seam.
 |
| Flounce all attached! |
 |
| Same view as the image above, but from the inside. Notice the corded panel, rows of stitching where the bias band is attached, and French seam joining the upper portion of the skirt. The scalloped trim is set 1" lower than the corded hem. |
I did balance the skirt so that the front and sides are 1" shorter than the back, but at this point, the skirt was finished and set aside to work on the bodice:
 |
| Finished skirt, outside. |
 |
| Finished skirt, inside. |
Moving along to the bodice...since I spent so much time on finishings for the skirt, I thought it only appropriate to make sure the interiors of the bodice were just as tidy. I did actually do the bodice twice over - this first time, I used a thin cotton batiste, thinking I would cut down on the bulk of the bodice (since I line all of my dresses). However, I was afraid the weight of the skirt might stretch or tear the finer cotton - so I made a second bodice out of the same cotton muslin I used for the skirt and flounce.
I didn't take any pictures the first time, so during the redo, I made sure to document the sewing trick I used for lining the bodice, which is called the "burrito method!" It's kind of tricky to explain with words, but I promise it's much easier in practice, as long as you tuck and roll the fabric the right way. If you're a visual person, I made a 30-second TikTok tutorial on how to line a bodice using the “burrito method”. (If this is your first time, I also recommend this step-by-step, illustrated guide with an accompanying YouTube tutorial by Melly Sews on How to Sew a Lined Bodice - the "Burrito Method").
To further explain, the "burrito method" is a similar idea to bag-lining, except that armholes get in the way...first, you'll prep the fronts and backs separately. For me, this meant sewing the curved seams on the fashion fabric and linings, clipping, and pressing over a tailor's ham. Then, I joined the front and backs at the shoulders, and stitched along the entire neckline. Optional, but to help the lining roll to the inside, I understitch the neckline (and seam allowances) as well. Clip curves and carefully press over a tailor's ham.
.JPG) |
| Step one: join fronts and backs at the shoulders; sew around the neckline. Understitch to keep the lining in place, clip curves, and press over a tailor's ham. |
.JPG) |
| Step two: roll one side into the shoulder strap of the other, and stitch the armscye (armhole). |
Turn right sides out, and press well. In the picture below, the right side and shoulder strap are neatly finished, while the outer edge on the left still needs to be sewn:
.JPG) |
| Step three: turn right sides out and press shoulder strap and armscye. |
Repeat the burrito on the other side, tucking and rolling the finished side into the other shoulder strap. Pin and stitch the second armscye as before.
.JPG) |
| Step four: repeat for the second side. |
Pull right sides out again, and finish the side seams by sewing rights sides together, matching lining to lining and fashion fabrics. Now you have a fully lined bodice!
.JPG) |
| Step five: sew side seams - and now you have a fully lined bodice! |
.JPG) |
| Bodice from the inside. I pressed a 1/2" up on the lining, which will cover the skirt seam. |
With the bodice and skirt both finished separately, it was time to attach them! Since the petticoat is front-opening, I cut a slit at the center front of the skirt and hemmed the raw edges. Then, matching the skirt and bodice edges, I knife pleated and stitched them together. I whipped the lining over the raw edges at the waist, and topstitched along the joining seam. Two metal hooks and thread eyes serve as closures.
 |
| Joining the bodice and skirt with directional knife pleats. Two metal hooks and thread eyes serve as closures. |
Completed Project Pictures
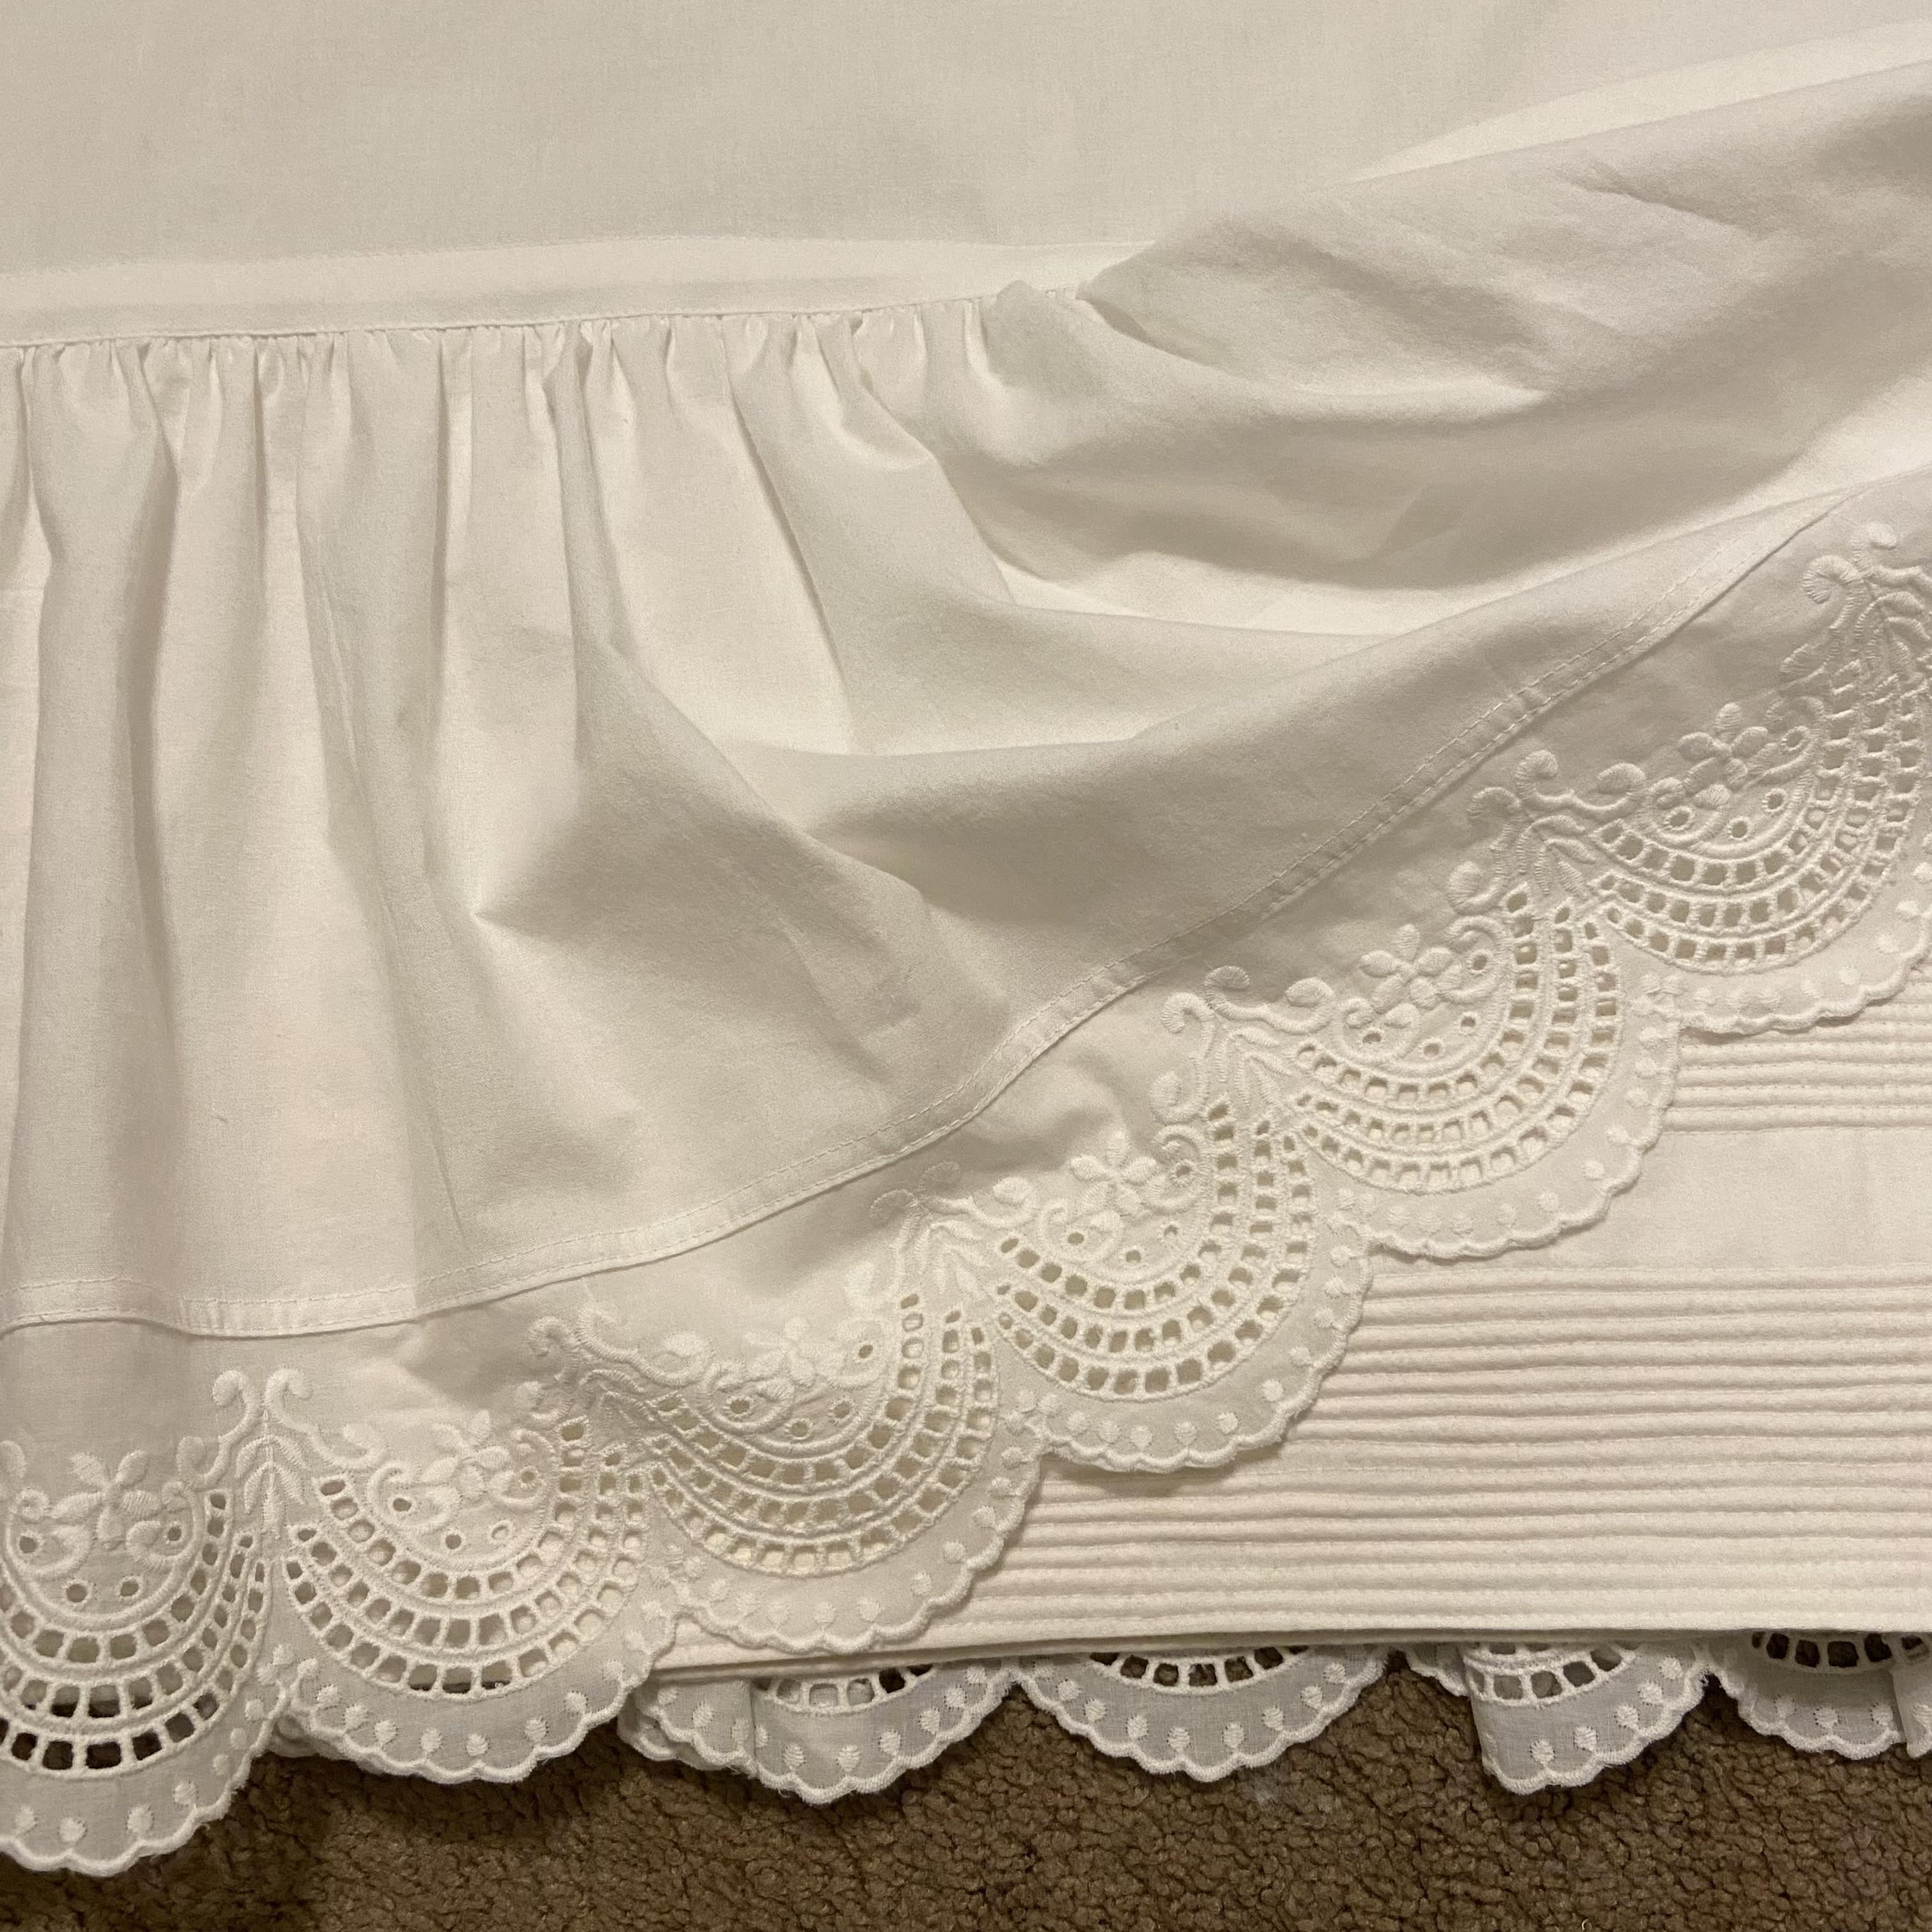
I hope you enjoyed reading all the construction details - and now, you know the drill, it's time for completed project pictures! From all angles, here's the finished 1820s bodiced petticoat with a corded hem and decorative whitework flounce:


 |
| Decorative flounce mounted on top of skirt, and revealing corded hem underneath. |


This petticoat is intended to be worn over a shift and long stays, and under a new c.1823 dress and accessories. More to come on my 1820s wardrobe project progress & "getting dressed" programs!
Like what you see here and want to support the creation of future content and fashion history programming? Consider joining us over on Patreon with pledges starting at $2/month, and you'll also unlock exclusive content like bonus blog posts and more! Follow @youngsewphisticate on Facebook & Instagram for regular updates.
Thank you for reading & special thanks to our generous patrons!
