September 19, 2016

Inside & Out: 1810s Dotted Dress and Chemisette

All I ask is a tall ship and a star to steer her by...Today's post details the construction of the 1810s dotted dress and chemisette featured in our most recent photo shoot, which can be viewed here: The Secret of the Sea.  (As well as four bonus photographs from our second shoot in the George Eastman House Gardens!) 

(Photograph courtesy of Maria M.)

The Inspiration

Typically, my garments are inspired by extant garments or entirely designs of my own; however, this dress was inspired by one in Miss Emma Woodhouse's wardrobe!  Emma (played by Romola Garai) sports a delightful, yellow floral print gown in my favorite adaptation of Jane Austen's Emma, the 2009 BBC miniseries. 

Emma's pale yellow floral gown.
(Image via: An Old Fashioned Girl)

What I like most about the dress is the striped, sheer detachable sleeves.  They add such elegance to an otherwise simple day dress.  (I had the perfect striped sheer fabric in the stash for the long sleeves; however, based on the sheen alone, I could tell it was a cotton/poly blend.  So, for my dress, I ended up going without.  Though, if I ever come across a more suitable sheer fabric, sleeves will certainly be on the sewing list...)

Emma & Mr. Knightley
(Image via: The Enchanted Garden, Tumblr)

Our version, pretending that Hartfield is in the background...
All I need is a Mr. Knightly!
(Photograph courtesy of Maria M.)

The Dress 

A while ago now, I found three yards of a wide, dotted print cotton at a price I couldn't pass up!  Though a modern fabric, I thought it passed for a Regency Era appropriate block print.  I struggled with a pattern, because I had so little fabric.  I originally thought of a jumper dress, but then the puffed sleeves with detachable long, sheer sleeves look from Emma won me over.  

A similar dress, Costume Parisien, 1804
(Image via: SceneInThePast, Flickr)


Patterning the dress itself presented several challenges.  I did not like the look of my first version at all.  I had tried to make the entire bodice gathered with drawstrings and it was just a no...so the second version then had to be cut from the bodice of the first as I literally had nothing to spare.  And I mean nothing.  (Note to self, minimum of four yards of fabric next time!)  

Several mock ups were made before cutting into the fashion fabric again.  I ended up compromising with a gathered center, which was literally a rectangle three times as long as the inside measure.  Some creative piecing and cutting layouts had to be worked out.  As for the sewing, some machined interior seams and hand finishings (and anywhere seams might show).  

Bodice in progress.  Originally designed to be added right to the pleated skirt;
however, due to skirt length issues (again not enough fabric),
a 1.5" waistband was added.

A look at the interior!
I'm very happy with how neat the inside looks.

Bias bound neckline of self fabric.
Slip stitched waistband lining of cotton muslin.

Only the two side and back pieces are flat lined with cotton batiste.

Here's the gathered center panel.  Notice that it too had to be pieced.
The top of the panel was folded over for a casing with two eyelets for the drawstring.

In the end, it did work out.  However, the fit is off, again.  When trying on the bodice in fittings, it seemed to fit fine; but when finished, I could barely get the back of the bodice to meet in the middle and top.  Oh, and there's the fact that something went wrong with the armseyes...I can barely move my arms higher than shoulder height.  I'm a little disappointed, but happy with the sewing itself.  I sure wish I could get better at draping, pattern making and fitting!  

The finished bodice, front.


The sleeves had to be pieced, as did the neckline bias binding.

The skirt features double-stacked knife pleats with the fullness concentrated in the back.
Because of the fabric situation, the skirt is only about 75" around,
which is less than my preferred skirt circumference.
Finished with a 4.5" white muslin hem facing (not pictured).

A note on the closure method:  The most common methods of closing the back (or front) openings of Regency Era dresses seems to be drawstrings, hooks and eyes, and buttons.  (And let's not forget about just regular metal pins!)  I chose to add three metal hooks and metal eyes (rather than my usual thread eyes) - one at the neckline and two at the waistband.  There is a small gap in-between, but based on examples I've seen, a sliver of white either from chemise, bodiced petticoat, chemisette or neckerchief is reasonable!

A very similar example with two metal hooks & eyes at the waistband!
Embroidered Regency Gown, c.1820
(Image via: Ebay, Pinterest)

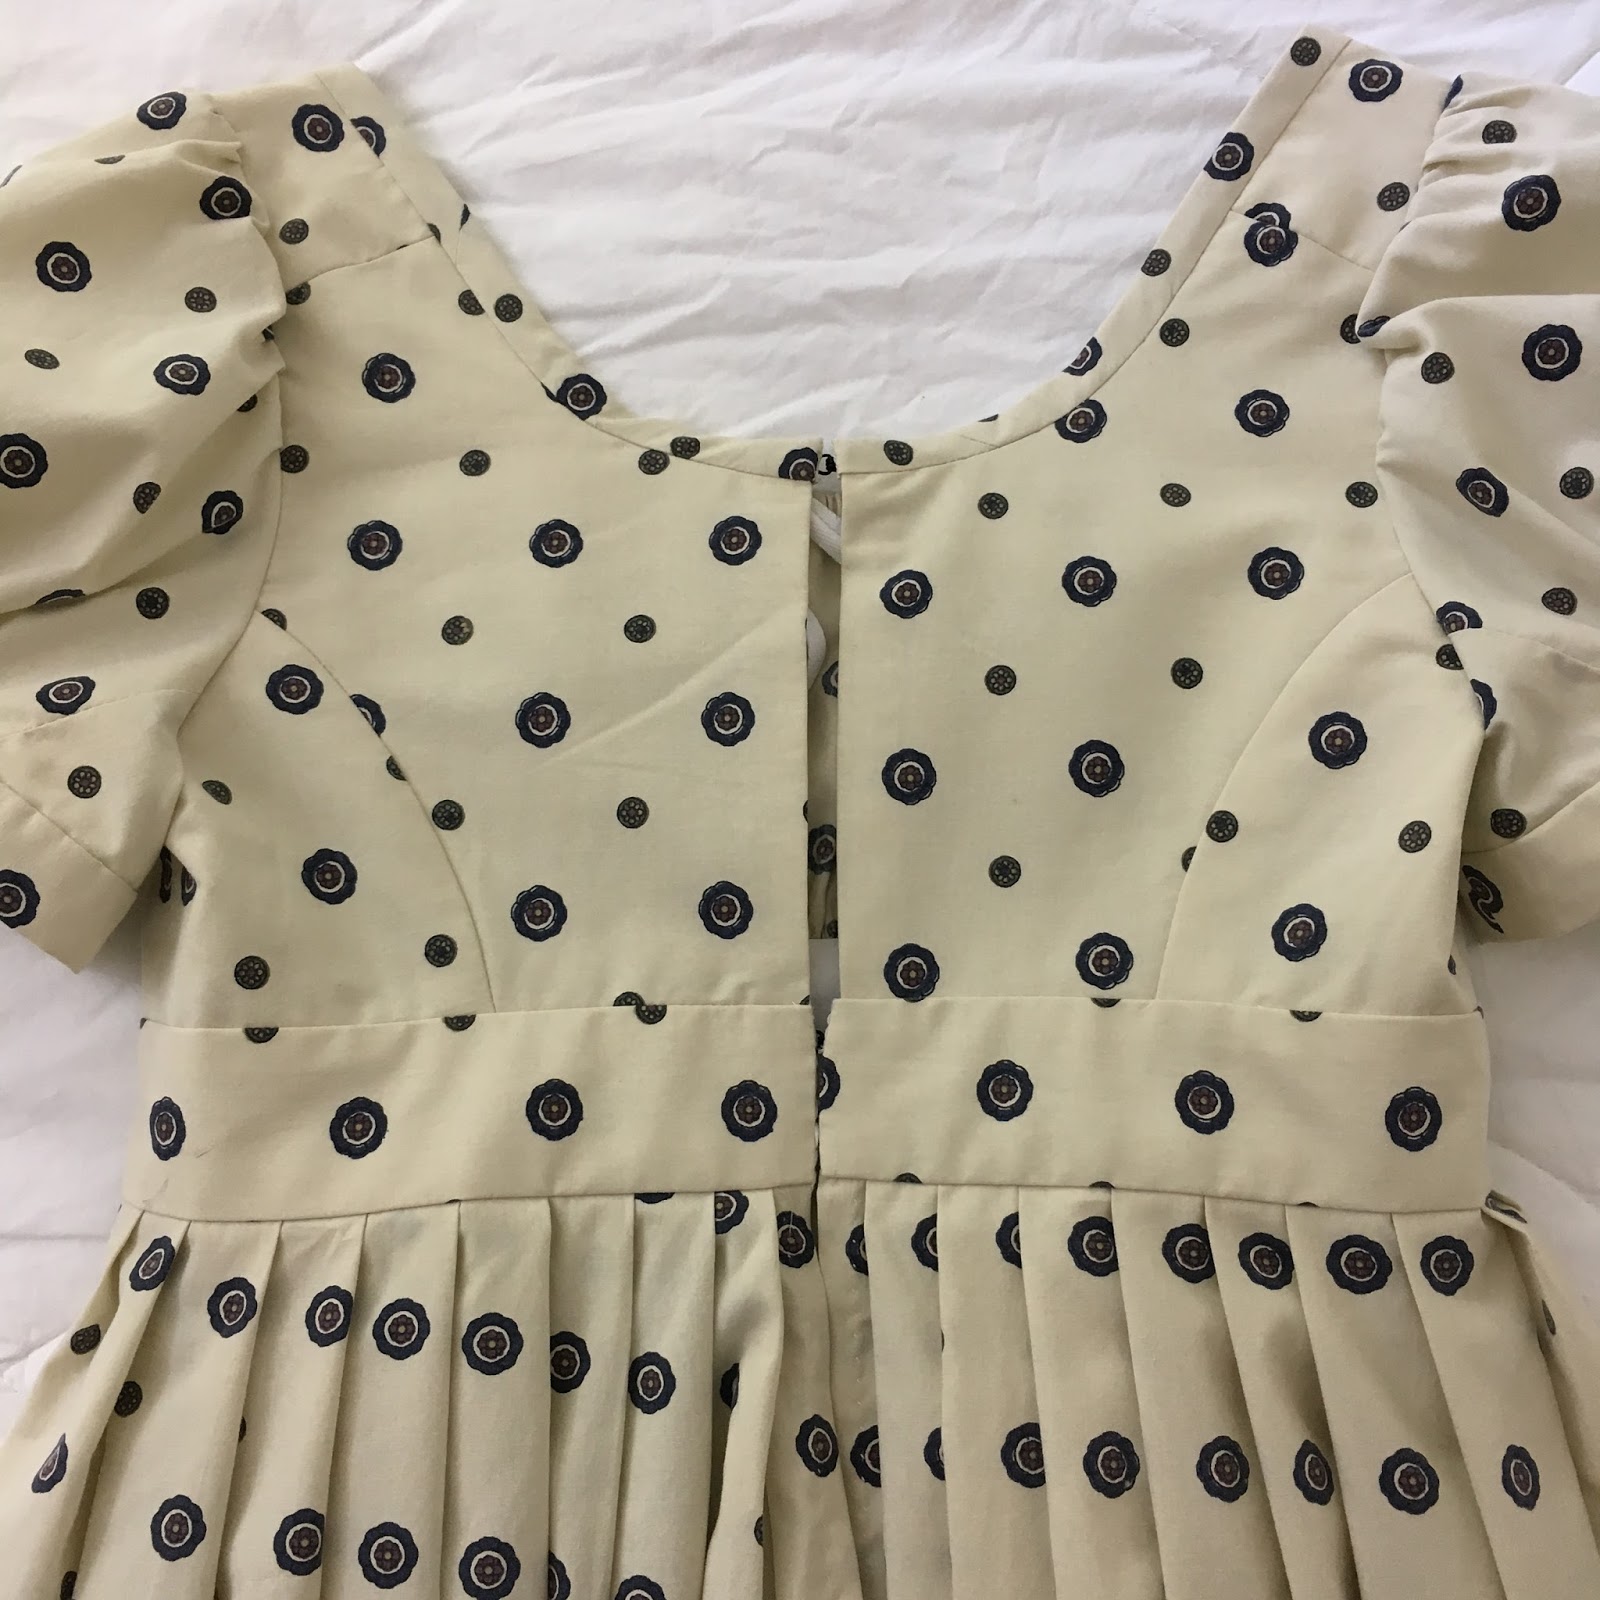
The finished bodice, back.
Three metal hooks and eyes - one set at the neckline, two at the waistband. 


The Chemisette

Moving right along to my favorite part, the accessories!  For this project, I made a chemisette based off this lovely example in the Manchester Art Gallery Collection: 

Dress & chemisette, c.1795-1800
(Image via: Manchester Art Gallery)


My version was made from a dotted swiss lawn (body) and another fine cotton lawn (ruffle).  Hand corded neckline tie and 1/8" bias tape tie at the waist.  Entirely hand stitched using the proper 19th century techniques of rolled hems and rolled whipped gathers for the ruffle.

The ruffle is densely gathered, reminiscent of an earlier ruff.
Around 120" total, I was afraid it wouldn't fit around the neckline!
Also notice the hand cording for ties.

The ruffle was pieced from two 60" strips of the cotton lawn.

I'd like to experiment with cartridge pleating/gauging ruffles next...
Entirely hand stitched...
this project went together much quicker than I imagined it would, yay!

The back of the chemisette.
The shoulders were stitched with French seams to enclose the raw edges.


One final look with the in-progress bodice: 


And, voila, a completed 1810s dotted dress and chemisette!  Now off to start the next project...thank you for reading!  

September 18, 2016

Summer Highlights: Joie de Vivre!

"I cannot even imagine where I would be today were it not for that handful of friends who have given me a heart full of joy.  Let's face it, friends make life a lot more fun." ~ Charles R. Swindoll

(Photograph courtesy of Hannah W.)

Oh the joy of living!  Is it just me, or did the summer pass by too quickly?  It seems like summer just started...there were so many things that I had to do, wanted to do, did do and still hope to do...I may not have met all of my summer blogging goals; but regardless of the frequency of updates, or lack thereof, it is of the utmost personal importance to find pleasure in the work before and company that surrounds me.  With that said, allow me to present a small slice of my summer - oh the joys of living, working and general shenanigans!

Fun with shadows!
(Photograph by Judy J.)

By now it should come as no surprise, my job as a historical interpreter at the Genesee Country Village & Musuem was my number one priority.  Whether I was talking with visitors, reading or sewing - at home or onsite - the goal was to improve my interpretation.  There were ups and downs, days that I just couldn't get enough of living history and days that all I wanted was a vacation.  In fact, sometimes I regret not taking some time off.  I barely spent time with the family or exploring other whims and passions.  But, it's okay, I tell myself - there is plenty of time, plenty of other opportunities for that.  All I know for sure is that I won't ever regret the time that I spent with my friends, they really made the summer!


July - In three words?  Hot.  Busy.  Laughs!

Strolling through the Livingston Gardens,
my favorite of the historic gardens in the village.

The month opened with a surprise tea party in the Livingston Garden House (one of my most favorite overlooked locations of the village), and the best birthday that I have ever had thanks to Judy, Hannah, Katie, Richard and practically our entire team of historical interpreters...where Judy's "special" brownies became the running joke:

Tea party in the Livingston Garden House

Judy in the Livingston Gardens.

That afternoon, my good friend and neighbor at the MacKay Homestead every Wednesday, Hannah, graciously played photographer and treated me to a yummy dinner and dancing:

The always graceful Hannah.

Judy and I had been wanting to have pictures taken together in our green dresses! 

From smiling interpreters...

...to serious Victorians.


For Civil War Weekend this year, I had the chance to stay with Katie at Hetchler, the pioneer cabin.  It was really neat!  Both days, a small group of us civilians played refugees, fleeing across the village green before the battle.  Katie carried a live Rooster, named Buddy, which was a big hit!  The only pictures I took, however, were of hair styling before the ball: 

Katie & Ava in their lovely summer sheers!

Rolls, braids & ornamental boxwood.

I splurged on a silk ballgown and now own an Ava original!!

(Photograph by Ava S.)

Though it doesn't just have to be a special event to have fun...as the day-to-day interpretation has its perks!  For instance, here at Hosmer's Inn, where I play Mrs. Hosmer, hostess and innkeeper of the popular stagecoach stop, the actual village twins stopped in for tea and lively conversation:  

(Photograph via Facebook)

This also may have happened...

No tea cup?  That's alright, I'll just drink from the spout! 
(Photograph by Richard D.)

Last but not least, I taught my very first historical fashions class!  Seven bright, young students, seven decades of fashion and five days - summer camp Fashion Fun was a success!  (Eventually there will be a separate blog post or two about this...)

Silks!  Silks!  Oh delightful, yummy silks!


August - Another hot month...with just as many memories!

August means Laura Ingalls Wilder weekend, which is probably the best attended event of the season.  On Saturday I had the chance to assist our master dyer, Dawn, at the dye pots again!  It is always such a pleasure to work with Dawn.  No matter how many times I get to experience the 19th century dye process, each and every time I'm just in awe of all of the brilliant colors!  Out of all of the domestic arts we present at the village, besides sewing, this is my favorite: 

A sampling of our naturally-dyed merino wool skeins.
Eeeee just look at that rainbow of colors!

Close up shot of the purple section dyed with either
cochineal over a chrome mordant (left) or logwood (middle and right).

Our set up for the day:

Cochineal dye (left) & a chrome mordant (right) over the fire.
Almost every visitor thought we were cooking spaghetti and sauce,
I don't see why haha ;)


An indigo cake!
As an imported dye, these would have been available in a general store.

The day's work!
From left to right - spring green (if I am remembering correctly, weld over-dyed with indigo), shades of blue (indigo), purple (cochineal over a chrome mordant), a very red-orange (weld over-dyed with cochineal), and a bright red (cochineal).


Company in the confectionery!  Another ordinary day turned extraordinary by a visit from one of my good friends and globetrotter from Pittsburgh.  It's always a pleasure to share a building with another interpreter, especially one as skilled as Kaela at connecting with visitors: 

Kaela, the pretty confectioner.

And finally, something new this season, I got to mix it up by assisting in the interpretation office a bit!  It was an honor to be trusted with more responsibilities - driving golf carts, fire prevention inventories, answering phone calls, petting kittens...all in a days work! 


All in all, it was quite the summer!  Thank you for stopping by! 

We ❤︎ Our Patrons

Like what you see here, and want to support future blogging and educational programming? Consider becoming a Patron - click on the button below to unlock exclusive contents, bonus blog posts, and more! Every contribution makes a big difference, thank you!