January 21, 2018

To Mark or Not to Mark Your Fabric?

Ask not whether you should mark your fabric, but rather, what you should mark your fabric with!  Whether it be stitch lines, darts or dots, transferring those important pattern markings easily and accurately is key to efficient clothing construction.


In my costume technology class, the first project we're tackling is a corset.  In this structural garment, there not only 16 boning channels to mark, but grommet placements and other notches to transfer.  In fact, it would be just about impossible to construct this corset without the guiding lines.  The question then becomes, how do I accurately transfer the markings from the paper pattern onto the coutil fabric?  

Corset paper pattern with boning channels and markings to transfer.

Luckily, there many tools, both made for the purpose or unintentionally discovered, that can be used to mark fabrics.  In this blog post, I will be sharing my top sewing tips, tricks and tool picks for marking fabrics.  Let's get started...


Fabric Marking Tools


Sewing Pins


Most people reach for pins to hold fabric together, however, they are also useful for indicating placement lines, notches, dots, and the like.  Need to make an adjustment?  Simply pull the temporary marker and re-pin.  

Pros:  Temporary, very easy to adjust, and does not leave a residue. 

Cons:  Temporary, may fall out, and sometimes has to be removed when stitching.


Thread Tacks or Basting 


These temporary stitches may be done by hand or machine.  

Pros:  Much like pinning, thread tacks and basting stitches are temporary and safe for all fabrics.  They leave minimal, if any markings once the stitches are removed, especially when done by hand, and can be seen from both sides of the fabric.  Thread also comes in every color. 

Cons:  Takes time, and will show in seams if not entirely removed.  For instance, if basting with red thread on a white garment, time and care must be taken to remove each piece of visible thread.  


Tailor's Chalk 


Tailor's chalk comes in both squares and triangles, as well as sticks, wheels or even in retractable pencil form.  

Pros:  Time honored tool.  Marks most fabric surfaces, brushes away easily, rarely discolors fabric.  I like to use chalk on wool and silk.  

Cons:  Temporary, and may brush away too easily.  Unless sharped constantly, the lines may be thick and not as accurate.  Chalk breaks easily, and is only available in certain colors.  


Dressmaker's Carbon Paper

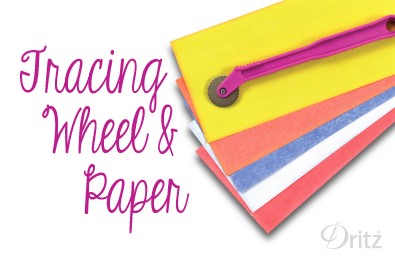
(Image source: Sewing Supplies: Dritz Sew 101)

According to the Dritz company article, "Sewing Supplies: Dritz Sew 101" - 
"These tools are used for transferring pattern markings to fabric. To get started, sandwich the tracing paper between your fabric and pattern. Trace along pattern markings using the tracing wheel and the markings will be transferred to your fabric."

Dressmaker's carbon paper must be used with a tracing wheel.  These pigmented sheets, most often available in white, black, red, yellow or blue, have a waxy surface that leaves a faint, colored line with pressure, as explained in the excerpt above.  

Pros:  Great for transferring markings from paper patterns to fabric.  These are the only tool (besides using a powerful light box) that I can think of that allows the user to simply and accurately trace from on top of a paper pattern.  

Cons:  Tracing wheels may be difficult to use, especially on curves, and may lack the control of pencils or pens.  Enough pressure has to be applied, or the colored, dotted lines will not show.  The waxy residue may not always rub out or wash away.  


Pencils, Ink Pens and Markers 


Pencils, ink pens and markers intended for paper may also be used to mark fabric.  However, these markings, especially from ink pens or markers, are usually permanent, and best for mock ups or for use in places that will not be seen.  

Pros:  Convenience (I am guilty of often reaching for mechanical pencils, which allow for very fine markings, rather than other instruments perhaps more suited for fabric...) and familiarity with handling. 

Cons:  Markings are usually permanent, and markers like sharpies tend to bleed into the fabric.  


Fabric Marking Pencils 


There are pencils and pens made specifically for marking fabric.  These include popular water soluble or disappearing ink options like Mark-B-Gone.  I, personally, like the blue (or white) water soluble pencils. 

Pros:  These handle much like their paper counterparts offering precise lines and dots.  The water soluble pencil markings are removable with a damp cloth.

Cons:  They may leave permanent markings or stain fabrics.  Disappearing ink pens tend to dry out and have to be replaced, while water soluble pencils need to be sharped constantly.  Limited color selection. 


 FriXion Erasable Pens 


Though intended for use on paper, these erasable pens are basically magic!  Okay, maybe not magic, but a product of some pretty cool thermo-technology which allows the ink to disappear with friction (heat).  Use an iron to erase the markings, and your freezer to make the lines reappear.  I love my FriXion pens! 

Pros:  These pens are made in a variety of colors, and write on both paper and fabric.  The ink disappears when ironed over, which makes it perfect for marking complicated designs or corset boning channels! 

Cons:  The ink may not completely disappear, and markings may be visible, even after applying heat.  


Crayola's Ultra-Clean Washable Markers 


Much like the FriXion pen hack, these are another one of my favorite sewing secrets.  Intended for children who often color surfaces other than paper, these washable markers are often more "washable" than the water soluble fabric pens or pencils.  They're also way less expensive.  I believe I paid around two dollars for the pack of ten colors, and the fine tips provide very thin and accurate stitch lines.  

Pros:  Low cost, water soluble option that is often visible from both sides of the fabric.  Can also double as paper makers.  

Cons:  Markings may not always wash away, and could bleed or discolor the fabric. 


And that concludes this list of fabric marking tool options!  Whenever using a marking instrument, it is always recommended important to test it on a scrap, before applying it to the final fabric.  

Do you have a favorite fabric marking tool or tip?  Share it below! 

January 13, 2018

Poinsettia Skirt

Today's the last day of winter break, and I thought it fitting to share the one and only project I managed to complete over the holidays...a poinsettia skirt with a vintage vibe:

Poinsettia skirt paired with
a vintage cardigan, fur collar and velvet hat.

I know, it's not much, but it's done and has been worn three times - to dinner, at contra dance and to visit a friend!  I would have loved to share some other exciting projects, but sometimes life has other plans...family comes first.  Plus, there are always other opportunities to sew.  I have big plans for you, 2018!  


For this project, all of the materials came from the stash.  The novelty fabric has large poinsettias with tiny green houses, snow-covered evergreens and a split rail fence.  The combination, for some reason, reminded me of the classic holiday film, White Christmas (1954) - snow, snow, snow!  Even the zipper, which is vintage, probably from another garment as thread remains indicated, interfacing, thread and metal skirt closure were pulled from the stash.  Oh, and the project was stitched on my 1940s Singer featherweight machine.  


The construction could not have been simpler or more straight-forward.  I ripped three panels for volume, seamed and hemmed them.  Then, gathered the skirt onto the waistband, which was stiffened with interfacing.  


I installed the zipper with a lapped seam, then hand whip stitched the inside of the waistband closed.  Lastly, I found a metal skirt closure to finish off the project.

Lapped zipper, outside.
Just imagine that the skirt is closed,
it's slightly too small for the dressform.

Lapped zipper, inside.


Completed Project Shots

The completed skirt, front and back.


Again, I've already worn the skirt for three occasions, and it's definitely well suited for twirling!  Though, I suppose it's time to pack it away until next Christmas...perhaps I'll be able to convince the sister to take a few pictures then.  In the meantime, there are plenty of other projects to work on.  So, thanks for reading, and I hope you'll stop back for more sewing!   

January 9, 2018

Year in Review: Goodbye 2017, Hello 2018!

It's that time again!  Time to look back and reflect upon the past year's accomplishments, and forward to another twelve months of sewing and blogging.


While I may not have been able to post as frequently as I would have liked, it's certainly a pleasure to look back at all that did happen.  Between work at the museum and college classes, sewing projects, travels and other adventures...2017 was quite the year.  So, without further ado, let's start this year in review!


January - I began the year with a new shift, corset and sleeve puffs to go under an 1830s sky blue ball gown.


February - The big project this month was a new cap, half robe and caramel petticoat.


March - Spent a long weekend thanks to several snow days making a new, 1860s sacque coat with a quilted lining.  Also completed an 18th century bum pad and red petticoat, which was the beginnings of a cosplay costume...


April - Made a splash with a first attempt at trashion (trash + fashion), combining water pollution with early-19th century stays.


April also brought the trip of a lifetime with my friend, Kaela!  We went to Williamsburg (life dream come true!), Jamestown and Pittsburgh...met Samantha of The Couture Courtesan blog fame, who is every bit as personable as she is talented...Janea Whitacre(!) and Fiona of Ruffles Not Rifles in the Margaret Hunter Millinery Shop.  Spent time with our good friends - Matt and Megan, Elyse, Elizabeth and her family, and some former Point Park classmates...I still have trouble believing that it all happened!!


To top it all off, I became a member of the Association for Living History, Farm and Agricultural Museums (ALHFAM) and the Costume Society of America (CSA).


May - May always means the start of a new museum season!  I returned to my home away from home, the Genesee Country Village & Museum, for a fourth season with a new position as the Interpretation Office Assistant.  Though never fear, Hosmer Dinners and shenanigans with friends and fellow interpreters resumed as usual...

Not much sewing happened this month, but I did become both basic life support/first aid and food safety certified.  Oh, and I completed a lengthy, final art project of 50+ sketchbook pieces:


And, I graduated with an Associates Degree in Liberal Arts!  Certificates and medallions were awarded for cumulative 4.0s.  Here's to the class of 2017, we did it!

(Photograph via: Monroe Community College)


June - Hands down, the 2017 ALHFAM conference was the highlight of the month!  I met soo many new people...great to see some familiar faces too - Elyse, Matt and Megan, and Justin all came up.


June also brought one of my favorite village events, the War of 1812/Jane Austen weekend.  I finished my short stays just in time, and helped my good friend, Rhonda, the dressmaker, set up a really neat mourning display in her dress shop.


I believe that I finished the DNA dress and over-hoop petticoat this month...as well as this beribboned, frilly cap:


July - Fashion Fun Camp, year two, happened, and, like the first time, there is just nothing better than sharing the passion with the next generation!  (Or getting to play dress up every day ;)


Speaking of passions, thanks to Deanna and others at the museum, I had the opportunity to write about another passion - the Chinese soldiers of the American Civil War.  The article was published on the Genesee Country Village & Museum Blog, here: That These Dead Shall Not Have Died in Vain.

Corporal Joseph Pierce
(Photograph via: Public domain, Wikimedia Commons)


August - This month brought the honor of making the wedding veil for Allison and Stephen's wedding:


As well as two, other, fun projects...the online CoBloWriMo, which is 100 bloggers strong on Facebook.  And the other, well, it's still a secret, but here's a hint:

A secret project!
(Photograph courtesy of Ruby Foote,
GCV&M photographer)

My family and I finished the summer with a trip down to Memphis.  In our sightseeing, we explored several museums as well as Millionaire’s Row - definitely recommended!


September - Blogging sort of disappeared this month, but for good reason...I started school again at Kent State University!


With seven classes, there wasn't much time for personal sewing :(  But, I did complete a muslin skirt for "Basic Costume Construction" -


October - Sarah (A new friend?  Technically we already met once in person at the village, and online, but now it's official haha!) and I explored Hale Farms on a much-needed 1860s adventure.  Ginny (our blog's traveling doll) received a new dress for the occasion:


As for school projects, I finished an Edwardian picture hat for the historical millinery class:


November - Lots of traveling this month, including making it to GCV&M's 4th annual Domestic Symposium and the "Undressed" exhibit at The Frick!  Class projects included finishing a pair of plaid pajamas and a 19-teens wool felt hat with an upturned brim.


December - Traveling seems to be the reoccurring theme this year...after the semester concluded, I spent some time with a dear friend, Lauren, in Pittsburgh before heading home.  Not before handing in several end of semester projects including a striped top, floral skort, "period bodice," and sampler of millinery trimmings:


The last sewing project for the year was a vintage style Christmas skirt, perfect for ringing in the New Year with family in Tennessee.  (Just for fun, we tallied our travels...in total, it was an 10 state year for me - NY, PA, OH, WV, MD, VA, NC, GA, TN & AR - yippee!)


And that concludes the 2017 year in review!  Shout out to you for making it all the way to the end ;)  I'd like to thank everyone, most dearly and sincerely, for reading and encouraging my sewing adventures.  Each and every "like," comment and follow here (and on Facebook) has meant so much to me – your continued support keeps me sewing!  May your needle always be sharp, and your fabric stash overflowing!

Cheers 2018, and may we make every minute count!

We ❤︎ Our Patrons

Like what you see here, and want to support future blogging and educational programming? Consider becoming a Patron - click on the button below to unlock exclusive contents, bonus blog posts, and more! Every contribution makes a big difference, thank you!