March 1, 2023

Making an 1880s Plaid Ensemble: Skirt & Draperies

This is the year we're finally making the plaid 1880s bustle dress!  In 2022, I finished the underpinnings for the project - including a lobster tail bustle, underpetticoat, and flounced petticoat - and today I'm sharing the completed skirt and draperies of what will be a three-piece, c.1883-86 plaid ensemble.  

As my lovely patrons already know, I have a deadline of an upcoming "Getting Dressed in the 1880s" presentation in April for the Niagara County Federation of Historical Agencies!  My session is bright and early at 9am to kick off the annual convention, which means I'll be waking up at 5am on a Saturday to travel there...I'll need to work diligently through March to pattern and produce both a bodice and hat for the ensemble, so you can expect at least two more, future blog posts on the ensemble.  

But for now, let's take a look at the making of the skirt and draperies - inspiration for the design, details of the construction, and completed project pictures.  

Historical Inspiration

Years ago, I bought 10 yards of the this navy blue, rust, and white woven cotton.  I knew I wanted to make a bustle dress era with it, but I can't say that I had a specific design in mind then, or really even now as I'm making it.  I just sort of let the fabric guide me into what it wants to be.  

There are certainly plenty of extant examples of plaid dresses from the 1880s, made in silks, cottons, and wools.  I liked the contrast of the pleated self-trim from this wine on white plaid, printed cotton day dress:

3-piece, printed cotton day dress, c. 1880s:
including a cuirass bodice, over, and under skirts.
Augusta Actions, Lot: 1038

I was also drawn to the bold, bias-cut trim on this long-time favorite portrait of a young Black woman in a plaid ensemble:  she's so pretty and poised, looking directly towards us.  I wish I knew who she was, and more of her story. 

Portrait of a young woman, c.1880s.
Source: Fabric and Color Journal 

Finally, here's a plaid walking dress from an 1887 French fashion plate:  I intended to have both the skirt and draperies match in the plaid, and am considering a solid, navy blue wool bodice with contrasting plaid panel at the center front.  My other design flips the fabrics, with the plaid as the main fabric, and contrasting panel in navy blue velvet with a matching collar and cuffs.  I could always make both...🤔  But for now, a single bodice will do, as we're on a deadline!

Walking dress, French fashion plate, c.1887.

Construction Details

As with most new projects (and since the 1880s are an unfamiliar era for me), I began with a mock-up for the skirt.  I started with Truly Victorian's 1885 Four-Gore Underskirt pattern (TV261), and added a casing and drawstring to help keep the skirts over the bustle in the back.  I used a cotton bedsheet for the mock-up: 

Mock-up for 1880s skirt, based on TV261 pattern.

Mock-up for 1880s skirt: test for casing with twill tape ties to hold the skirt in place over a bustle.
Interior view on the left, exterior or outside view on the right with directional pleats.

Pleased with the look, I cut the skirt panels from the plaid fashion fabric, and assembled the skirt.  I finished the hem with a cotton muslin facing (instead of lining the skirt), and pleated the skirt onto a band with a metal closure.  I thought the skirt looked a little limp, so I made a small cotton pad after the dimensions in Costume in Detail by Nancy Bradfield, page 253: 

On the left, skirt before adding a small bustle pad. 
On the right, a much-improved silhouette with a little padding!

Small cotton pad measures 7" long, and ties under the pleats at the back with cotton tapes. 

With the base done, it was time to trim the skirt!  I played around with different designs, thinking first of deep rows of ruffles or pleats, and then settled on box-pleated bias bands.  After cutting, seaming, and pressing all the bias strips together, I eyeballed and pinned wide box pleats, making enough for the skirt hem, and for trimming the draperies too:

To make the trim, I cut and stitched bands of bias together.
I turned and pressed the top and bottom edges inwards by a half-inch each.
Then, I eyeballed and pinned wide box pleats along the strips.

Pinning a row of pleated trim all around the skirt, I top-stitched them around the hem at the top and bottom edges to secure the individual box pleats and mount the trim.

Pinning the box-pleated trim in place.

Here's what the newly-trimmed skirt looked like when finished:

Finished skirt with a box-pleated, bias band of trim: front and side views.

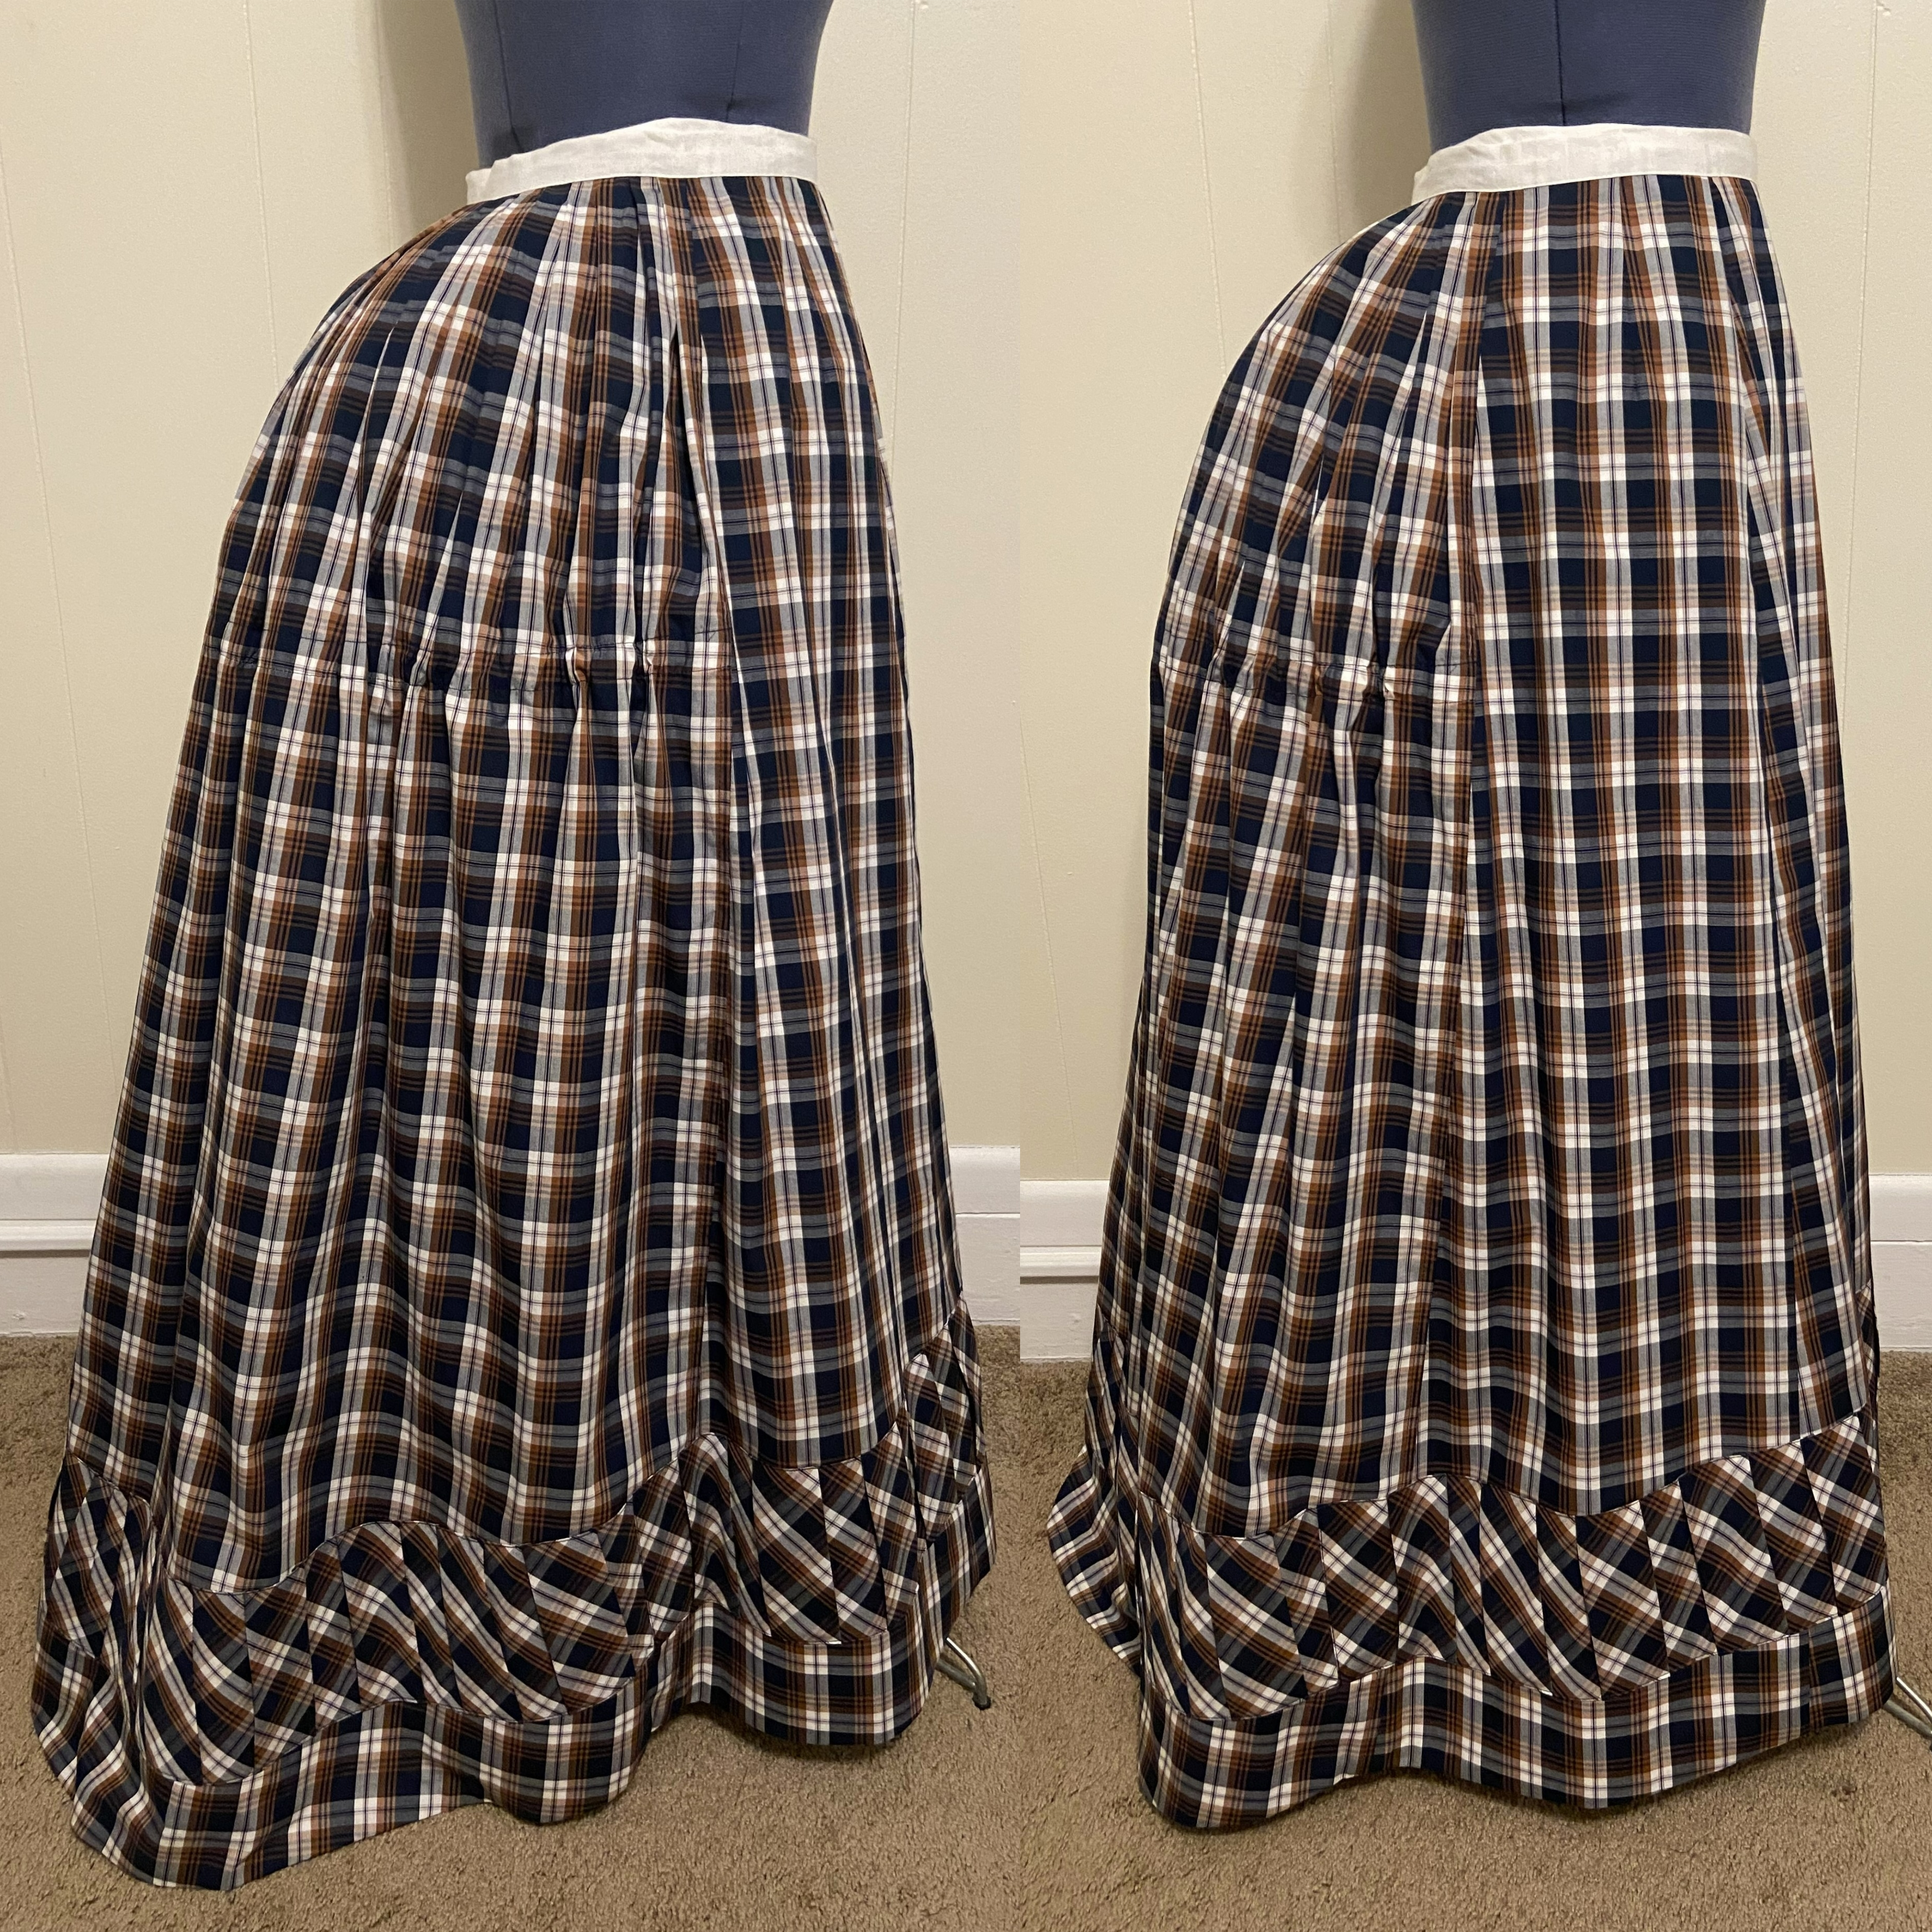
Additional side and side-back views of the finished skirt.

With the skirt finished, I moved onto the draperies.  For these, I traced the pieces from Truly Victorian's 1886 Asymmetrical Drapery Add-on pattern (TV382).  According to the pattern directions, this add-on is made one with the skirt; but mine is meant to be a separate piece and pleated onto its own waistband.  This way, I can mix-and-match the pieces, if I do end up making a navy-blue wool or solid silk underskirt.

Drapery in progress...a look at the finished front.
The front and back draperies were trimmed and pleated separately, 
before being joined at the sides and attached to a waistband.

I lined both the front and back draperies with cotton lawn to give them more body.  I applied the same box-pleated bias trim to the long sides, playing with the direction of the plaids. 

Inside view of the front drapery, showing cotton lawn lining.
Both the front and back draperies were finished with 1" hems,
and trimmed with the matching box-pleated bias bands.

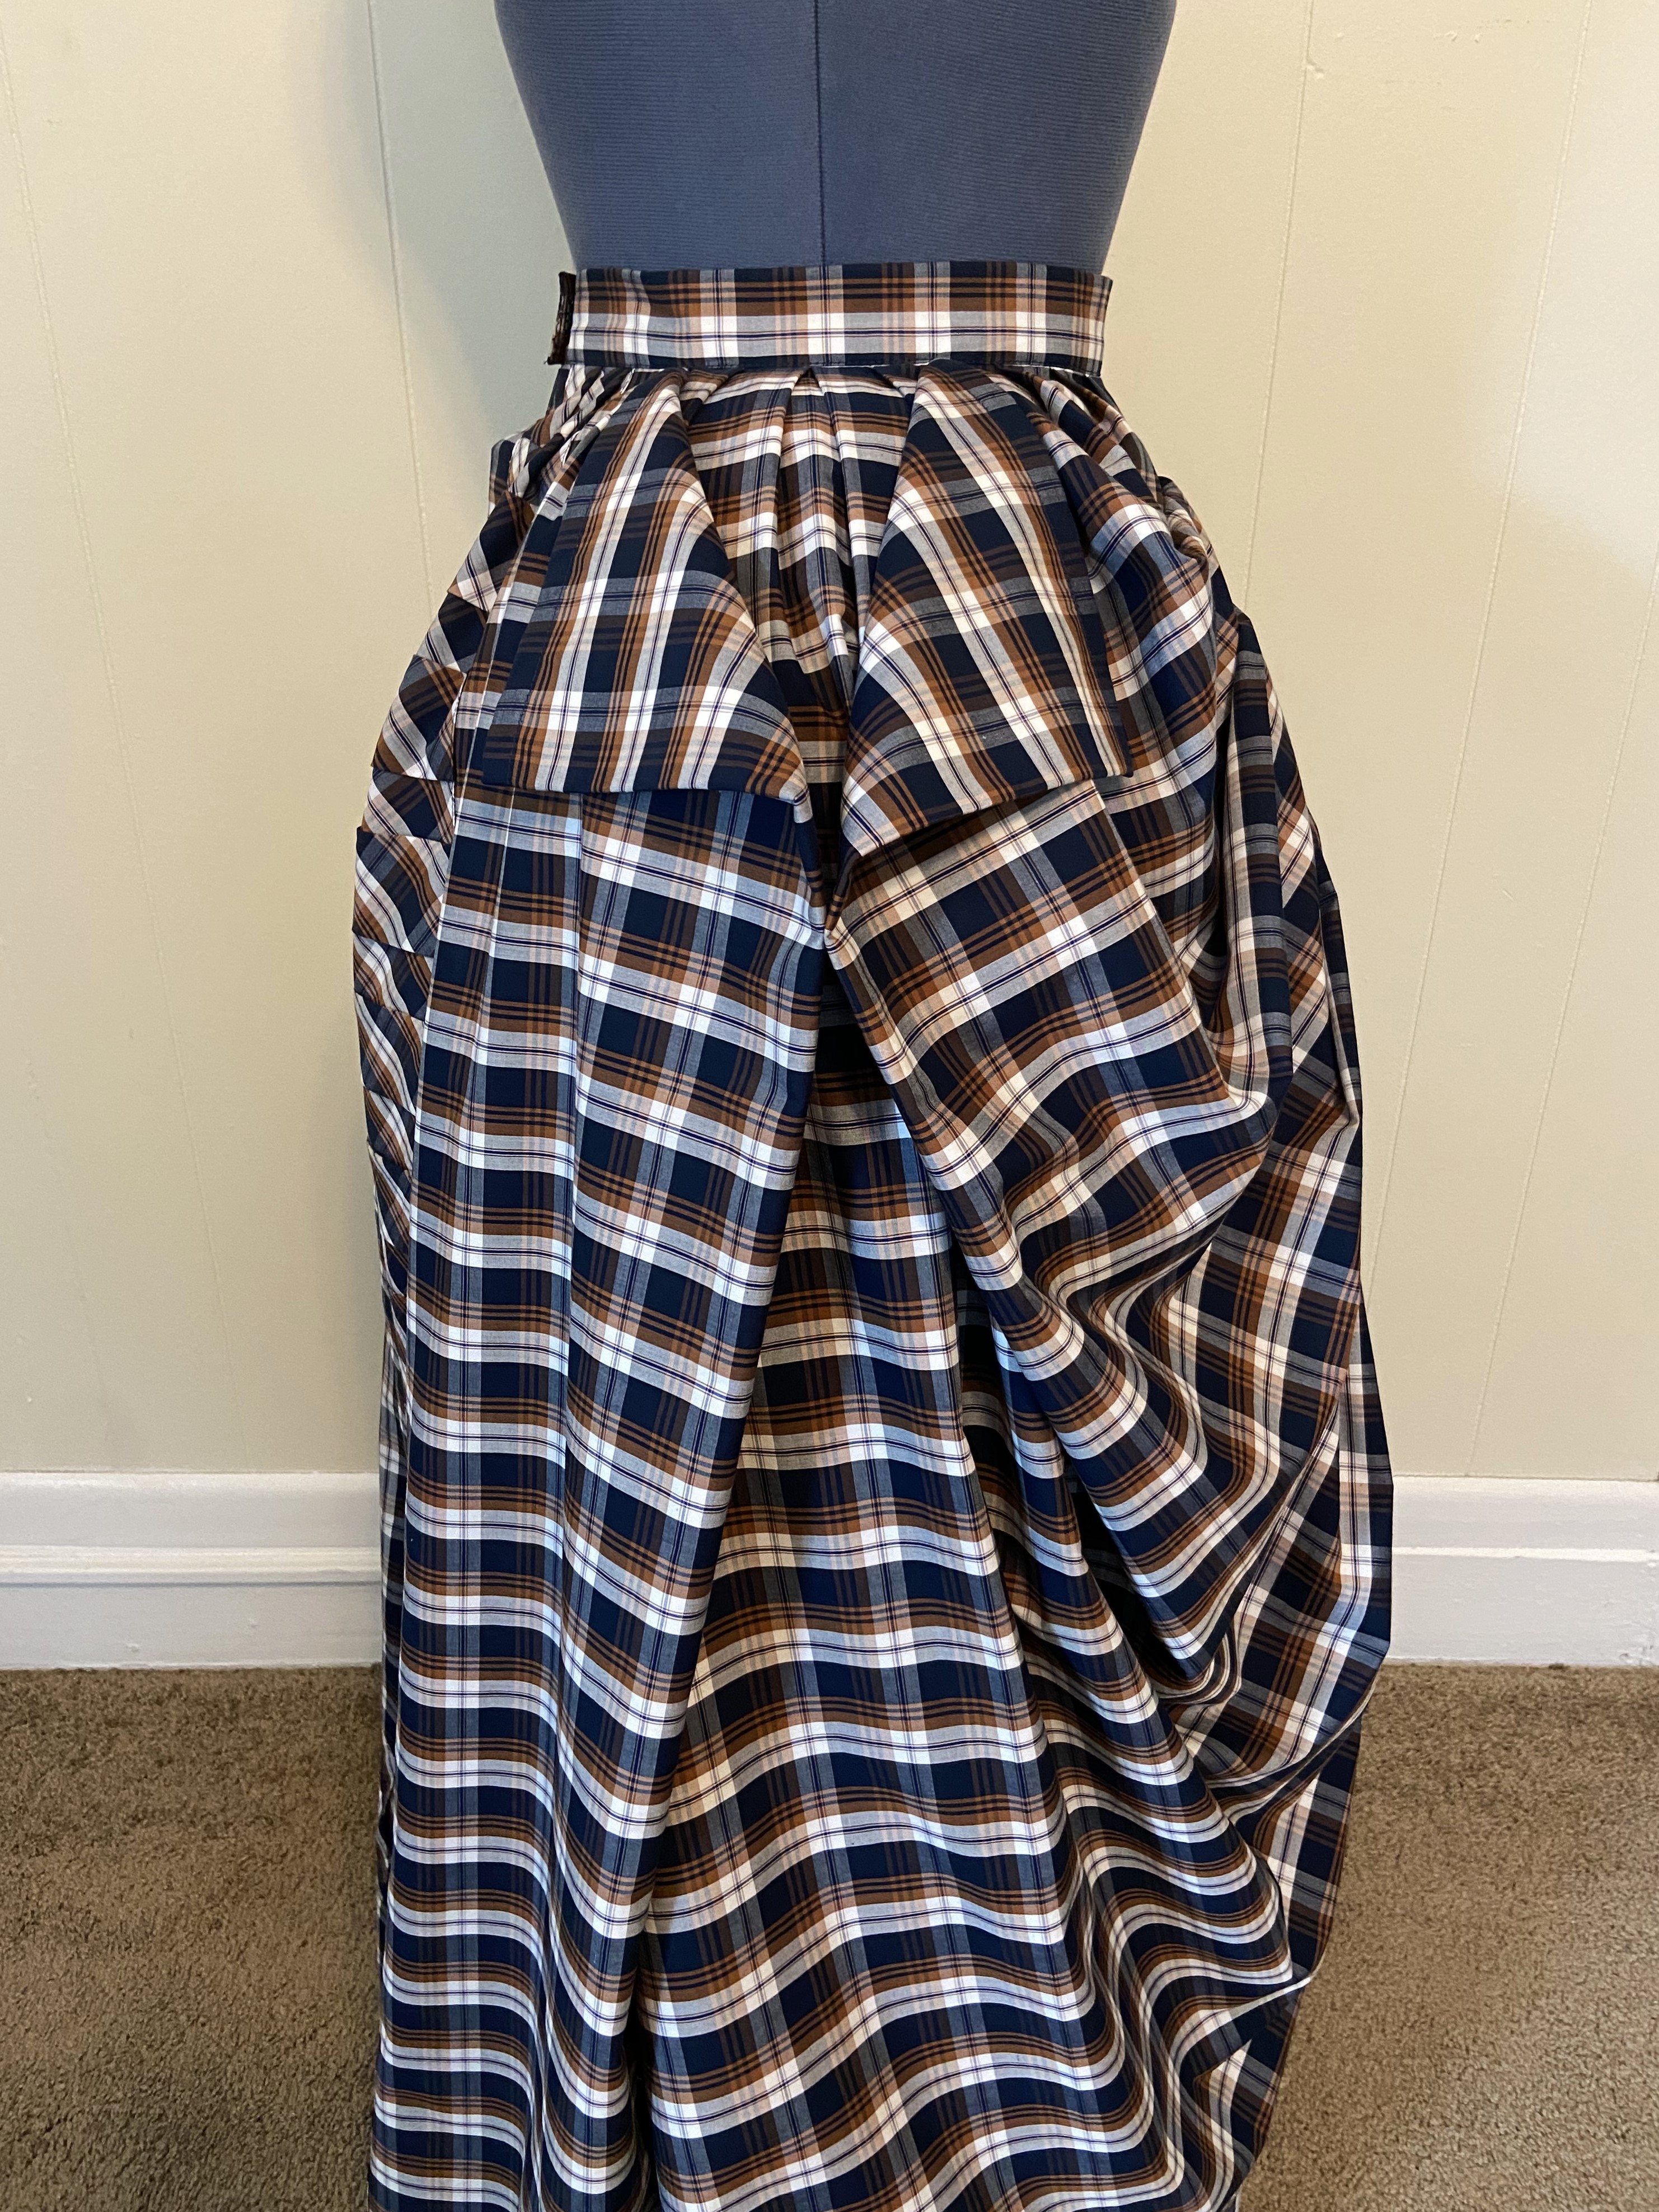
After both the front and back draperies were trimmed and pleated, I attached them together at the left side.  I mounted them on a waistband - this time made of the fashion fabric with lining - matching the pleats to the front, sides, and back of the skirt.  The waistband overlaps at the right, and fastens with a metal skirt hook and bar.  With that, both the skirt and draperies were complete! 

Completed Project Pictures 

Finished skirt and draperies for my c.1883-86 plaid ensemble: 

Font view of c.1883-86 plaid skirt & draperies.


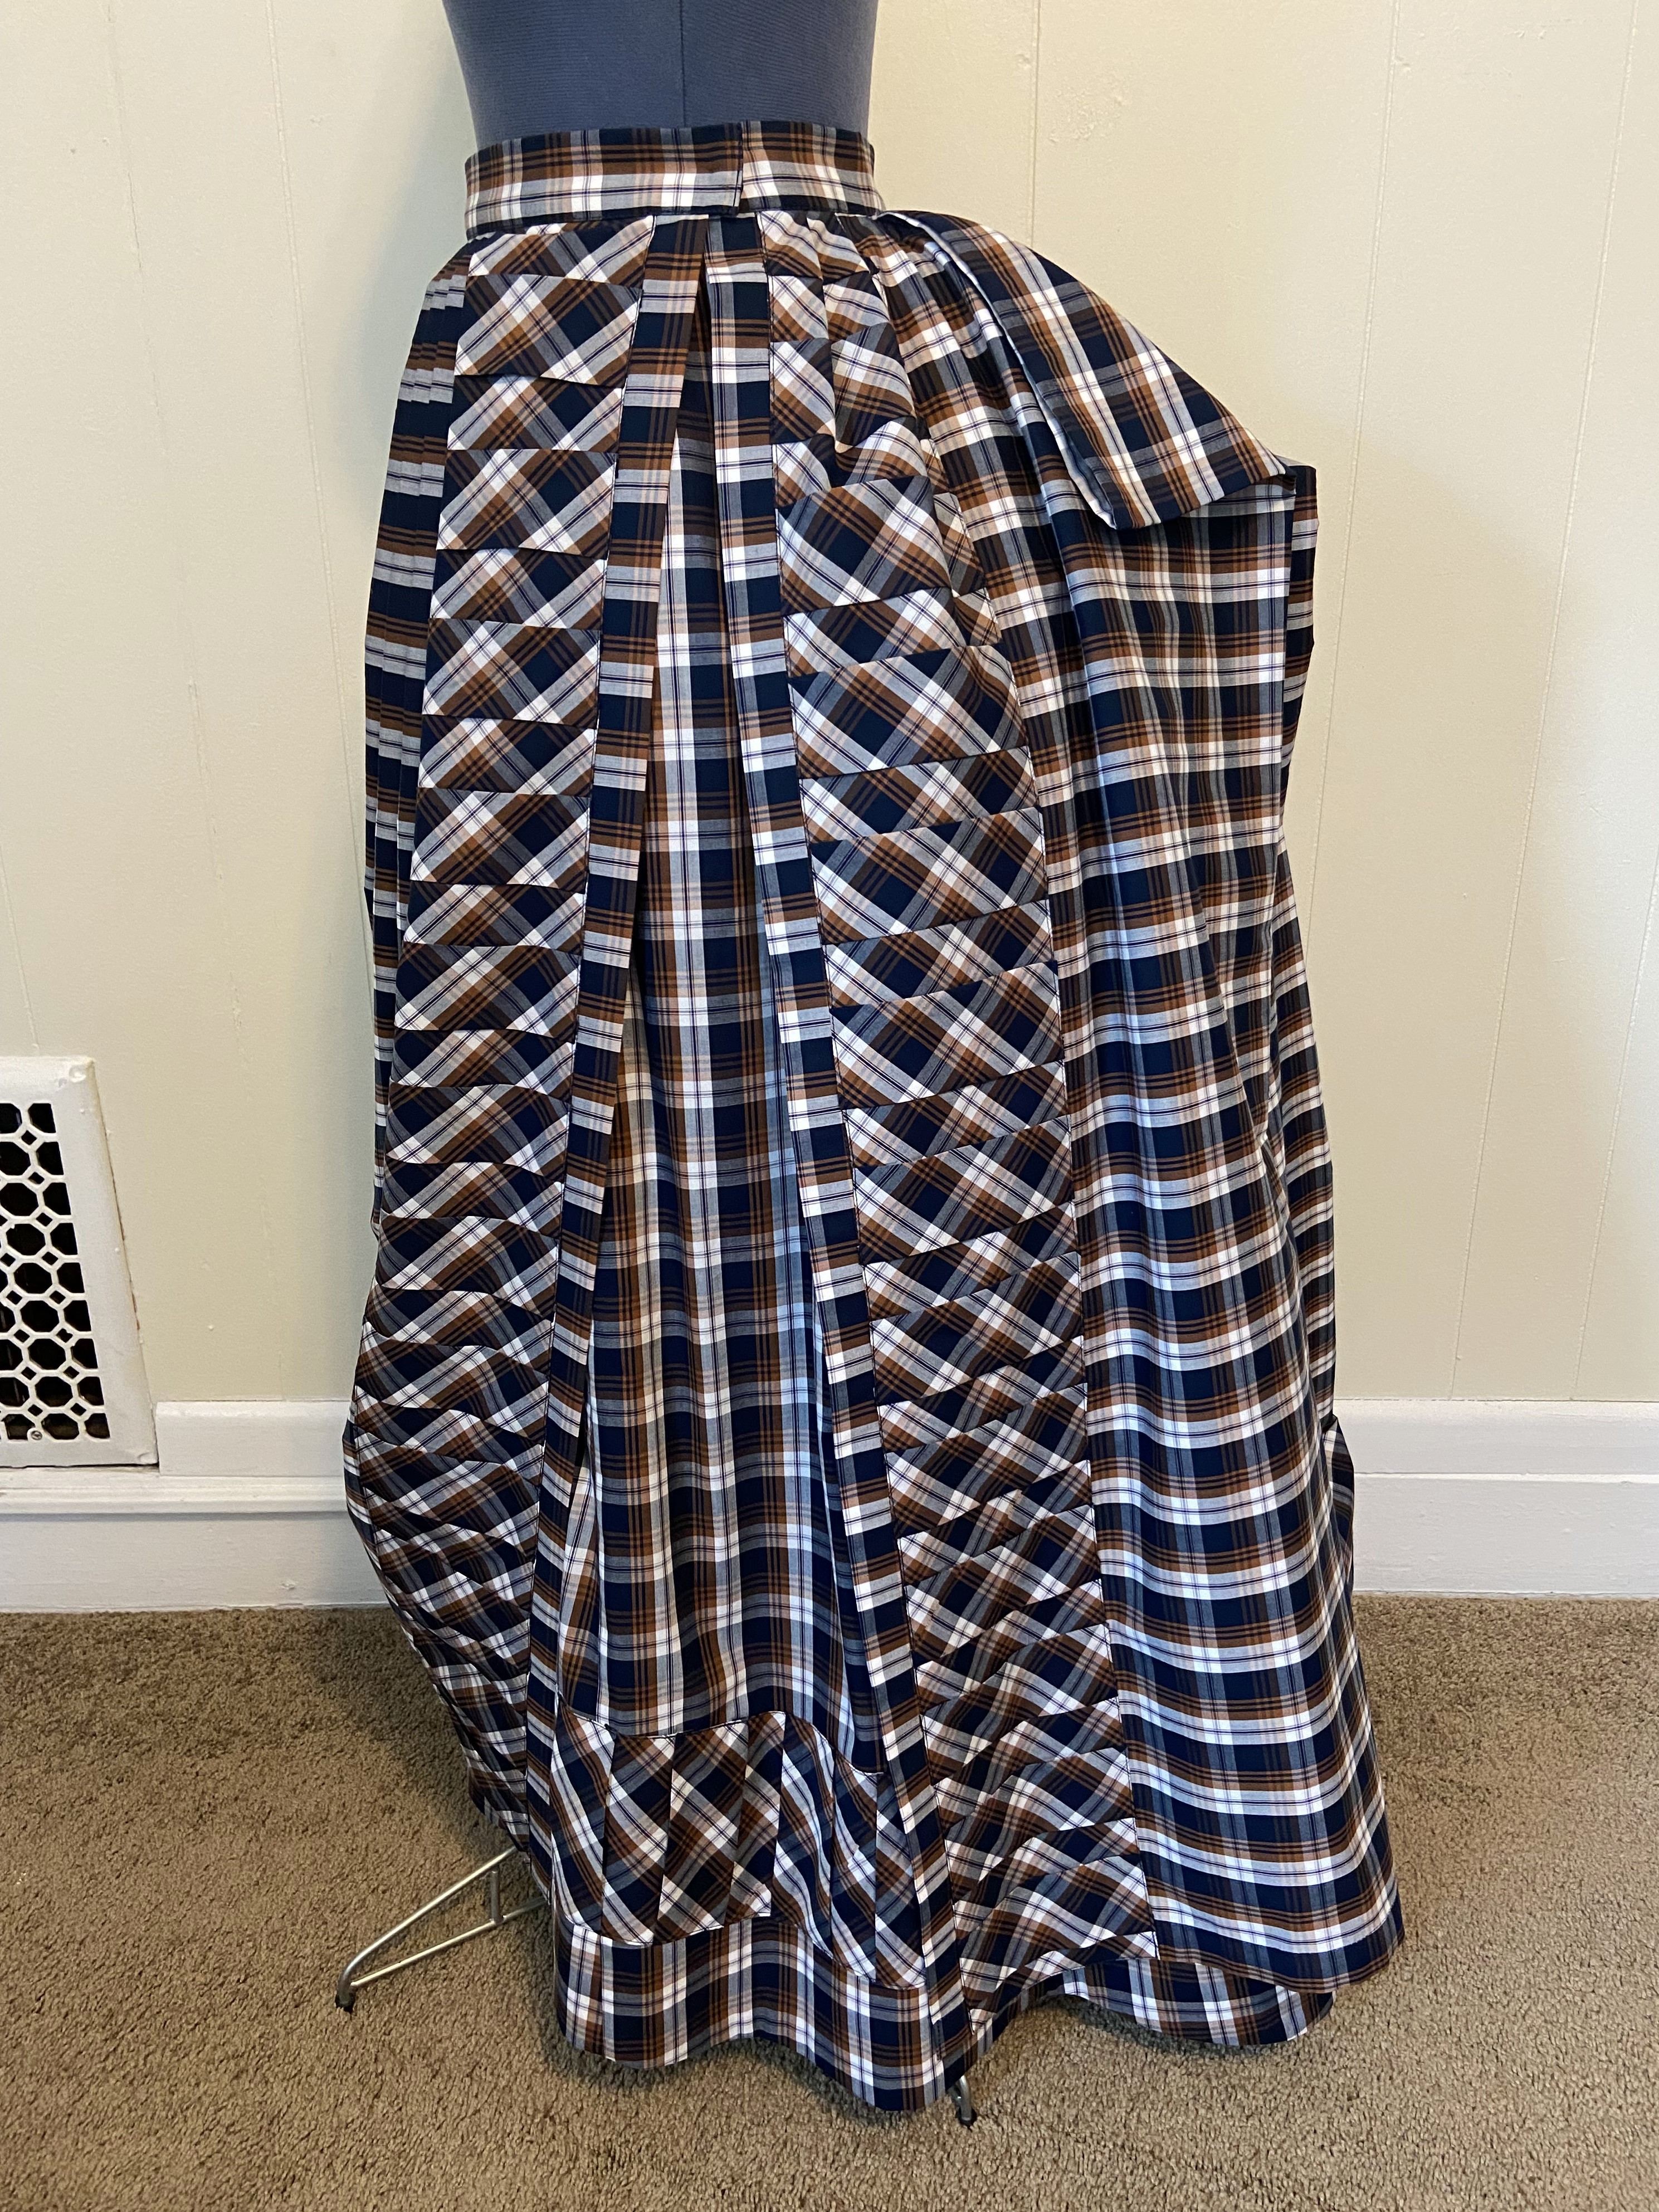
My favorite side view - just look at all of those pleats!


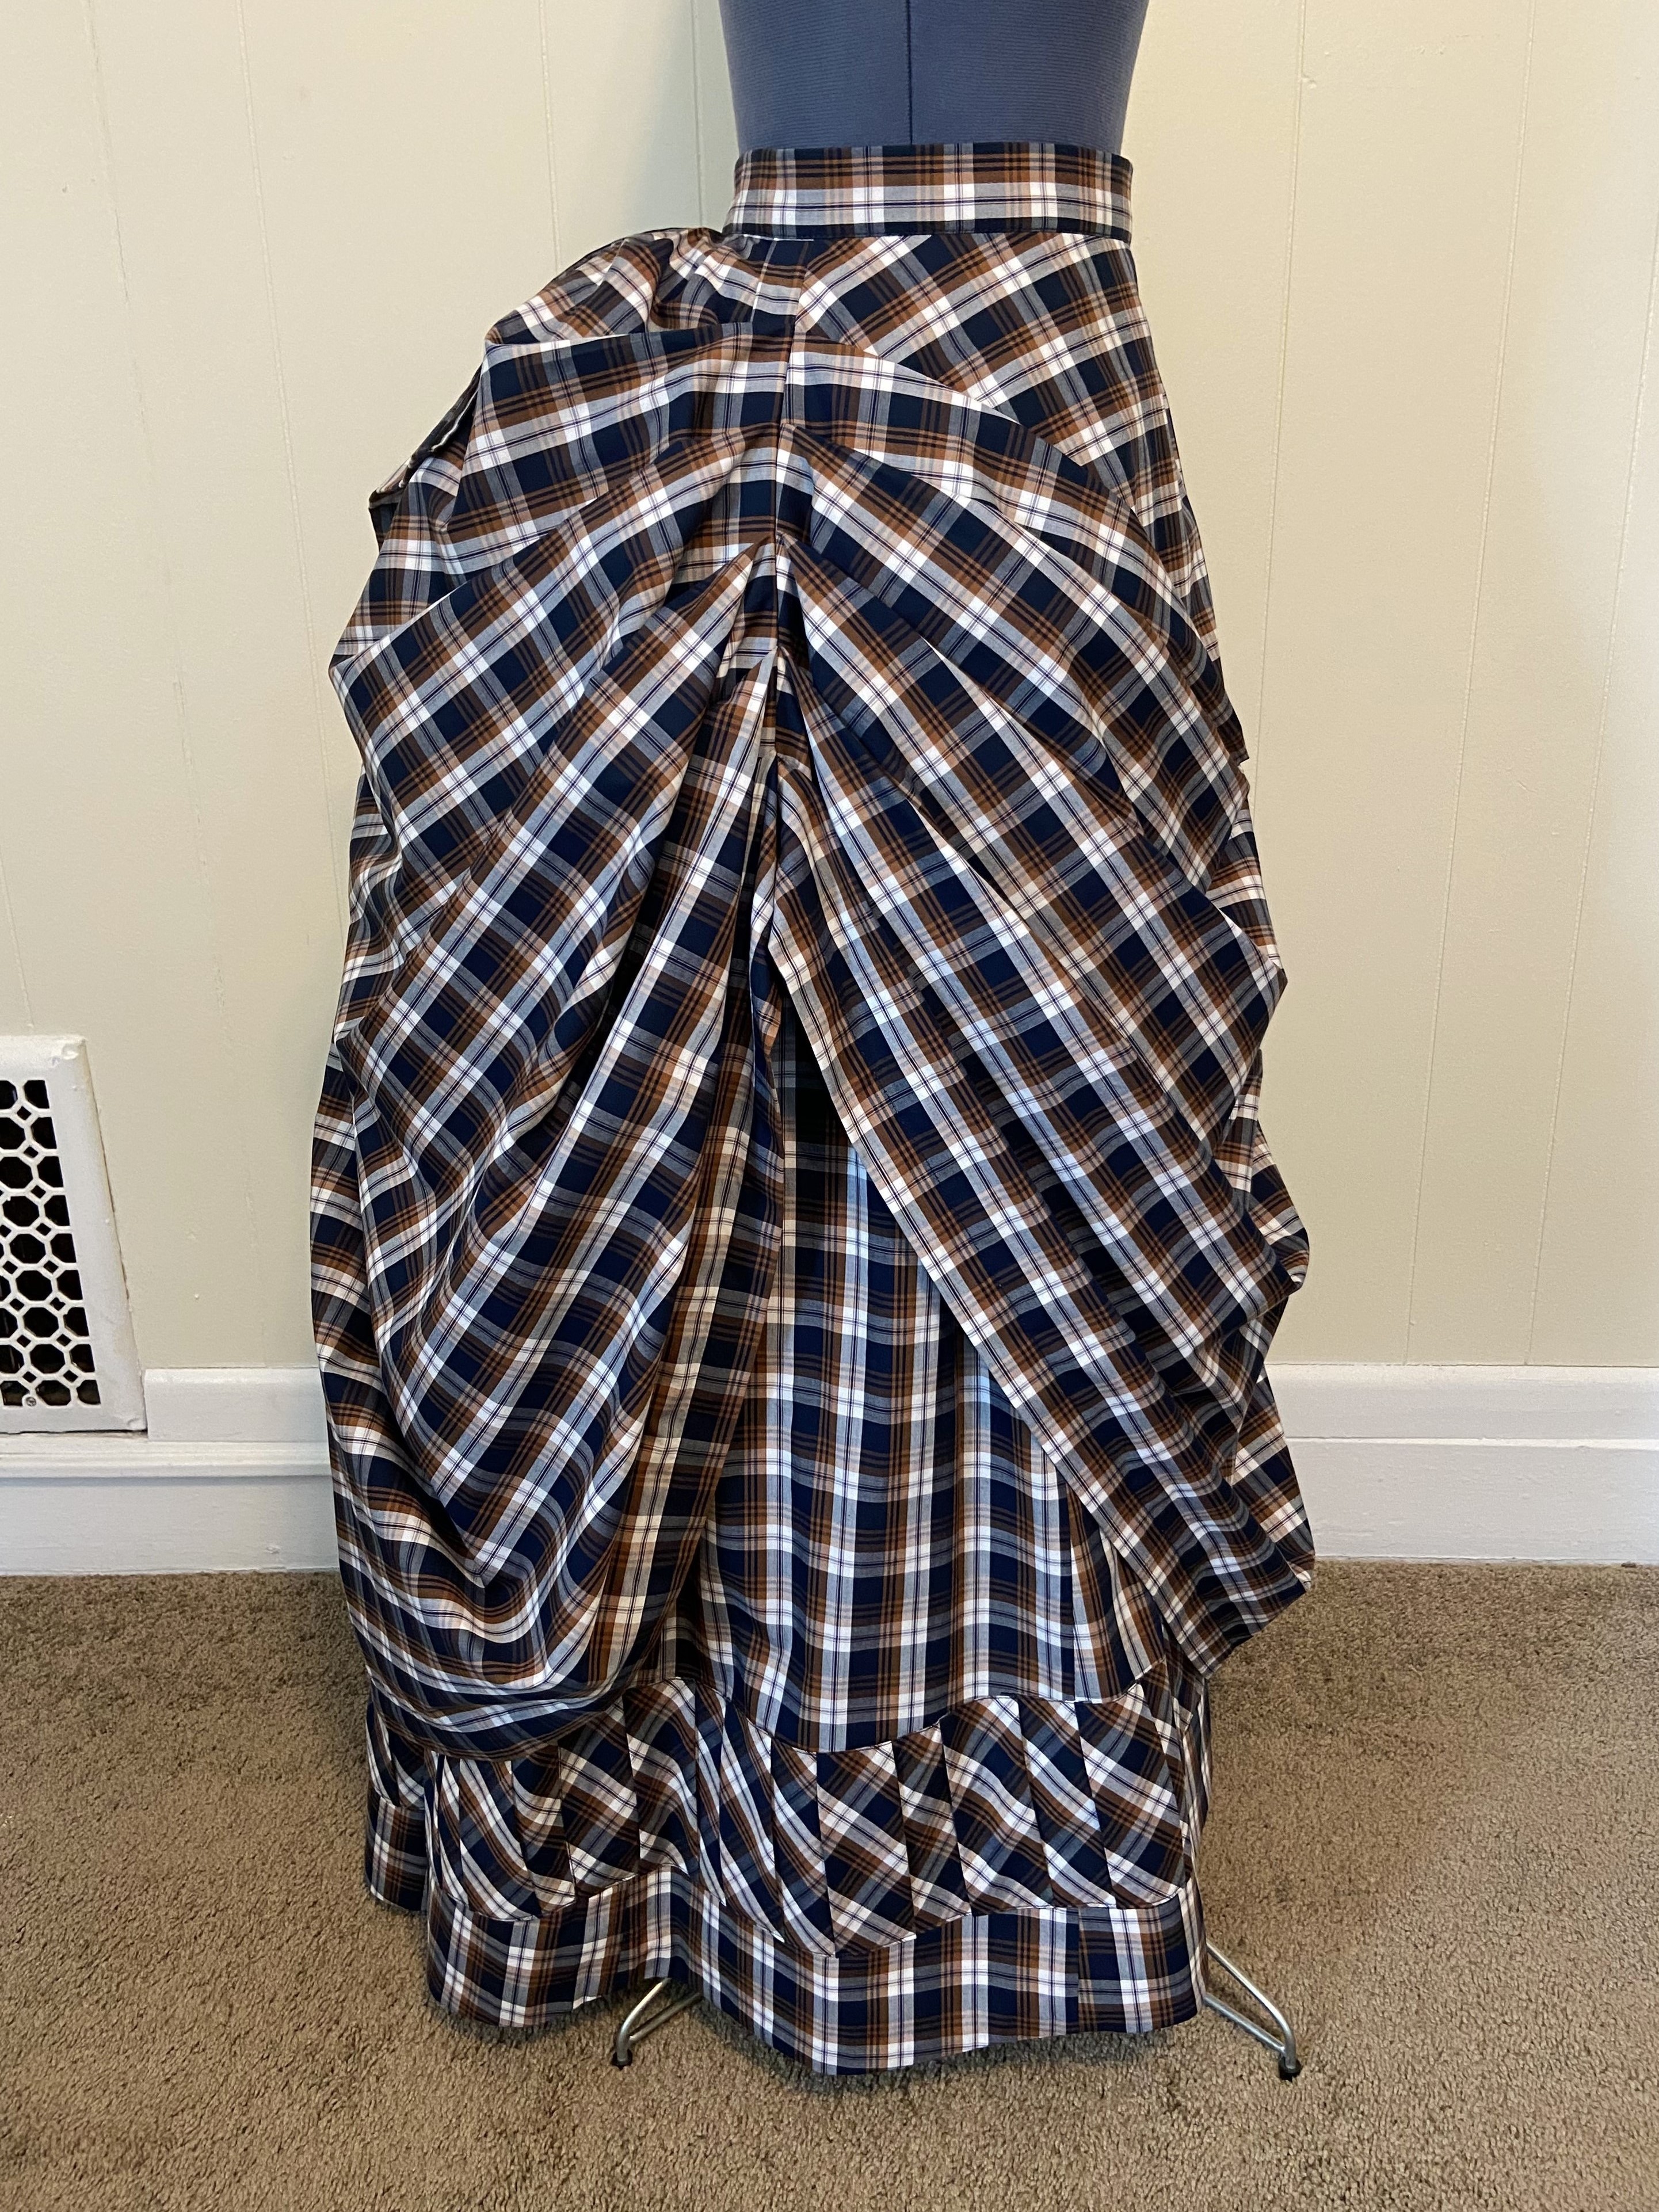
Back view of the c.1883-86 plaid skirt & draperies.

Detail shot of the burnous pleats, which are large folds of fabric left free from the waistband
and hang down in a cascading loop.

Wish me luck as I tackle a bodice and tall hat next!


Like what you see here and want to support the creation of future content and fashion history programming?  Consider joining us over on Patreon with pledges starting at $2/month, and you'll also unlock exclusive content like bonus blog posts and more!  Follow @youngsewphisticate on Facebook & Instagram for regular updates.

Thank you for reading & special thanks to our generous patrons!

February 6, 2023

Making an 1820s Corded Petticoat

My first completed - and now blogged about - sewing project of 2023 is an 1820s corded petticoat! 


If you've been following along over on the Facebook page and Instagram @youngsewphisticate, you'll know that I've been working on a few projects simultaneously, including a plaid 1880s ensemble and the beginnings of an early-1820s wardrobe.  Both projects are for "getting dressed" programs later this year (the details of which are still secrets!) - and while it seems silly (overwhelming perhaps?) to take on two new eras, I need the challenge to keep pushing my sewing skills.  Especially post-college, and now that I'm no longer wearing historical clothing as part of my daily job...

Anyways, the project I'll be featuring in this post is my newly completed 1820s petticoat.  I wanted something to bridge the gap in my wardrobe between my rather columnar, 1810s bodiced petticoat and 1830s petticoats - both corded and tucked - which sit a the natural waistline.  Enter the perfect combination of the two - a high-waisted bodiced petticoat with a corded hem and full flounce!


Historical Inspiration

When looking at examples of 1820s petticoats, (yes, I made a whole pinterest board), the one that kept popping up in searches is the c.1828-1835 bodiced petticoat from the Manchester City Galleries.  Quinn of the Quintessential Clothes Pen blog, made her own c.1822-1824 version after the Manchester original, and you can read about her sewing project, here: Project Journal: 1822-1824 Ensemble Part II: Initial Petticoat Detail

A couple of other inspirational examples include this petticoat, unfortunately without a source other than the watermark:  I knew I wanted a flounce at the hem of my petticoat to give it more body and volume, without having to wear a second petticoat.  This example also has gentle pleats at the front, which would presumably be more concentrated at the back, and two flounces with whitework trimming.  

Petticoat, c.1820-1825
(Image source: Pinterest)

I also took lead on the corded hem from this example from the Victoria & Albert Museum, which has two blocks of cording, and six rows in each section.  There appears to be a deep tuck right at or above knee-level - and I mimicked this, as you'll read later, with a French seam to add much-needed length to my skirt.  Also, according to the entry, the original petticoat's hem circumference measures 220cm. (which is 86.6 in.), and my reproduction ended up being just under 90" too.  

Petticoat, c.1820-1829 
Victoria & Albert Museum, (accession number: T.194-1929)


Construction Details

Now for the making of my own 1820s petticoat!  I like to start with the skirt portion, because it's usually all rectangles.  In my mind, skirts are the easier, but more tedious, part of construction - giving me the mojo to tackle the more difficult and fiddly bodice.  When both parts are done, all that's left to do is join the top and bottom, add closures, and then you're finished!  But, I'm getting ahead of myself here...

For this petticoat, I started at the hem and worked my way up.  I flat-felled two lengths of cotton muslin to create a ~90" tube, and folded it in half.  To cord the hem, I sandwiched rows of sugar-n-cream crochet yarn between the two layers, and stitched, and stitched, and stitched, in a continuous circle until I felt like I had enough rows.  Then, I skipped an inch, and made another, smaller section of cording.  

Once the two sections were corded to my liking, I folded the inner edge by a 1/2" and topstitched to enclose the raw edge: 

Finishing the edge of the corded panel.

The finished hem with two blocks of continuous cording!
Cording provides volume at the hem of the skirt,
 and keeps all the layers from tangling around the wearer's legs.  

Next, I worked on the flounce.  By mounting a deep flounce over the corded panel, I'm smoothing the line of cording, and creating more volume at hem without having to wear a second petticoat.  The 1820s was a transitional fashion period between the columnar silhouette of the previous decade, and the bell-shaped skirts of the 1830s.  

My flounce ended up being a little wider than I initially planned, but I didn't want to cut the gorgeous, scalloped whitework trim that I found!  So, instead of 1.5x, I went with 2x the width of the hem.  After sewing enough lengths of muslin together, I finished the hem by turning it a 1/4" twice.  Then, very carefully, I edgestitched the lace, which had a machine overcasting, so I didn't have to worry about fraying.  I divided the ruffle into four sections, and evenly gathered it around:

Gathering the flounce to the petticoat hem.

Once the gathers were pinned in place, I went ahead and stitched at a 1/2" from the top.  To cover the raw edges, I pressed a 1" band of self-fabric bias, and topstitched to neatly encase the seam allowances.  At this point, the hem needed a good pressing too.    

Flounce with scalloped whitework trim mounted above the corded panel.
A 1" band of bias neatly covers the top of the flounce.

To finish the skirt, I needed to add length to the corded panel.  I cut and flat-felled another ~90" tube, and attached the pieces with a 1" French seam to mimic a tuck, and to match the length of the bias band.  The corded panel with the flounce is quite heavy, so the double fold of the French seam also made for a stronger seam. 

Flounce all attached!

Same view as the image above, but from the inside. 
Notice the corded panel, rows of stitching where the bias band is attached,
and French seam joining the upper portion of the skirt.
The scalloped trim is set 1" lower than the corded hem.  

I did balance the skirt so that the front and sides are 1" shorter than the back, but at this point, the skirt was finished and set aside to work on the bodice: 

Finished skirt, outside.

Finished skirt, inside. 

Moving along to the bodice...since I spent so much time on finishings for the skirt, I thought it only appropriate to make sure the interiors of the bodice were just as tidy.  I did actually do the bodice twice over - this first time, I used a thin cotton batiste, thinking I would cut down on the bulk of the bodice (since I line all of my dresses).  However, I was afraid the weight of the skirt might stretch or tear the finer cotton - so I made a second bodice out of the same cotton muslin I used for the skirt and flounce.  

I didn't take any pictures the first time, so during the redo, I made sure to document the sewing trick I used for lining the bodice, which is called the "burrito method!"  It's kind of tricky to explain with words, but I promise it's much easier in practice, as long as you tuck and roll the fabric the right way.  If you're a visual person, I made a 30-second TikTok tutorial on how to line a bodice using the “burrito method”.  (If this is your first time, I also recommend this step-by-step, illustrated guide with an accompanying YouTube tutorial by Melly Sews on How to Sew a Lined Bodice - the "Burrito Method"). 

To further explain, the "burrito method" is a similar idea to bag-lining, except that armholes get in the way...first, you'll prep the fronts and backs separately.  For me, this meant sewing the curved seams on the fashion fabric and linings, clipping, and pressing over a tailor's ham.  Then, I joined the front and backs at the shoulders, and stitched along the entire neckline.  Optional, but to help the lining roll to the inside, I understitch the neckline (and seam allowances) as well.  Clip curves and carefully press over a tailor's ham. 

Step one: join fronts and backs at the shoulders; sew around the neckline.
Understitch to keep the lining in place, clip curves, and press over a tailor's ham. 

Now for the burrito part - tightly roll one side into the shoulder strap of the other.  Pin along the armscye (armhole), seam, and clip curves. 

Step two: roll one side into the shoulder strap of the other, and stitch the armscye (armhole).

Turn right sides out, and press well.  In the picture below, the right side and shoulder strap are neatly finished, while the outer edge on the left still needs to be sewn: 

Step three: turn right sides out and press shoulder strap and armscye.

Repeat the burrito on the other side, tucking and rolling the finished side into the other shoulder strap.  Pin and stitch the second armscye as before.  

Step four: repeat for the second side.

Pull right sides out again, and finish the side seams by sewing rights sides together, matching lining to lining and fashion fabrics.  Now you have a fully lined bodice! 

Step five: sew side seams - and now you have a fully lined bodice!

Bodice from the inside.
I pressed a 1/2" up on the lining, which will cover the skirt seam.

With the bodice and skirt both finished separately, it was time to attach them!  Since the petticoat is front-opening, I cut a slit at the center front of the skirt and hemmed the raw edges.  Then, matching the skirt and bodice edges, I knife pleated and stitched them together.  I whipped the lining over the raw edges at the waist, and topstitched along the joining seam.  Two metal hooks and thread eyes serve as closures. 

Joining the bodice and skirt with directional knife pleats.
Two metal hooks and thread eyes serve as closures. 


Completed Project Pictures

I hope you enjoyed reading all the construction details - and now, you know the drill, it's time for completed project pictures!  From all angles, here's the finished 1820s bodiced petticoat with a corded hem and decorative whitework flounce: 


Decorative flounce mounted on top of skirt, and revealing corded hem underneath.


This petticoat is intended to be worn over a shift and long stays, and under a new c.1823 dress and accessories.  More to come on my 1820s wardrobe project progress & "getting dressed" programs! 


Like what you see here and want to support the creation of future content and fashion history programming?  Consider joining us over on Patreon with pledges starting at $2/month, and you'll also unlock exclusive content like bonus blog posts and more!  Follow @youngsewphisticate on Facebook & Instagram for regular updates.

Thank you for reading & special thanks to our generous patrons!

January 8, 2023

Year in Review: Goodbye 2022, Hello 2023!

While I may not have initially sat down to write a blog post tonight, I'm really glad you & I are here to reflect on the crazy year that was 2022.  There's so much that could be said...but I think I'll let this infographic capture the highlights: (Clicking on the graphic should make the text larger!)


I love the idea of setting an overall intention or theme for the year, rather than a list of "New Years resolutions."  In 2022, I kept repeating that I would "embrace change" - and I did, as I moved to a new apartment; weathered several losses of managers in my former department, which led to the craziest museum season, where those left had to pick up more positions; and focused on growing my interest and skills in DEAI (diversity, equity, accessibility, inclusion) practice - ultimately leading to my recent career shift.  Though, for those wondering about the costumes - they aren't going away, even if I'm not wearing them on the regular through my job anymore! 

For 2023, two phrases have stood out to me - the first, being the intention to "establish balance" in my life; and the second came through a tarot card reading in the beginning hours of New Years, which predicted me "rejoining society."  Whether you believe in the cards, fortune-telling, and fate - or not - this struck a chord within, so I'm running with it.  Those of you closest with me, know that I've struggled with work-life balance for years; and anyone who works non-profit or for living history museums knows of the 60-80 hour work weeks we pull on the regular.  So obviously, finding balance there will be central to living out my intention this year, but there are other areas to balance as well.  Including my social life - which leads me to the second part, and my hopes in a return to society that will mean more time spent with family, friends, (maybe dating again haha), going to costuming events, pursing professional opportunities, and even just traveling for fun.  I'll be interested to see where this year will take me, and what I'll have to say in review at this time, next year.


I believe I've rambled enough for one night, so I'll leave you with this question: what intentions or words will you be living by in 2023? 

Thanks for reading - and cheers to 2023, may we make every minute count! 

We ❤︎ Our Patrons

Like what you see here, and want to support future blogging and educational programming? Consider becoming a Patron - click on the button below to unlock exclusive content, bonus blog posts, and more! Every contribution makes a big difference, thank you!