February 28, 2017

I Could Have Danced All Night - 1830s Photoshoot

"'Whom are you going to dance with?' asked Mr. Knightley.
She hesitated a moment and then replied, 'With you, if you will ask me.'
'Will you?' said he, offering his hand."
~ Jane Austen, Emma


At long last, the 1830s sky blue ball gown is complete!  I began the project back in December (see the Project Planning post), but after several frustrations, set the pieces aside.  That was until this past week, which was February Break for college, when I realized that it would make the perfect entry for this month's Historical Sew Monthly Challenge: Re-Make, Re-Use, Re-Fashion!    

Worn over a proper shift, the new corset and sleeve puffs, flounced bum roll and three petticoats, the silhouette came together.  Vintage gloves, matching costume pearl bracelets, ribbons and a belt with a gold buckle accessorized the look.  And by far, the hairdo, with its towering plumes, flowers, ringlets and bow (all cleverly hiding my current copper ombré style), was my favorite part! 


The next step was to find a suitable location for the photo shoot.  For sure, I was envisioning a grand (passably-period-looking) staircase and the George Eastman Mansion was so kind to allow us to photograph inside!  In fact, the response could not have been more welcoming!  Several lovely people spoke with us, asking about the dress, and there were a lot of group pictures.  The two ladies that we conversed with in the interactive sitting room (pictured above) were among the most memorable.  I highly recommend a visit to the George Eastman Museum if you haven't already! 

Finally, I am so grateful to Maria, my sister and photographer, for all of her time and talent!  Without her, none of these photo shoots would be possible, and it is her artistic eye - despite the busy Saturday crowd, the rainy and overcast day - that brings my historical dress-up dreams to life.  A million thanks, Maria!  *All photographs courtesy of Maria M.*


Completed Project Shots 

I could have danced all night
And still have begged for more


I could have spread my wings
And done a thousand things
I've never done before


I'll never know
What made it so exciting
Why all at once
My heart took flight


I only know when he
Began to dance with me
I could have danced, danced, danced,
All night!


Even though it was raining outside, we decided to take a couple of shots in our favorite location as a just because...and I'm so pleased that we did since the sky blue sari fabric photographed spectacularly! 


Lyrics are "I Could Have Danced All Night" from My Fair Lady.  An in-depth look at the dress construction (and more info on the hair!) to follow...


Historical Sew Monthly Entry Details

The Challenge: February: Re-Make, Re-Use, Re-Fashion - Sew something that pays homage to the historical idea of re-using, re-making and re-fashioning. Turn one thing into another. Re-fit or re-fashion an old gown into something you would wear again. Re-trim a hat for a new outfit, or re-shape a modern hat to be a historical hat. Re-purpose the fabric from an old garment (your own or a commercial one) into a new garment.


My sky blue 1830s ball gown falls under the "re-purpose" category as the fashion fabric was originally a satin sari.  And, as a bonus, the lace frill was "re-used" from a 1970s prom dress! 

Material:  One sky blue and gold satin sari, cotton twill for lining, cotton organdy for sleeve lining, interfacing for interlining, white satin for piping, blue cotton for hem facing 

Pattern:  Drafted my own.  The sleeves were re-cut several times.  

Year:  Early-1830s

Notions:  Cotton cord for piping, re-purposed lace, metal hooks and eyes, ribbon and metal pin backs, thread and twill tape

How historically accurate is it?  Material-wise, not very...the burn test (unfortunately) confirmed that the sari is most likely poly, and the lace is only accurate for 1970...however, the overall cut, design and construction methods would be recognizable for the early-1830s.  So, 25%? 

Hours to complete:  Did not keep track, but too many!  This dress was very intense on the hand, and every seam needed to be overcast.  (Polyester ugh!) 

First worn:  For pictures! 

Total cost:  Well, the sari was a generous gift from one of my Aunt's "de-stashing," and most everything else had been bought for other projects or pulled from the stash...so I'd guess a very reasonable $25-$30? 


Finis.

February 18, 2017

Pretty in Pink

"Next week I shall begin my operations on my hat, on which you know my principal hopes of happiness depend." - Jane Austen, October 27, 1798

It is a truth universally acknowledged that one can never have too many ruffles!
(Photograph courtesy of Maria M.)

Just a quick post today showing off my newly-trimmed cap, which I had intended to finish for Valentine's Day!  


Completed Project Pictures

Side.

Front.

Other side.

Made from the last of the three yards of fine cotton lawn I bought for caps, it features two starched ruffles and a satin bow - hence, the title, pretty in pink!  Entirely hand-stitched using the period construction techniques of rolled whipped gathers and rolled hems. 

Fun fact: the "ribbon" is actually vintage quilt binding!
Hand tacked for easy removal.

I practiced my couching stitches to attach the ruched strip to the band.

Now for some fun, pictures of the first wearing, all thanks to the sister and resident photographer:  In fact, it's the first wearing for both the cap and the crossover robe, which I may have worn out in public to a day of sewing with my partner-in-crime-and-sewing-projects...it was worth it! 

In case you were wondering, it's a two story book
with Sense & Sensibility and Northanger Abbey. 


All I will say for now is that the new outfit is part of a secret sewing project with the partner-in-crime...all will be revealed, soon...so stay tuned for the upcoming blog post!


In the meantime, I'll get back to rolling hems because one can never have too many caps!  Especially now with the ombre hairdo...I have a perfectly enabling excuse to pursue all things frilly and fru fru for the head haha!  I just need to order more cap making material...more lawn or maybe try organdy?  Any suggestions?  

February 12, 2017

1 Hussif + 2 Reticules = A Sewing Round-Up

How about a sewing round-up to kick off this month's blogging?  Today's post is all about the accessories, those finishing touches that pull the outfit together!


Way back in December, I put together three, little satisfying projects that hopefully will get lots of use in the coming months: 


1 Hussif or Housewife


Hussif | noun |
1.  A little case or bag for materials used in sewing, 
and for other articles of female work. 
2.  Origin - From Middle English huswif, equivalent to house +‎ wife


As introduced in the article, "The Soldier’s Hussif," which presents an illustrated history of the military sewing kit from the American Civil War to the 1990s:
"The term 'housewife' refers to a sewing kit but housewife was not the only term used. They were also known as huswife, hussive, or, most commonly, hussif, which appears to be the contraction of the word 'housewife'. By the beginning of the Regency, hussif was the term most often used to refer to these small pocket sewing kits by nearly everyone, though pronunciation of the word would vary from region to region across Britain." - Nicola, author and designer at Hands Across the Sea Samplers


My hussif or housewife is completely hand stitched from a variety of reproduction cottons, heavy weight linen for the interior lining, and wool scraps for the needle pages:


What I like best is that each of the fabrics used, minus the orange which was a gift from my partner in crime, Judy, came from previous projects.  Dresses, a short gown, petticoat, a tiny sacque coat for C - small accessories are a perfect way to put those fabric scraps to use! 

Rolled up and ready for action!


2 Regency Reticules


Reticule | noun | \ˈre-ti-ËŒkyül\  
1.  A woman's small handbag, originally netted and typically having a drawstring
and decorated with embroidery or beading.
2.  Origin - Early 18th century: French réticule, from Latin reticulum 


A while ago, The Dreamstress published a fascinating article on the use of reticules and the ridicule they inspired at first in "Terminology: What is a reticule or indispensable?"  It's a very interesting read, if you haven't already through the original Historical Sew Fortnightly.  On the reticule's rise to fashion, she writes: 
"At the end of the 18th century, as fashions changed from full skirted dresses that could easily conceal pockets, to slim garments of light fabrics that would show unsightly bulges over pockets, that reticules came into their own.  Easily made, easily carried, they were the indispensable accessory of the last decade of the 18th century and the first three decades of the 19th.  They were, in fact, so very indispensable that they were also known as indispensables." - The Dreamstress, Leimomi Oakes


Intended for an upcoming Jane Austen Festival, I set out to make two, new indispensables of my own.  Eventually, the should have coordinating outfits too haha!  

The first was inspired by this extant in a private collection - unfortunately, I cannot locate the source, and would love to recover it to give credit: 


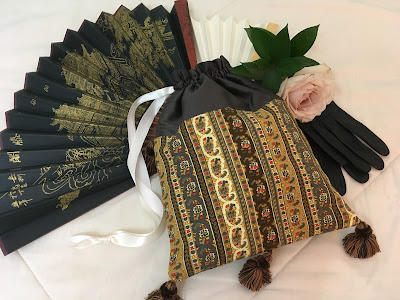
Mine is constructed from a beautiful wool challis, dark grey/black silk taffeta and white twill for the lining.  The tassels were a compromise, cut from home decor trim: 


Intended for day use, it's a pretty good size at about 11" top to bottom and just under 9" at the sides.  It's my favorite of the projects shared in this post, and I'm so looking forward to using it at an event! 


The second, triangular reticule came from the American Girl's Book by Miss Eliza Leslie, first published in 1831:


The directions were as follows:
"Cut your silk into three pieces of equal size. Each must be about a quarter of a yard in depth, and half a quarter wide. The sided of each must be straight till within a finger’s length of the bottom; they must then be sloped off to a point. Sew those three pieces of silk together, (inserting a covered cord between the seams,) and make them all meet in a point at the bottom. Put a tassel or bow at each corner, and one at the bottom. Hem down the top, and run a ribbon into it." - American Girl’s Book (1831) by Miss Eliza Leslie

A Three Sided Reticule.
(Source: World Turn'd Upside Down)


My version was constructed from a vibrant, striped silk taffeta and lined in polished cotton.  It is just under 10" from top to bottom.  


Best of all, it feature the same tassels as the first; and, despite how neat it looks, I never want to have to deal with three tassels at a point again! 


Have you reproduced a Regency reticule recently?  Thanks for reading!

We ❤︎ Our Patrons

Like what you see here, and want to support future blogging and educational programming? Consider becoming a Patron - click on the button below to unlock exclusive content, bonus blog posts, and more! Every contribution makes a big difference, thank you!