
"I am unwilling to condemn altogether an article of dress so universally worn as stays, corsets, or whatever other name may be given to the stiff casing that is employed to compress the upper parts of the body...I admit most readily that stays sometimes add to the elegance of the shape, but if this is done at the hazard of injuring the health, the sacrifice will be allowed to be too great"
- "Stays and Corsets," page 175
The Duties of a Lady's Maid by J. Bulcock, 1825
 |
| Romantic Era Undergarments: A shift, long stays & sleeve plumpers |
Today's blog post is all about the construction and completed project pictures of my long, corded Romantic Era stays. A project over two years in the making, these stays were finished just in time for the fashion show at the Bement-Billings Farmstead Museum and will be used as an example in future historic fashion presentations. Along with a new, me-made shift, sleeve plumpers and corded petticoat, which was handmade by Michelle Forbes of Hand Stiches in Time on Etsy, I am thrilled to finally have a complete set of 1830s undergarments!
Historical Inspiration
As with any other sewing project, I turned to extant examples, fashion plates and other period resources for inspiration.
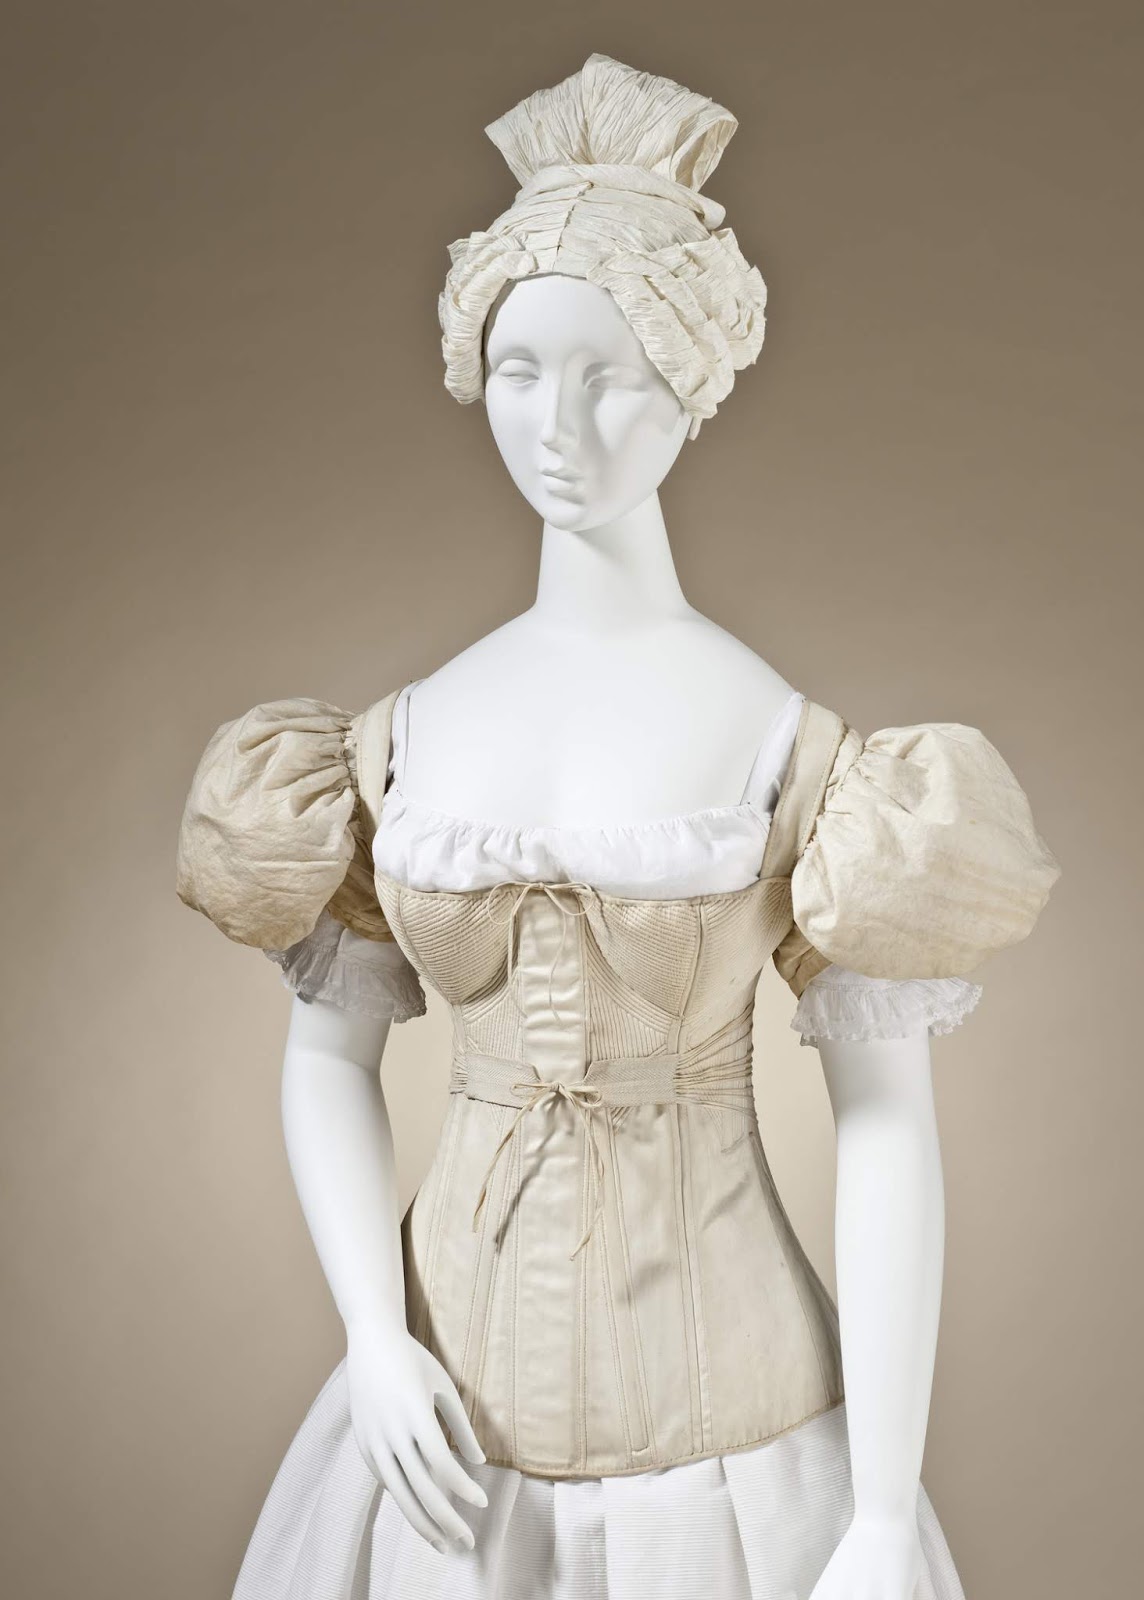 |
| I've always admired this set of c.1830-1835 undergarments from the Los Angeles County Museum of Art's Costume Collection (Image source: LACMA) |
 |
| My version of 1830s undergarments |
My diagonal cording design was greatly influenced by this extant example of cream cotton, corded stays from 1828: Unfortunately, the image came from Pinterest without an original source!
 |
| Corded stays, c.1828 (Image via: Pinterest) |
As well as this beautiful version from the Museum of Fine Arts in Boston:
 |
| Women's stays, c.1820s Museum of Fine Arts, Boston (Image source: MFA, 99.664.34) |
And this one from my university's collection featuring hand stitched cording in green thread, leaf motifs and bone grommets:
 |
| Corset, late 1820s Kent State University Museum (Image source: KSU, 2011.12.37) |
I chose to stitch over my grommets with pearled cotton floss to simulate the look of bone or ivory eyelets after these fantastic examples from Augusta Auctions:
 |
| Corded cotton corset, c.1825-1830 with 9 pairs of ivory eyelets for back lacing (Image source: Augusta Auctions, Lot 243) |
 |
| I love the cording and bone eyelets on this corset, c.1800-1825 (Image source: Augusta Auctions, Lot 578) |
Additional images and extant examples of early corded stays can be found on my 19th Century Undergarments Pinterest Board.
Construction Details
For my long stays, I chose a white cotton twill for the outer layer and a natural cotton drill for the inner layer. The pattern was a combination of views A and B from the Laughing Moon Pattern #115 with a few alterations and a cording design based on the originals above. The cording itself is the popular Sugar'n Cream cotton crochet yarn.
 |
| Long stays in progress |
To cord the stays, I first drew the cording channels and then machine stitched them. Using a tapestry needle and pliers, I pulled the crochet yarn through each channel, leaving short tails at the end to gently ease inside. In the future, I recommend laying the cording in and using a zipper foot or hand stitching the channels, rather than adding the cording afterwards...doing so will save your needles, hands and sanity!
 |
| Cording channels in progress |
Along with the cording, four flat steel bones from Corset Making Supplies and a handmade, wooden busk from Redthreaded on Etsy provide shaping and support.
 |
| Handmade, hardwood busk from Redthreaded on Etsy |
I thought about hand stitching the eyelets, but decided against it as I had already used a machine on the cording channels and knew the stays were destined for fashion program use (rather than personal wear). Also, metal grommets have been used in corsets since 1828, according to Norah Waugh in Corsets and Crinolines, so I didn't feel too bad or anachronistic about my choice.
Later, I ended up stitching over each grommet with pearled cotton floss to simulate the look of ivory or bone eyelets. If you have of a modern source or equivalent for either today, I'd love to know in the comments below!
 |
| Binding and grommets and flossing, oh my! |
The last step was to bind the straps, top and bottom edges. For the binding, I cut and pressed bias strips from the outer cotton twill material and hand stitched them in place. All of the edges were whip stitched down, except the area across the busk pocket, which was basted to allow for easy access and removal of the busk. And now, it's time for pictures!
Completed Project Pictures
 |
| Corded long stays - complete! |
 |
| Front. |
 |
| Back. |
 |
| Exterior view. |
 |
| Interior view. |
 |
| Left side. |
 |
| Right side. |
 |
| Front cording. |
 |
| Back grommet flossing, outside. |
 |
| Back grommet flossing, inside. |
 |
| Binding and grommets for the straps. |
 |
| Binding, exterior detail shot. |
 |
| Binding, interior detail shot. |
 |
| Shoulder straps, inside and outside. |
 |
| A complete set of 1830s undergarments! |
Thanks for reading!

Looks fantastic! Is it the one you started in January?
ReplyDeleteThanks, Kaela! Perhaps? For some reason, I thought these had been languishing in the stash for longer...hmm too many U.F.O.s, I'm losing track of all of the projects! ;)
Delete