
 |
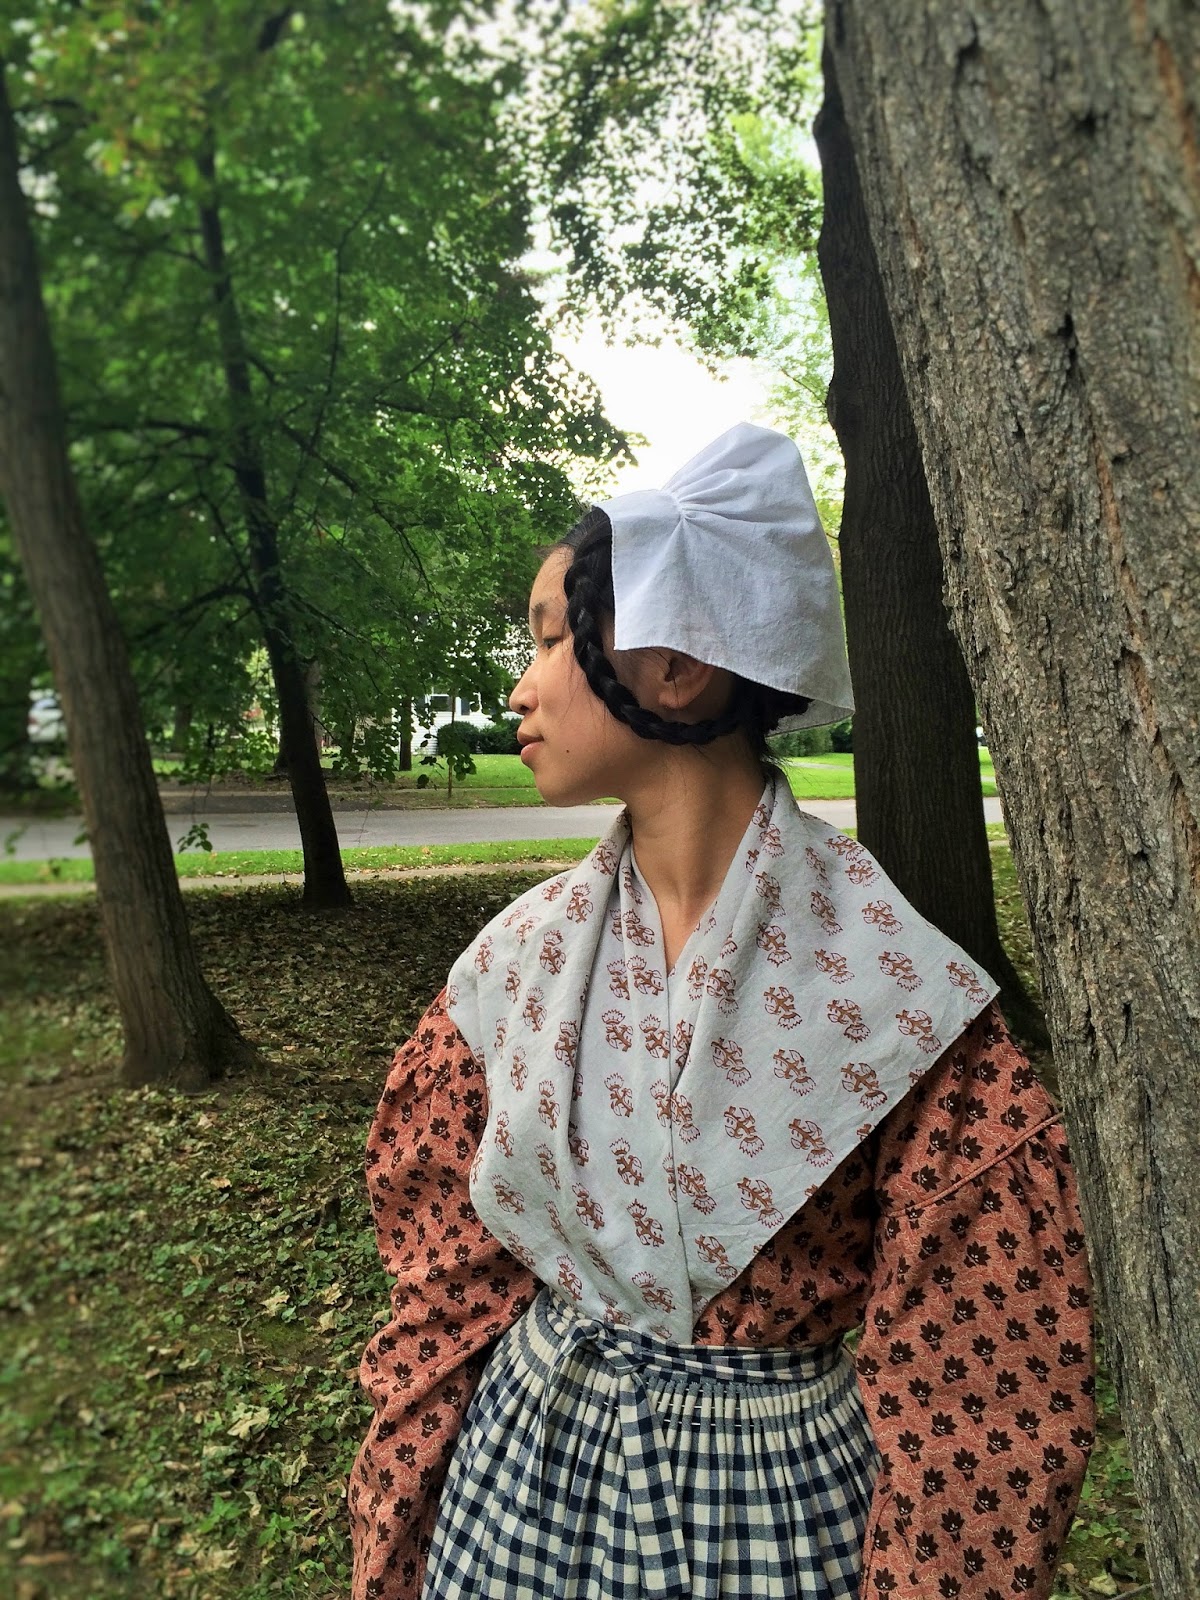
| Completed 1830s working wear! |

 |
| Image provided in pattern. |
As a simple and utilitarian garment, short gowns often seemed to be cut from one piece of fabric, with the sleeves cut as one with the body. So this particular style stood out to me as an exception, and, actually, was remarked upon in the provided description from the pattern: "This short gown is not cut in the classic shape used in the 18th and eary 19th century but rather has a set-in sleeve that makes it look more like a shortened gown" (156).
 |
| A very simple "T" shaped garment with set-in sleeves. |
 |
| Set-in sleeves with a small poof reminiscent of the fashionable giggot style, but on a much more practical scale! |
The pattern description then discussed the "suitable fabrics for this garment[, which] are cotton calicoes of appropriate design, plain or checked cottons, fine woolens and homespun linen" (156). I chose a suitable reproduction cotton print appropriate for the 1830s.

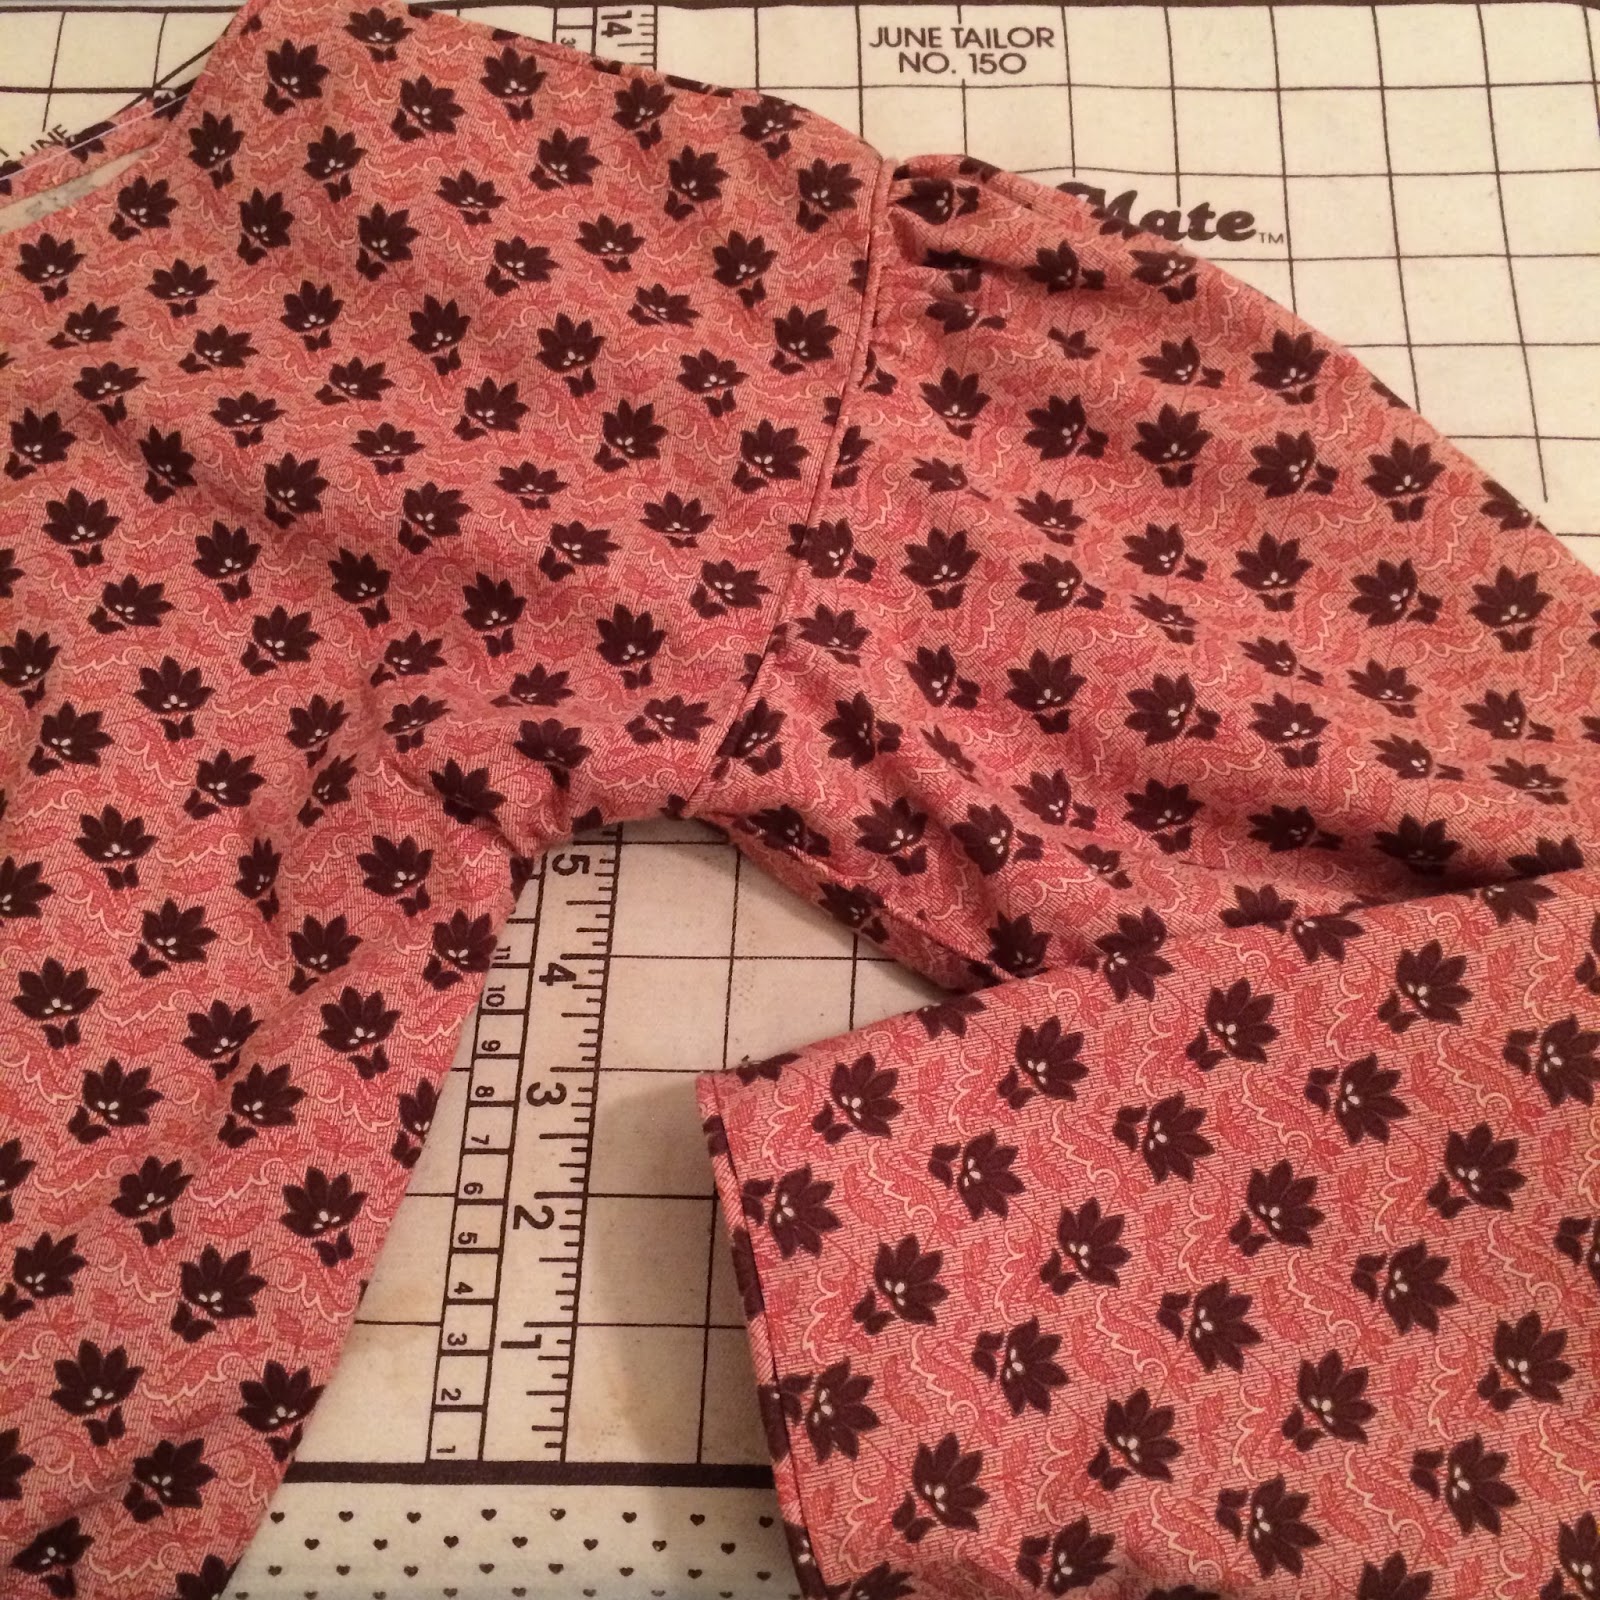
The pattern's directions were very simple. Seam the long sides of the body, as well as the sleeves. Gather the sleeve heads and insert them into the armscye. Hem everything! Sides, wrists, neckline, skirt hem...And, lastly, take a tuck along the body to create a casing for the drawstring.
 |
| Detail of the tuck/drawstring casing. The tuck was first stitched with spaced back stitches, and then, whip stitched down for a neater finish. |
To add visual interest (and stability to the seams), I piped everything - long sleeve seams, shoulder seams, armscyes - and added a narrow, piped facing to the neckline and wrists.
 |
| Detail shot of piping. Notice the very much dropped shoulder seam. |


Just like any other project, I first turned to extant examples when planning my short gown. Take a look at some of the these:
 |
| "Schootjak, Zuid-Holland" A very familiar shape! (Image via: Memory of the Netherlands) |
 |
| "Jak, Friesland" Look at those poofy sleeves! (Image via: Memory of the Netherlands) |
 |
| "Schootjak, Drenthe" (Image via: Memory of the Netherlands) |
 |
| Jak, 1835 - 1845 (Image via: Fries Museum) |
For more extant short gowns, take a look at my Pinterest board!


Bonus: A few pictures of my newest, blue & white check apron! Entirely hand stitched. Aprons are such satisfying projects. You can never have too many aprons!

 |
| Close up of the gauging at the waist. Hand overcast on the inside to prevent fraying. |

Another project done! Thanks for reading!


Well done! I love learning about working class wear as well, but some eras are far more researched than others. I didn't know anything about 1830's working class, I hadn't even thought about it! I'm with you on the aprons; they are satisfying, but I haven't tried gauging one yet.
ReplyDeleteThank you, Michaela!! I agree with you, there certainly seems to be more research on the working wear of some eras as opposed to others...and, the 1830s seems to be one of the "others." There is just so much more research that needs to be done! Also, I really like the look of gauging, so applying it to my apron simply made sense!
DeleteHappy sewing! Anneliese :)
OH how I love the look, textures, patterns and colors of your outfit!! That's one of the things I love about the earlier eras...they used so many colors that if you put them together (the fabric) in your shopping cart at the store, they wouldn't even look good together. But when you combine them in an outfit....fabulousness!!!! You have once again, done a breath taking job on your ensemble! You are such a marvelous inspiration!!
ReplyDeleteBlessings!
g
*Squeals* I was just called an "inspiration" by the legendary Gina! I can now die happy...Thank you!! Oh I definitely agree, you would think that all of the different colors and patterns would clash together terribly. However, somehow, it seems to work, though perhaps a little different to the modern eye!
DeleteThanks again! Anneliese :)
so fantastic!!! the fabrics are perfect and this was a very interesting and informative post! you also look great in 1830s!
ReplyDeleteEeee thank you, Samantha!! Receiving such compliments from my sewing idols always makes me giddy! I must say, the 1830s have really grown on me this past year!
DeleteHappy sewing! Anneliese :)
Any chance you still know of or have this pattern? I cannot find it anywhere!
ReplyDeleteThe Book of Buckskinning VII has the pattern as pictured here.
ReplyDelete